Testing Methodology
Find out how we test shoes and how our testing methodology has evolved over time (and we keep improving it).

How we test shoes
- We buy all the shoes with our own money, always in men's US 9
- We cut shoes in half and measure and assess over 30 parameters for each shoe
- All our lab tests are standardized, which means all the shoes are given the same treatment
- We wear test all shoes
- You can see shoes that we’re currently testing in the lab on our Shoe Pipeline page.
Here, you will learn how we decide which shoes we buy next, where we store them, why we cut them in half, why we freeze shoes, why it is important to stick to World Athletics’ guidelines, and much, much more.
Why we perform both wear tests and lab tests
To ensure the highest level of objectivity, we personally test shoes in the appropriate surroundings - whether it’s a street road, gym, hiking trails, basketball courts, track, etc., and we also cut the shoes in half and put them through numerous tests in the lab.
This way, we can discuss how the shoe actually feels and performs and back that up with 30+ lab data points. A caliper in the lab can tell us how thick a tongue is or how stiff a heel counter is, but it can’t tell us whether those materials itch. That’s where our personal experience comes in.

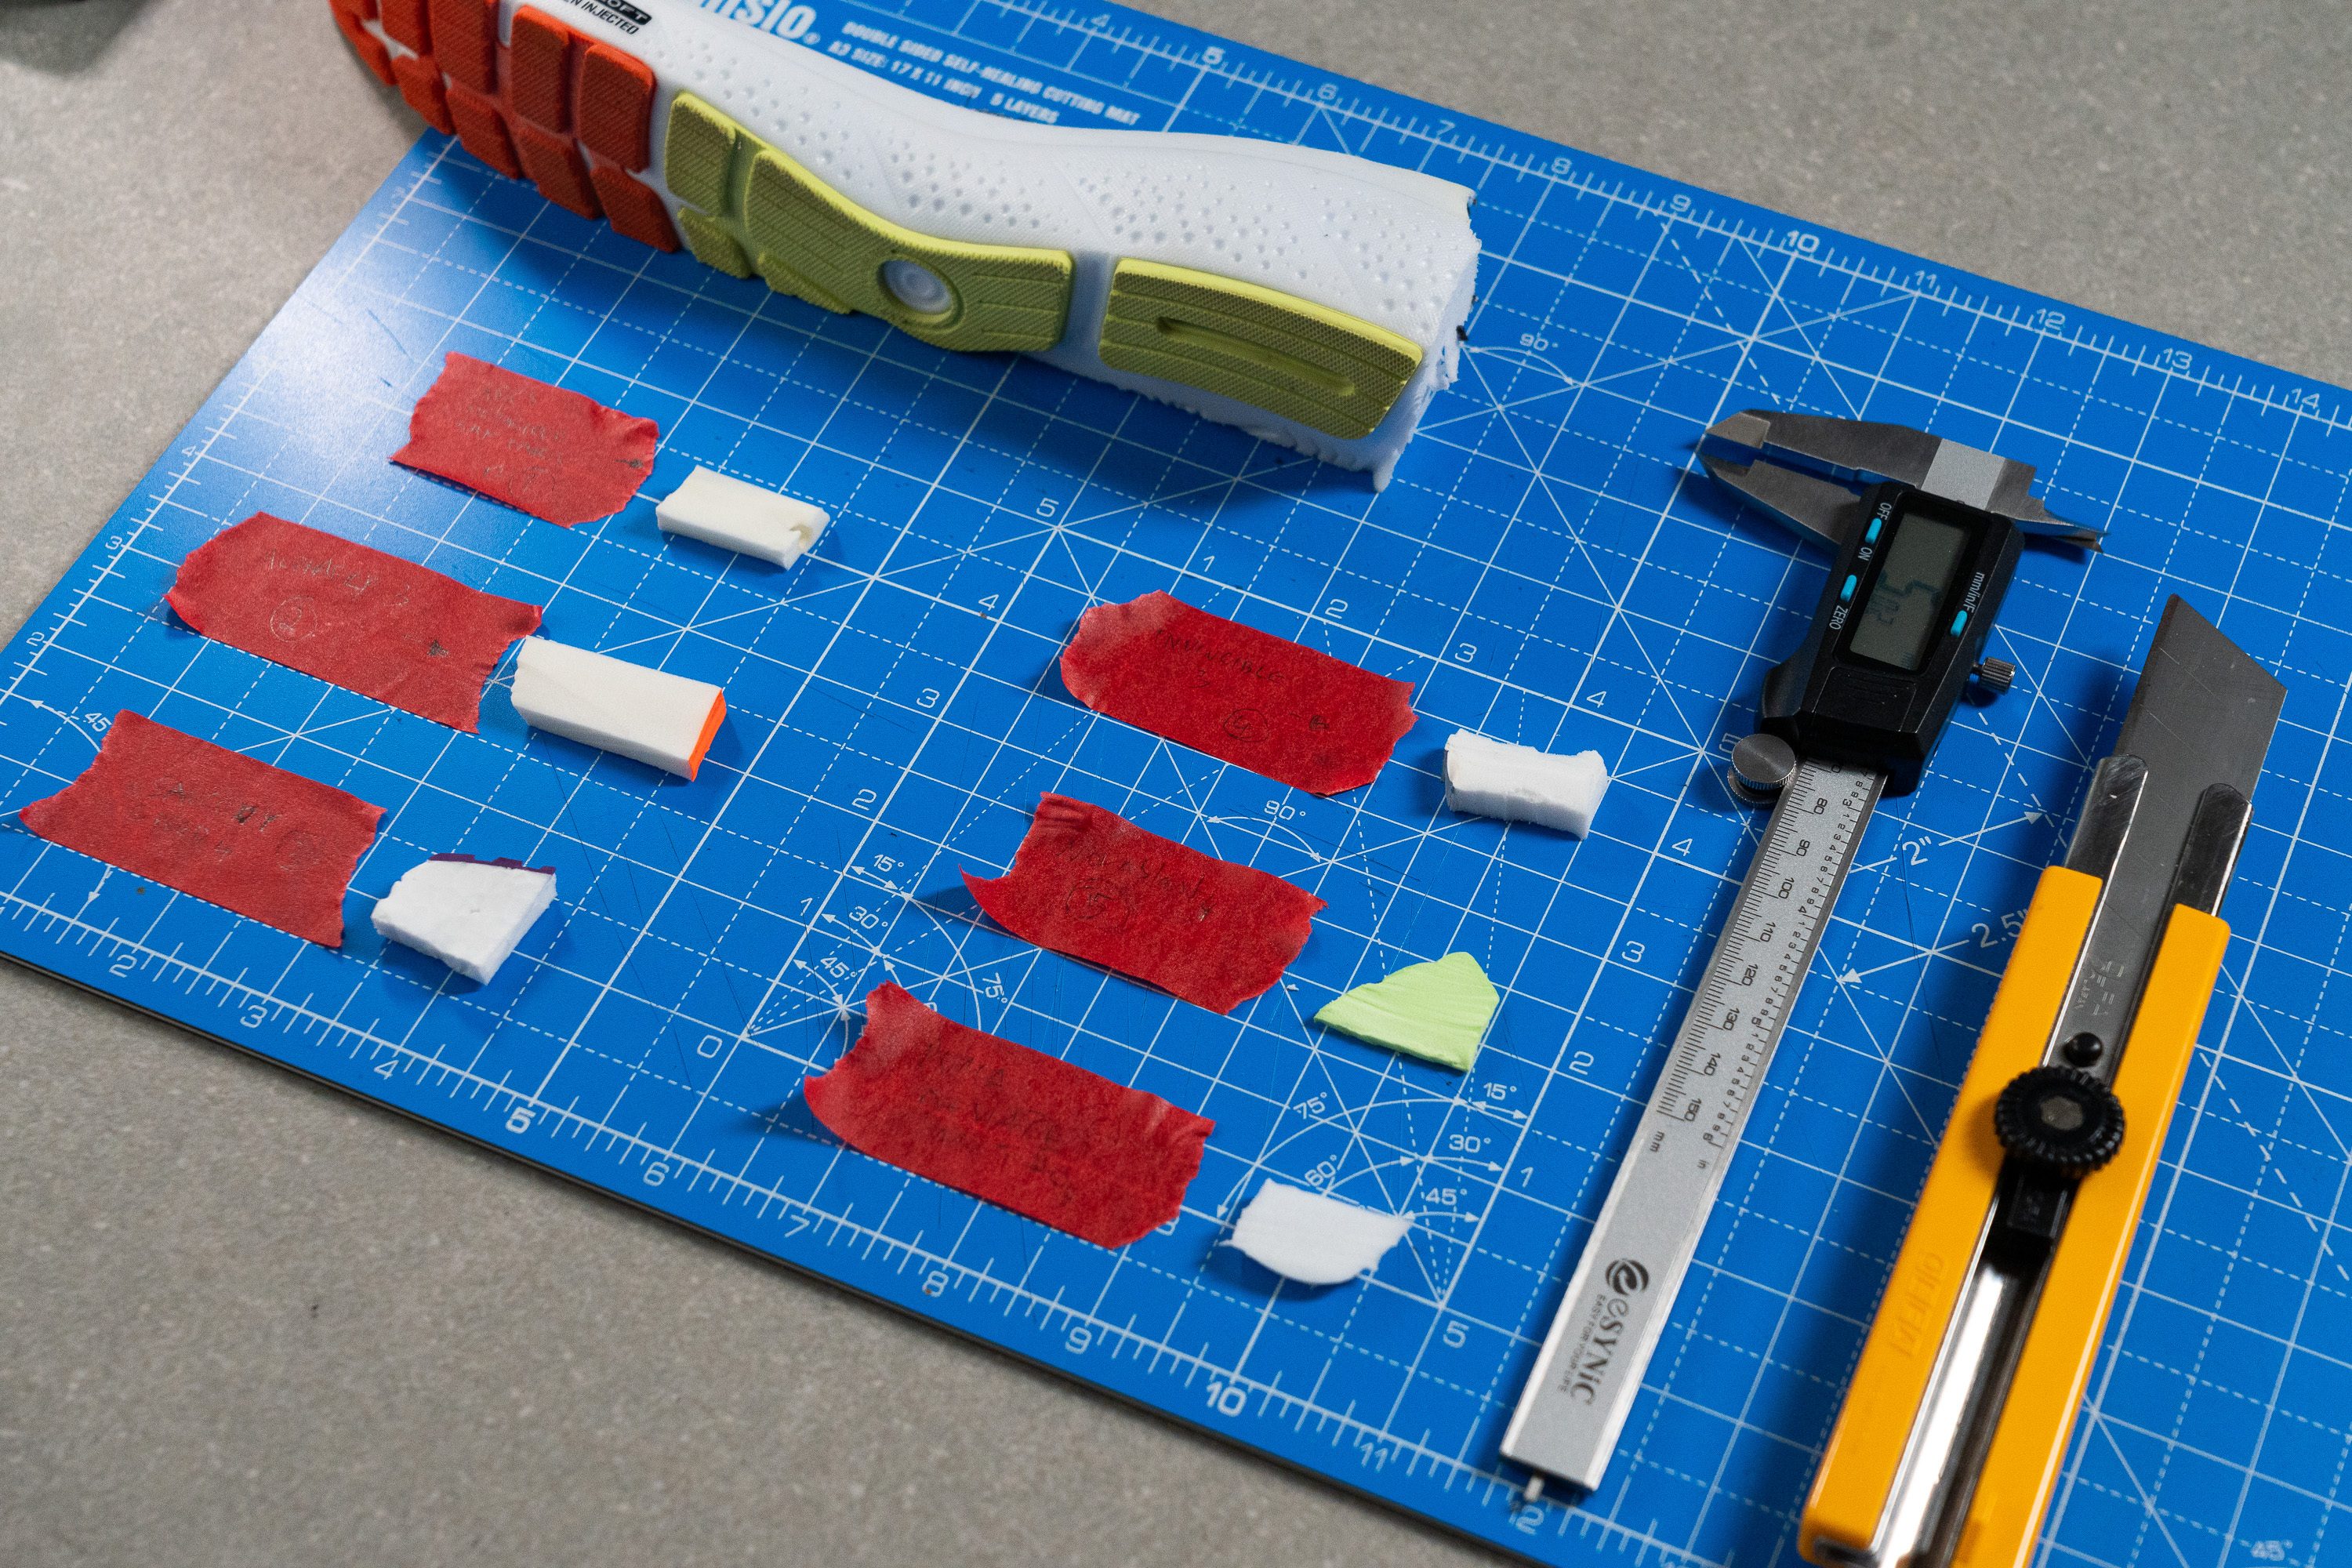
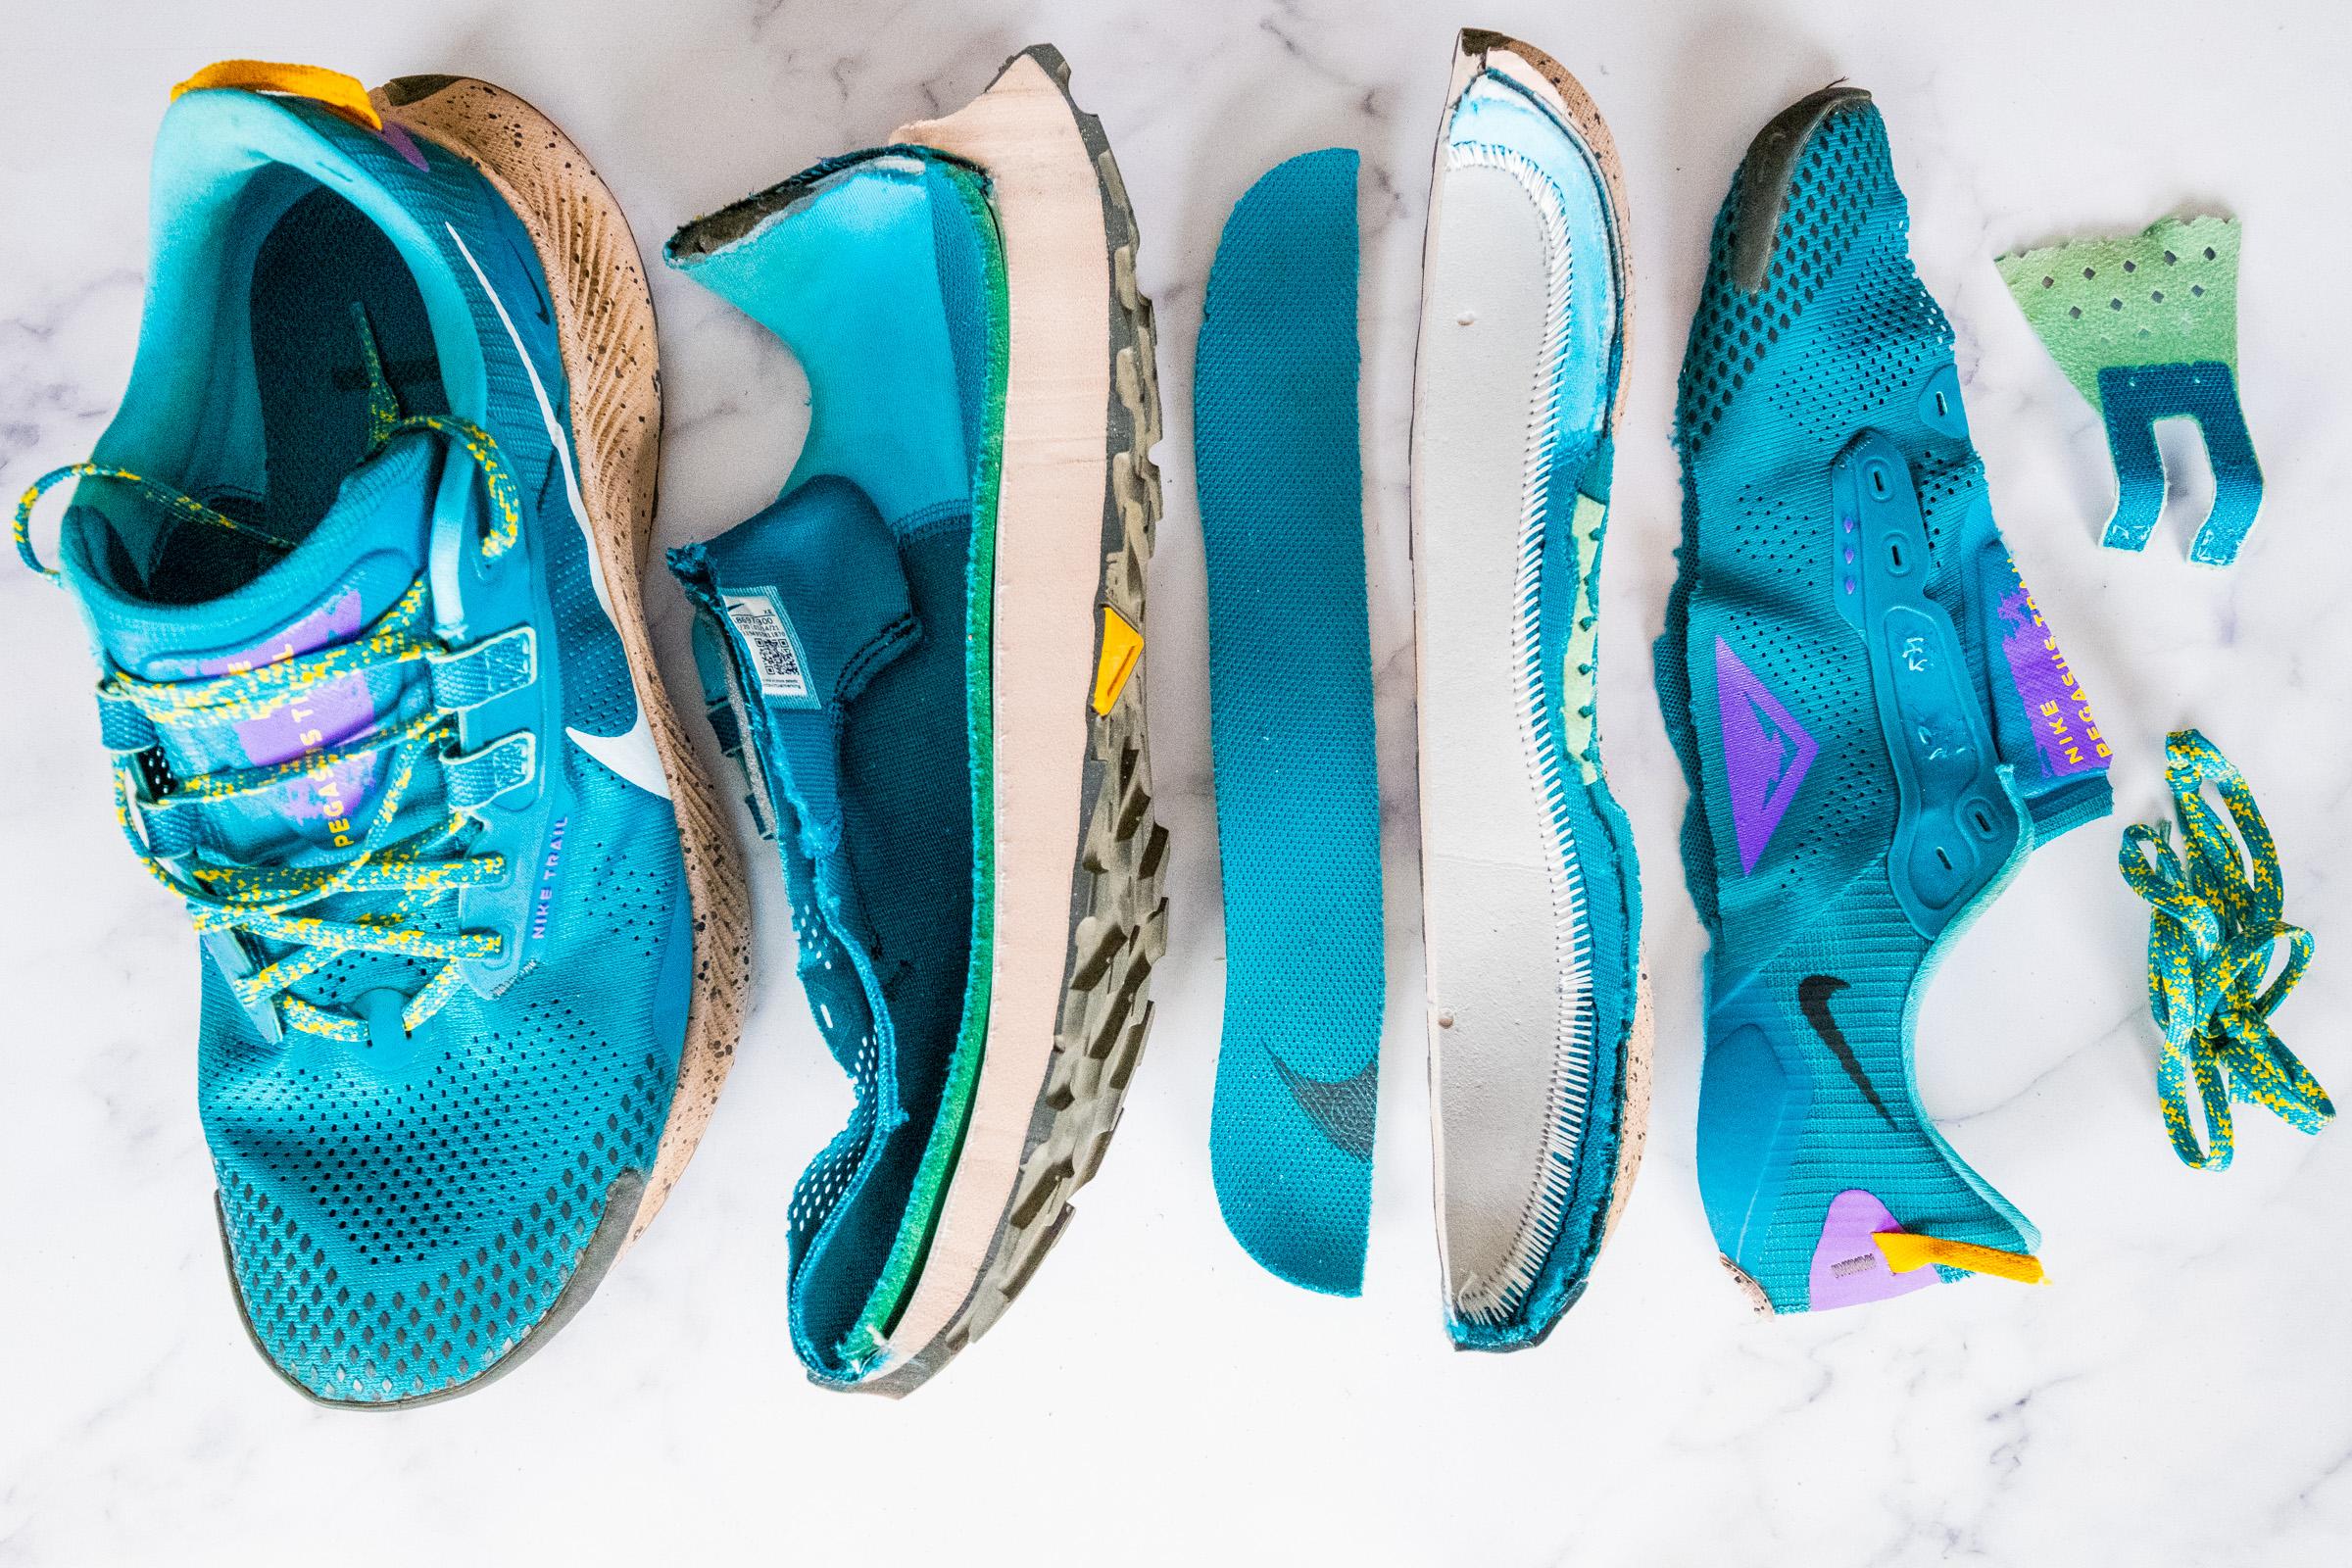
Why we cut shoes in half
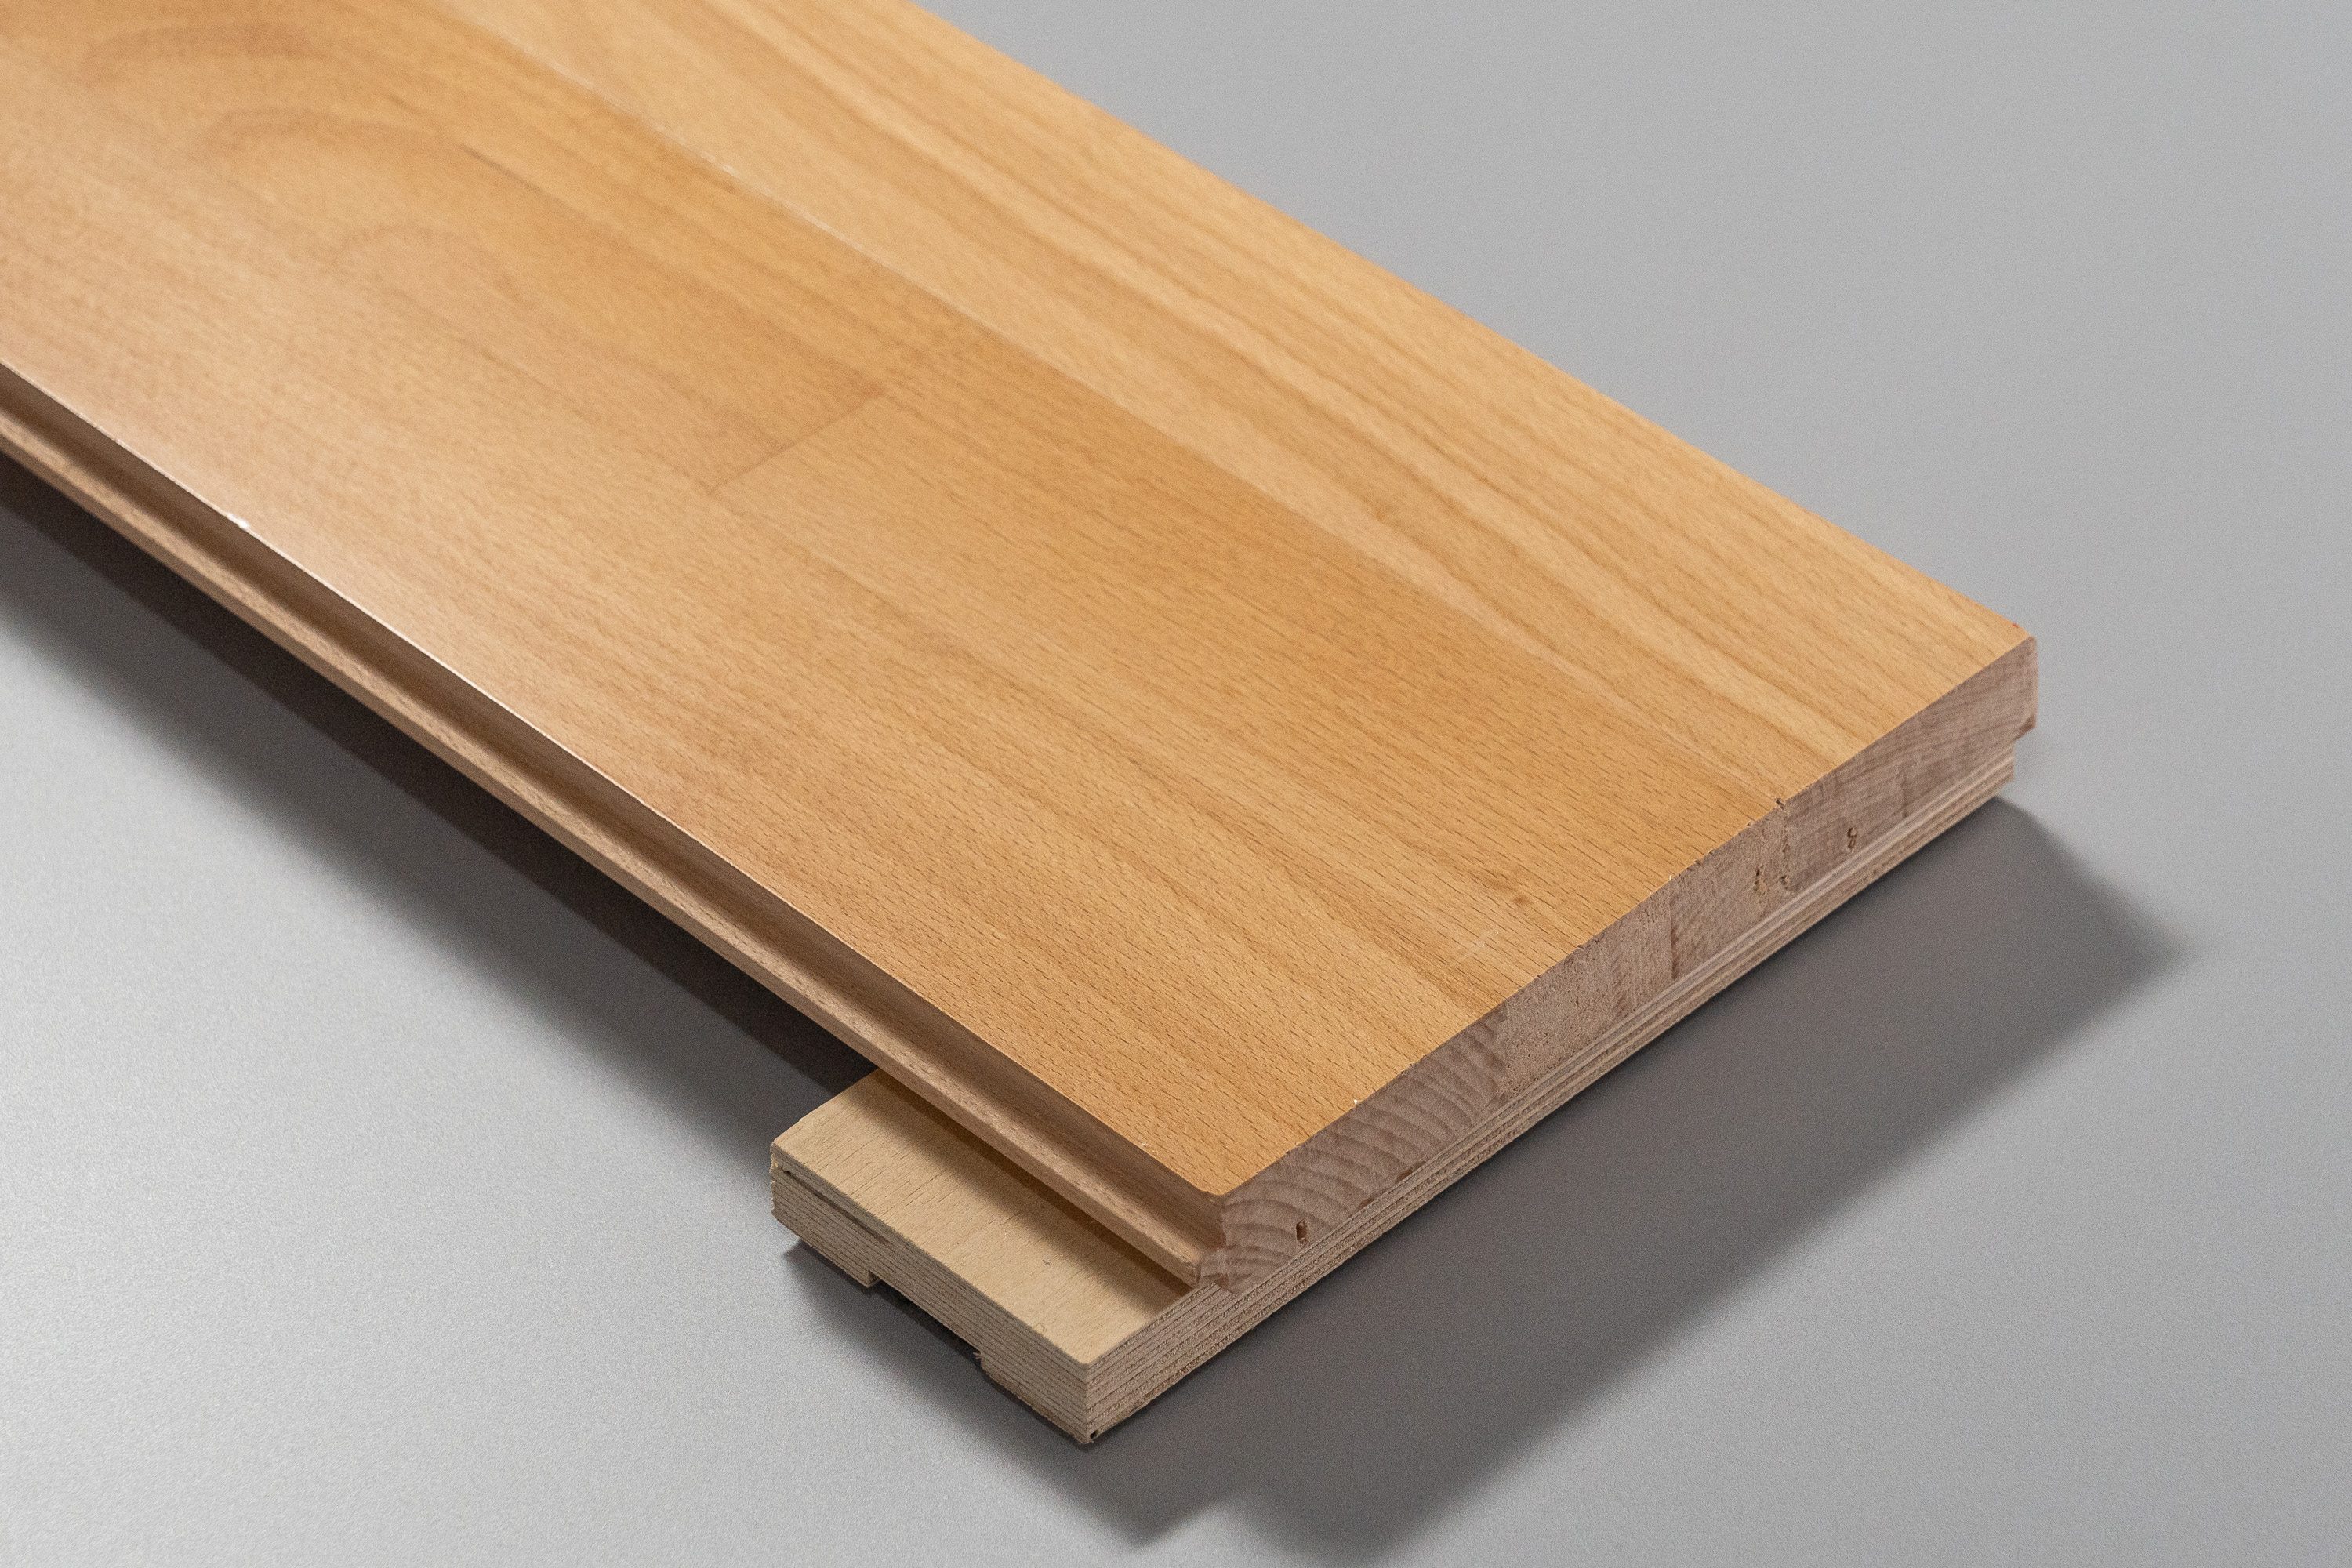
Shoes come in pairs. One shoe we keep whole. The other one we tear apart by first cutting its upper so that it's completely detached from the bottom and then using a band saw to cut the midsole in half lengthwise. We do this because some tests need a shoe to be cut in half for them to be properly done. And because we are meticulous.
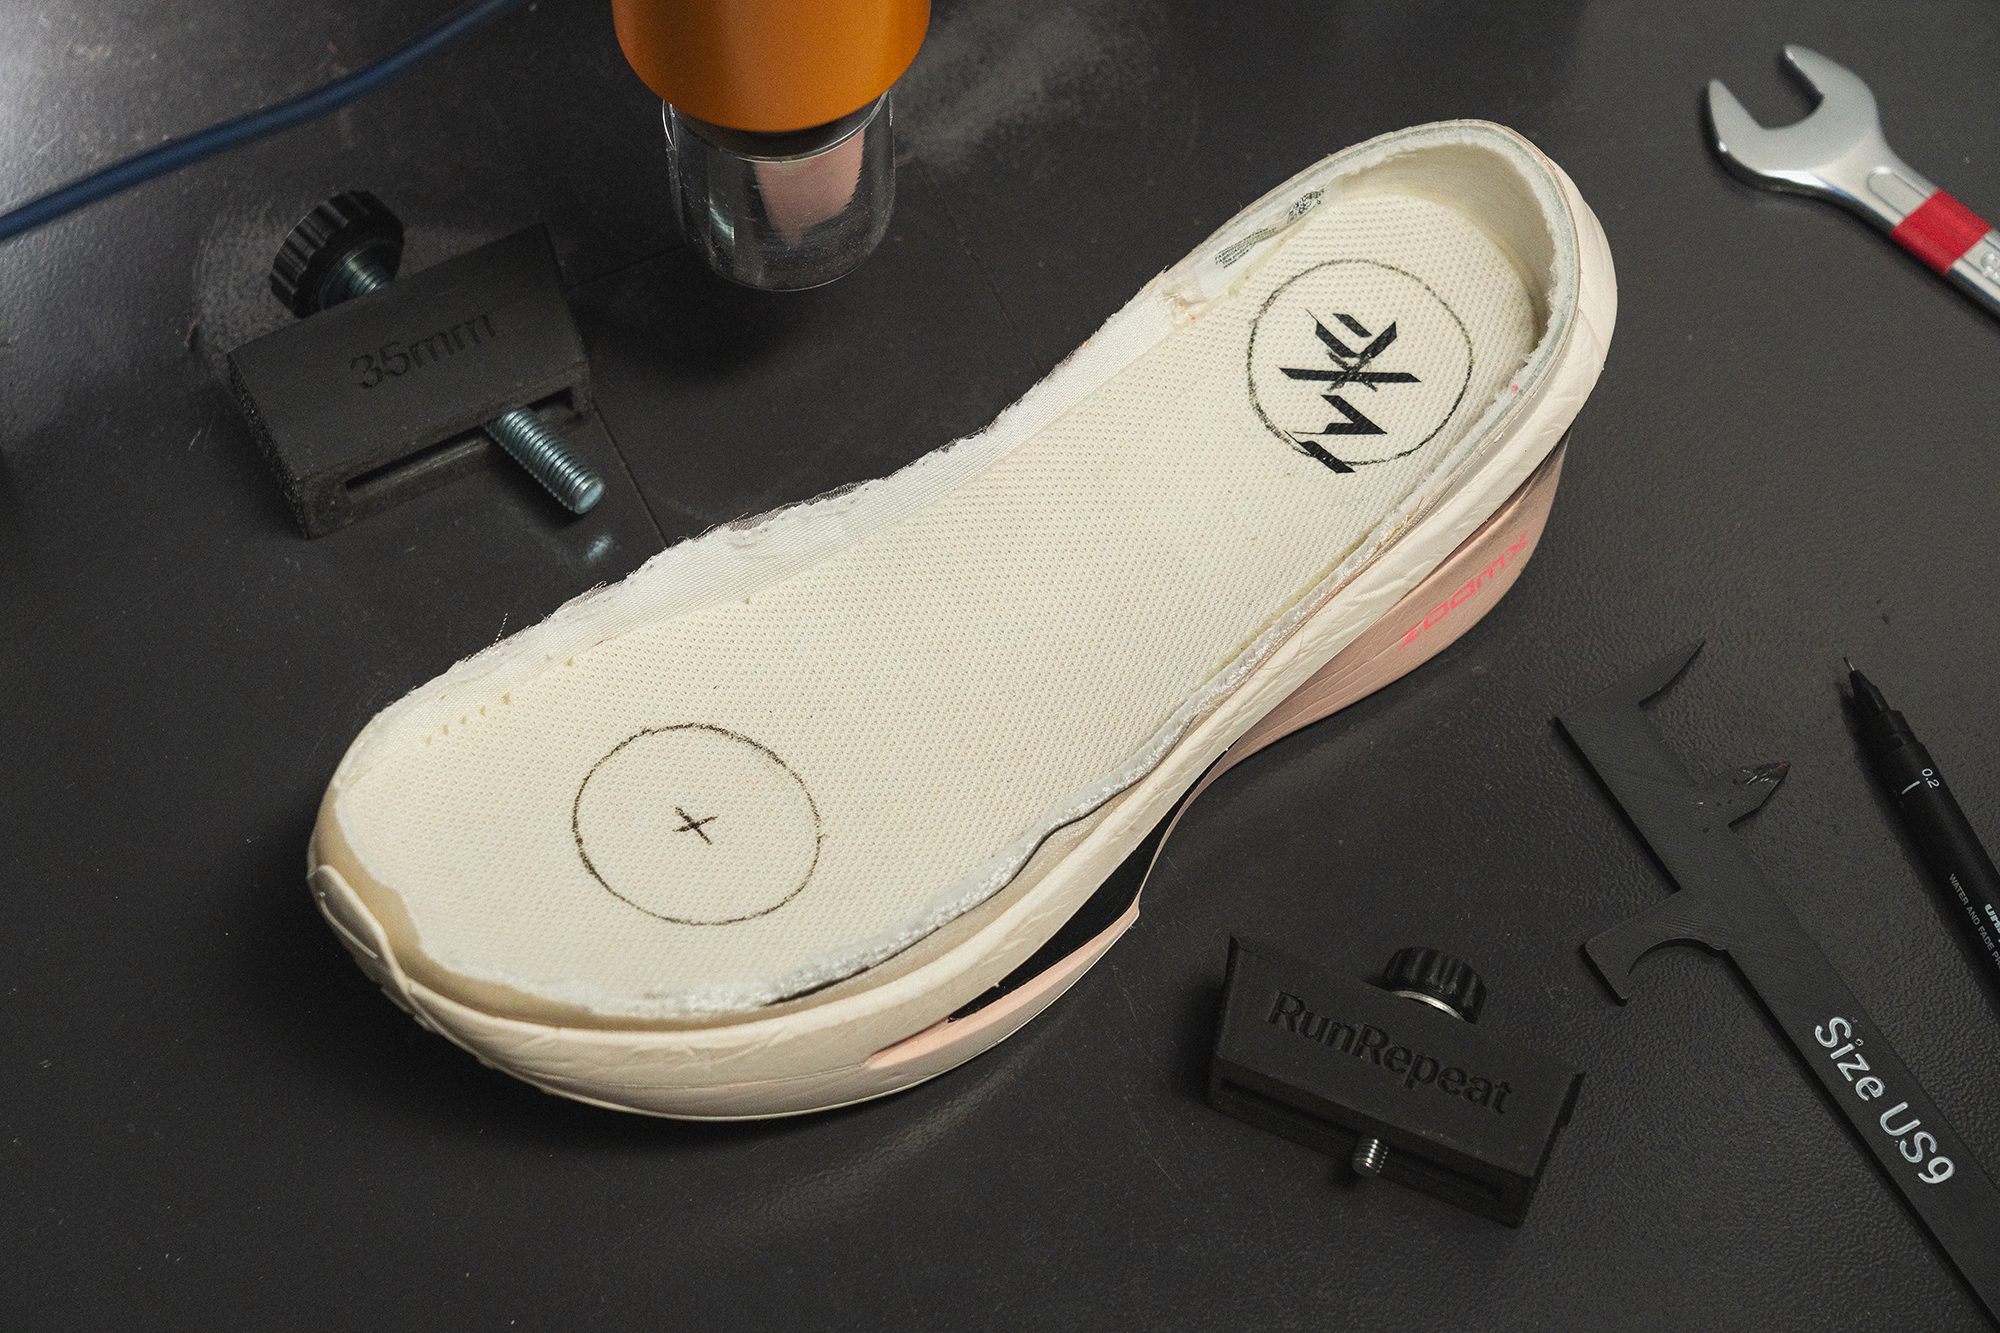
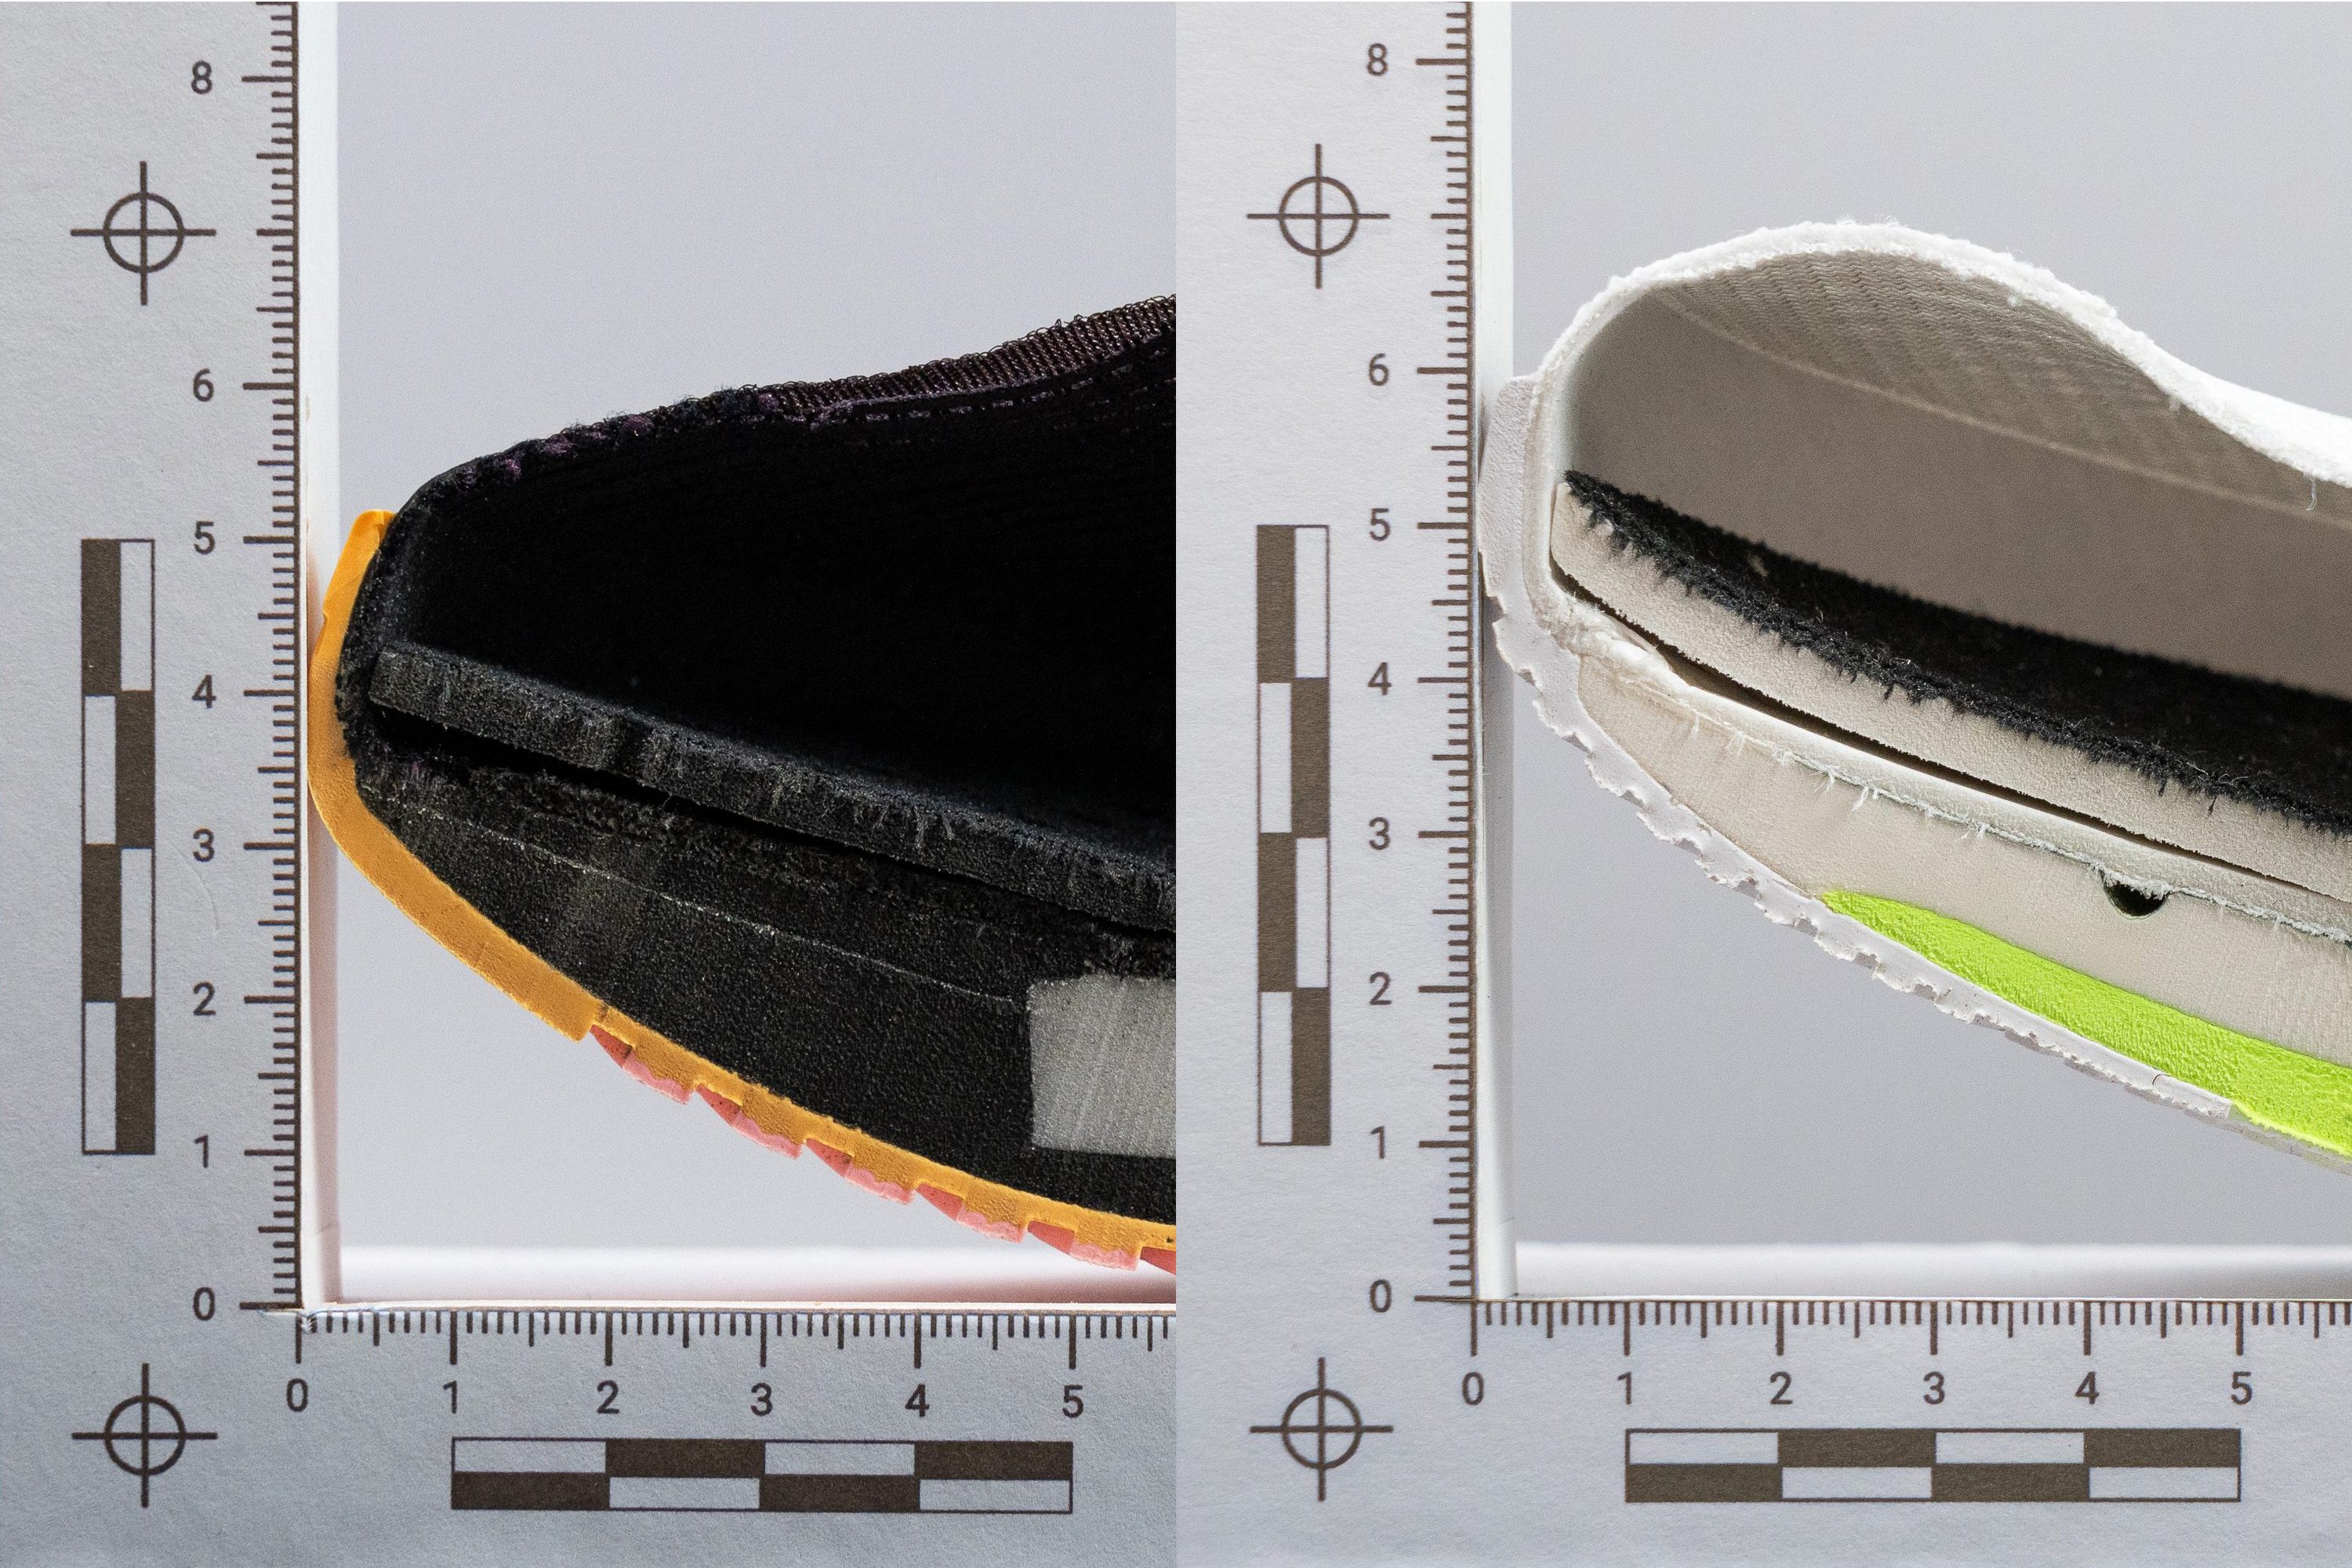
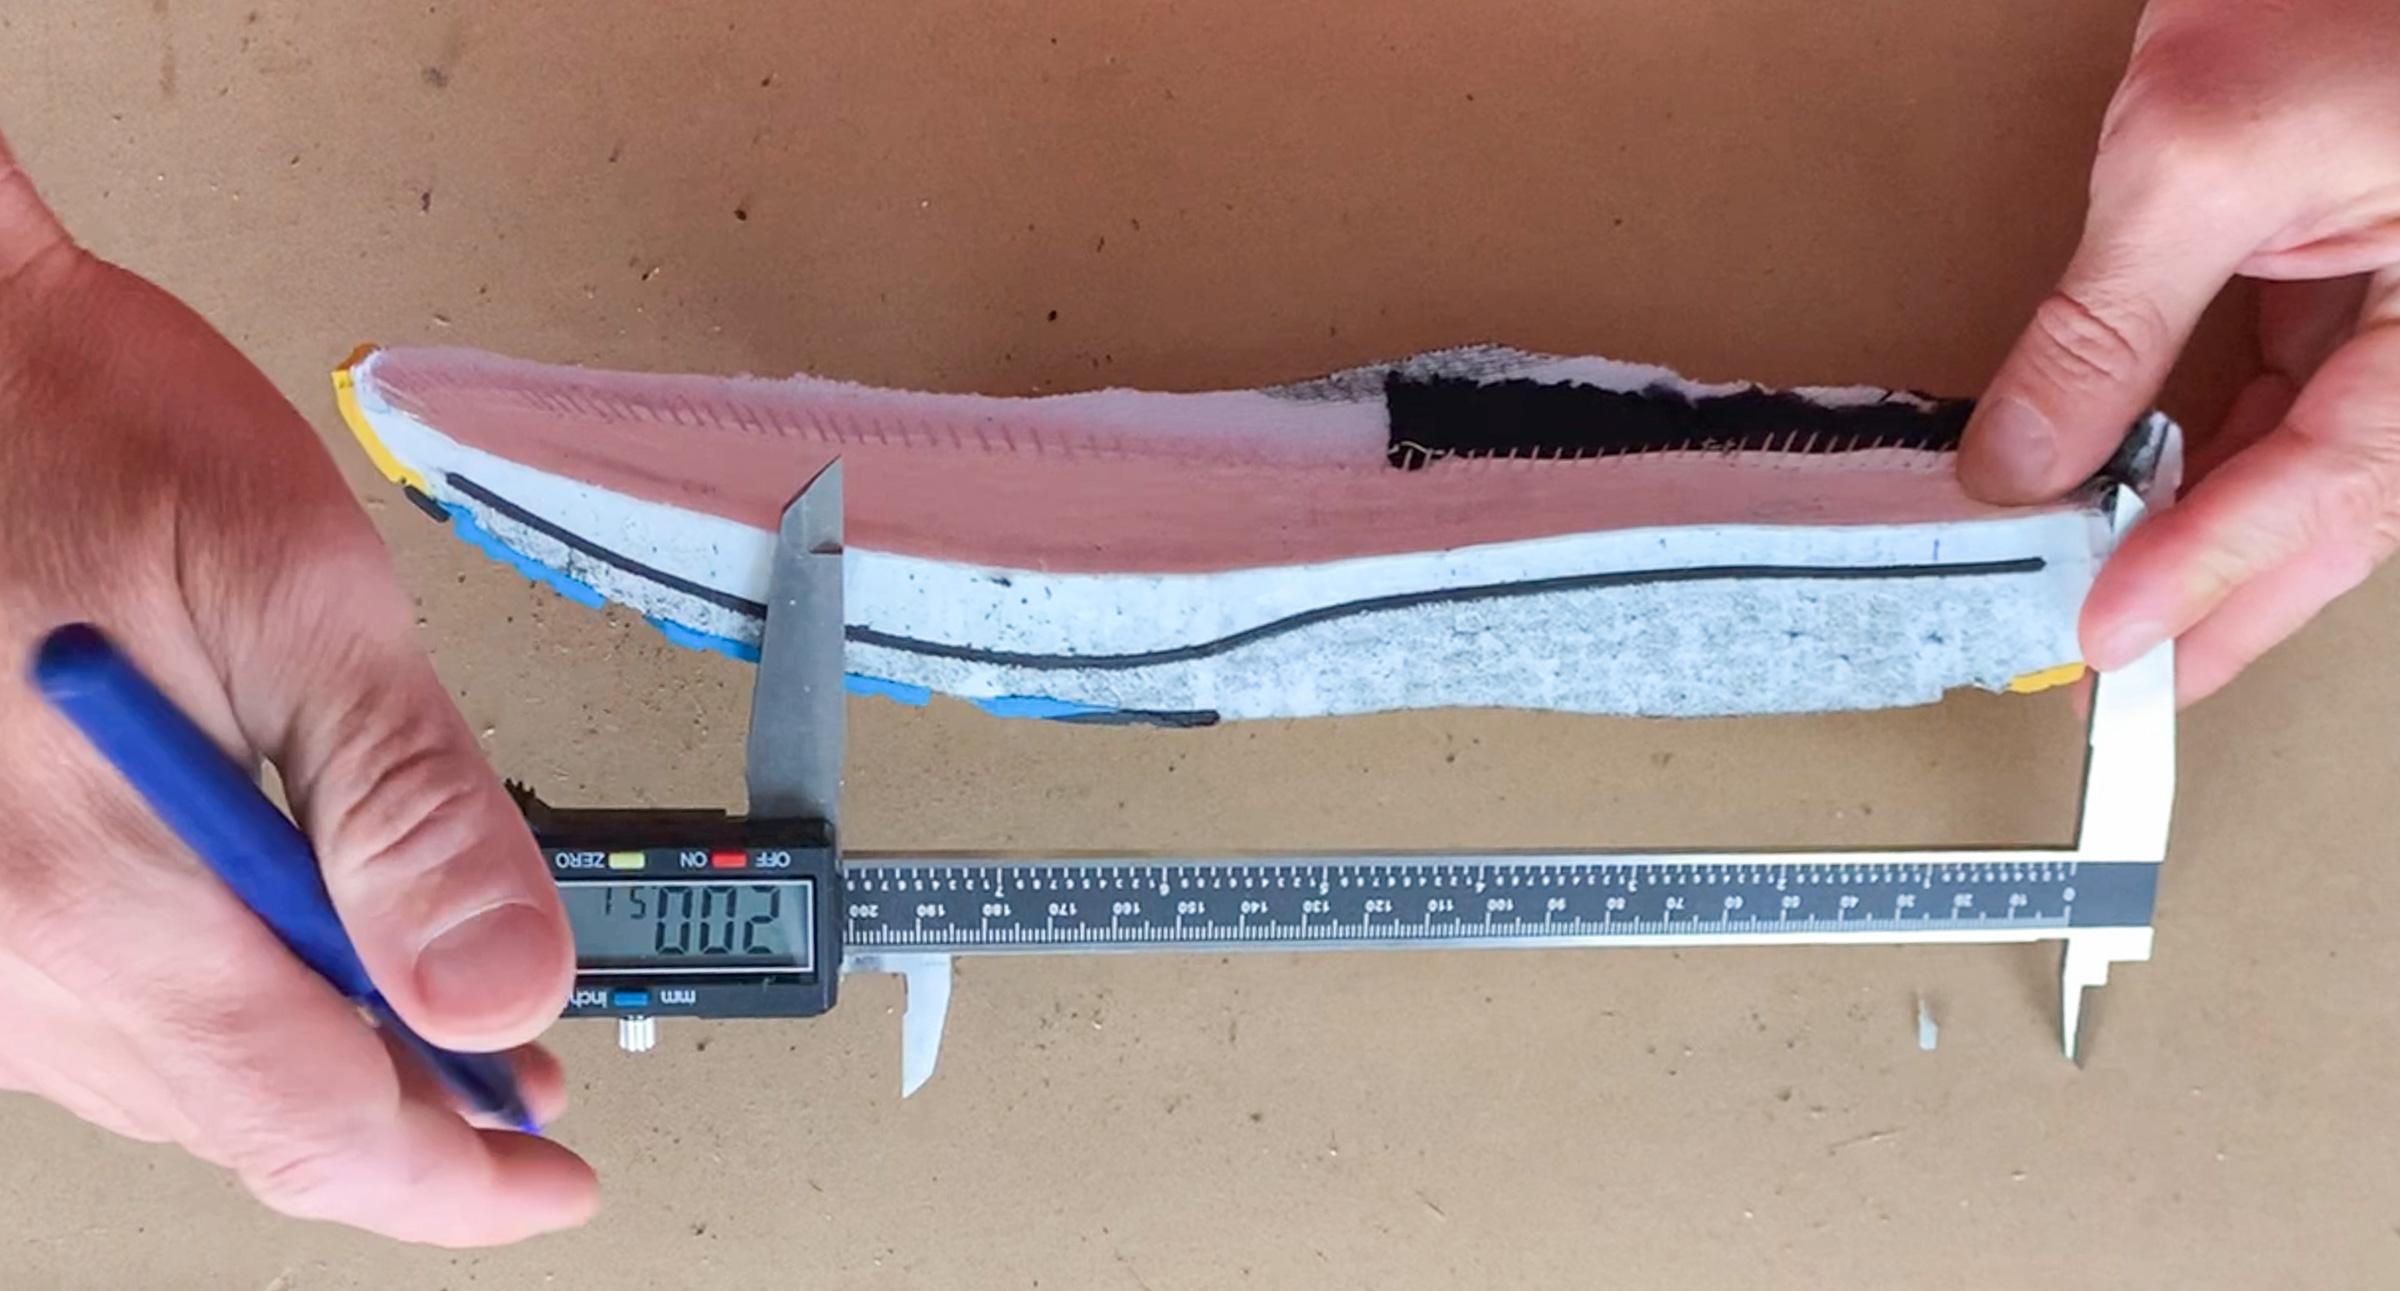
When the upper is detached from the midsole, we perform the energy return and shock absorption tests. Once the midsole is cut in half, we measure the heel and forefoot stack heights (which allow us to calculate the heel drop) and the softness of the midsole. Measuring the stack heights on whole shoes would go against the World Athletics standards and common sense.
The black lines visible on the midsole mark 12% and 75% of the shoe's internal length, which is exactly where we measure the heel and forefoot stack height and where we test the energy return and shock absorption.
Tests that we perform on a shoe after its upper has been cut out or its midsole cut in half:
- Energy return
- Shock absorption
- Forefoot and heel stack height. Using these 2 numbers, we calculate the heel drop
- Softness of the midsole at room temperature and in cold weather. We even wrote a comprehensive guide about this called Why cutting running shoes in half is key to measuring midsole softness
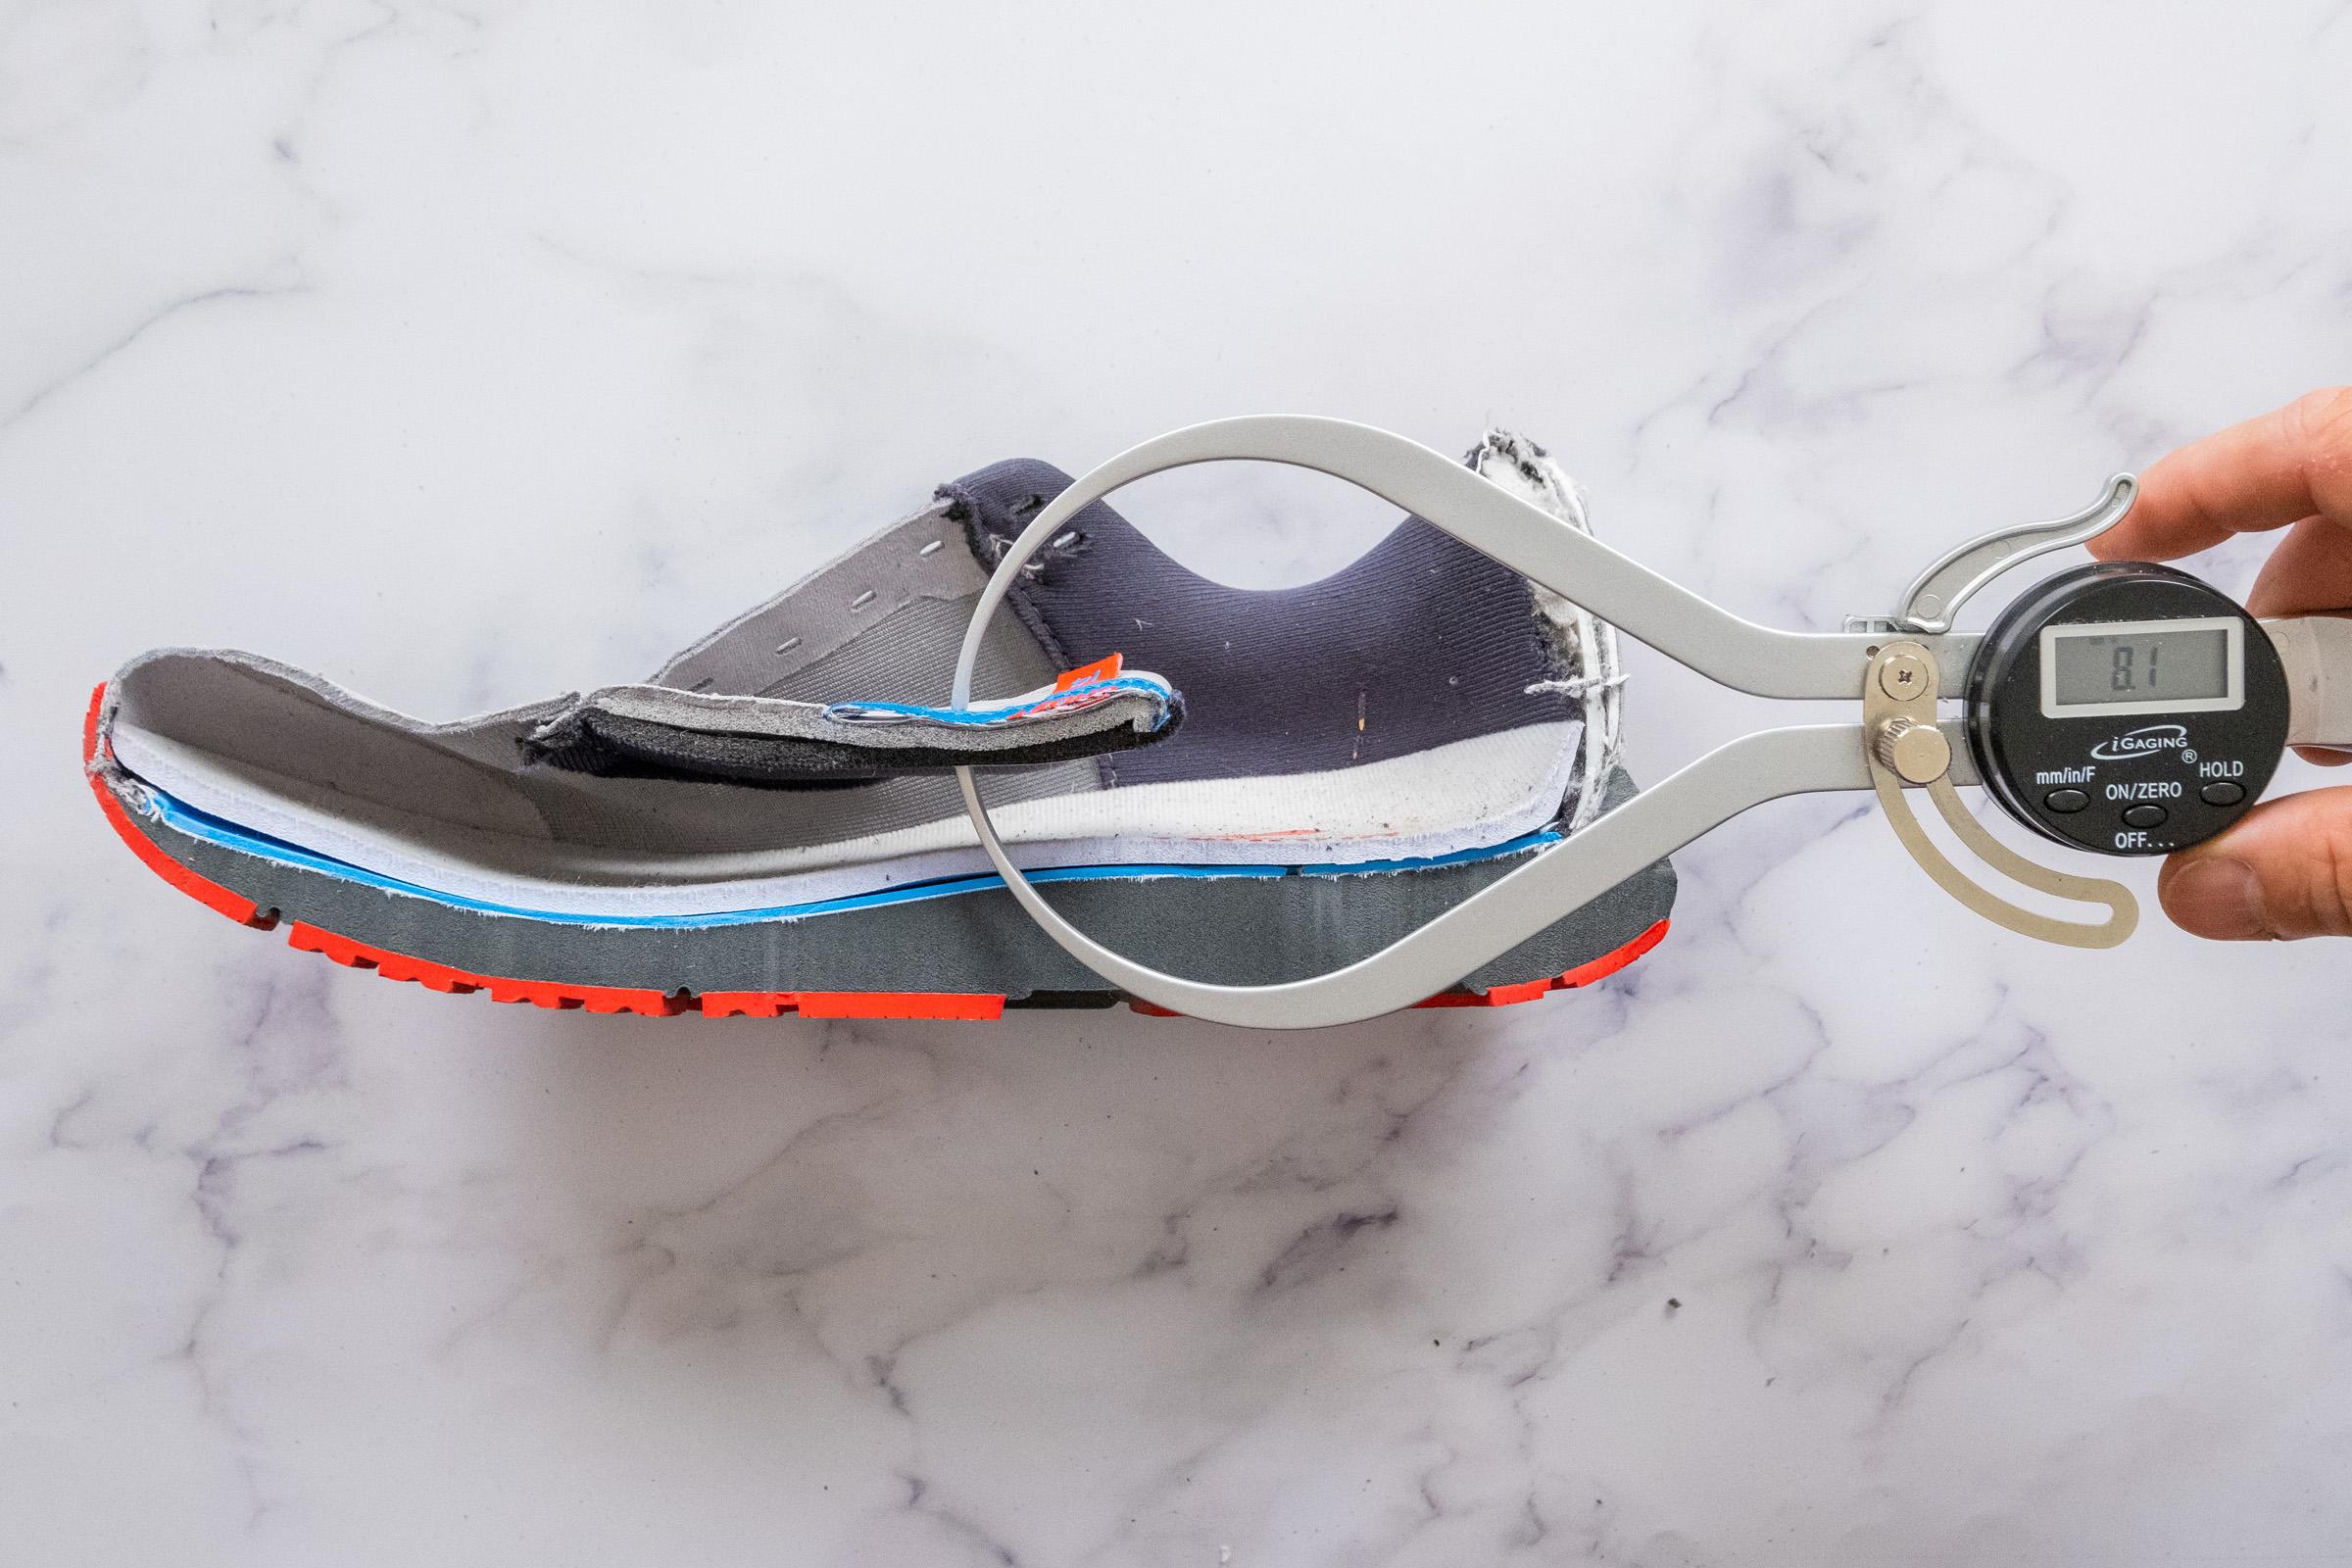
- Insole and tongue thickness.

How we measure stack height and heel drop in the lab
To get accurate measurements of the forefoot and stack height, we honor the official guidelines from World Athletics. These guidelines are clear:
- The stack height must be determined at the exact center of the shoe rather than the sides.
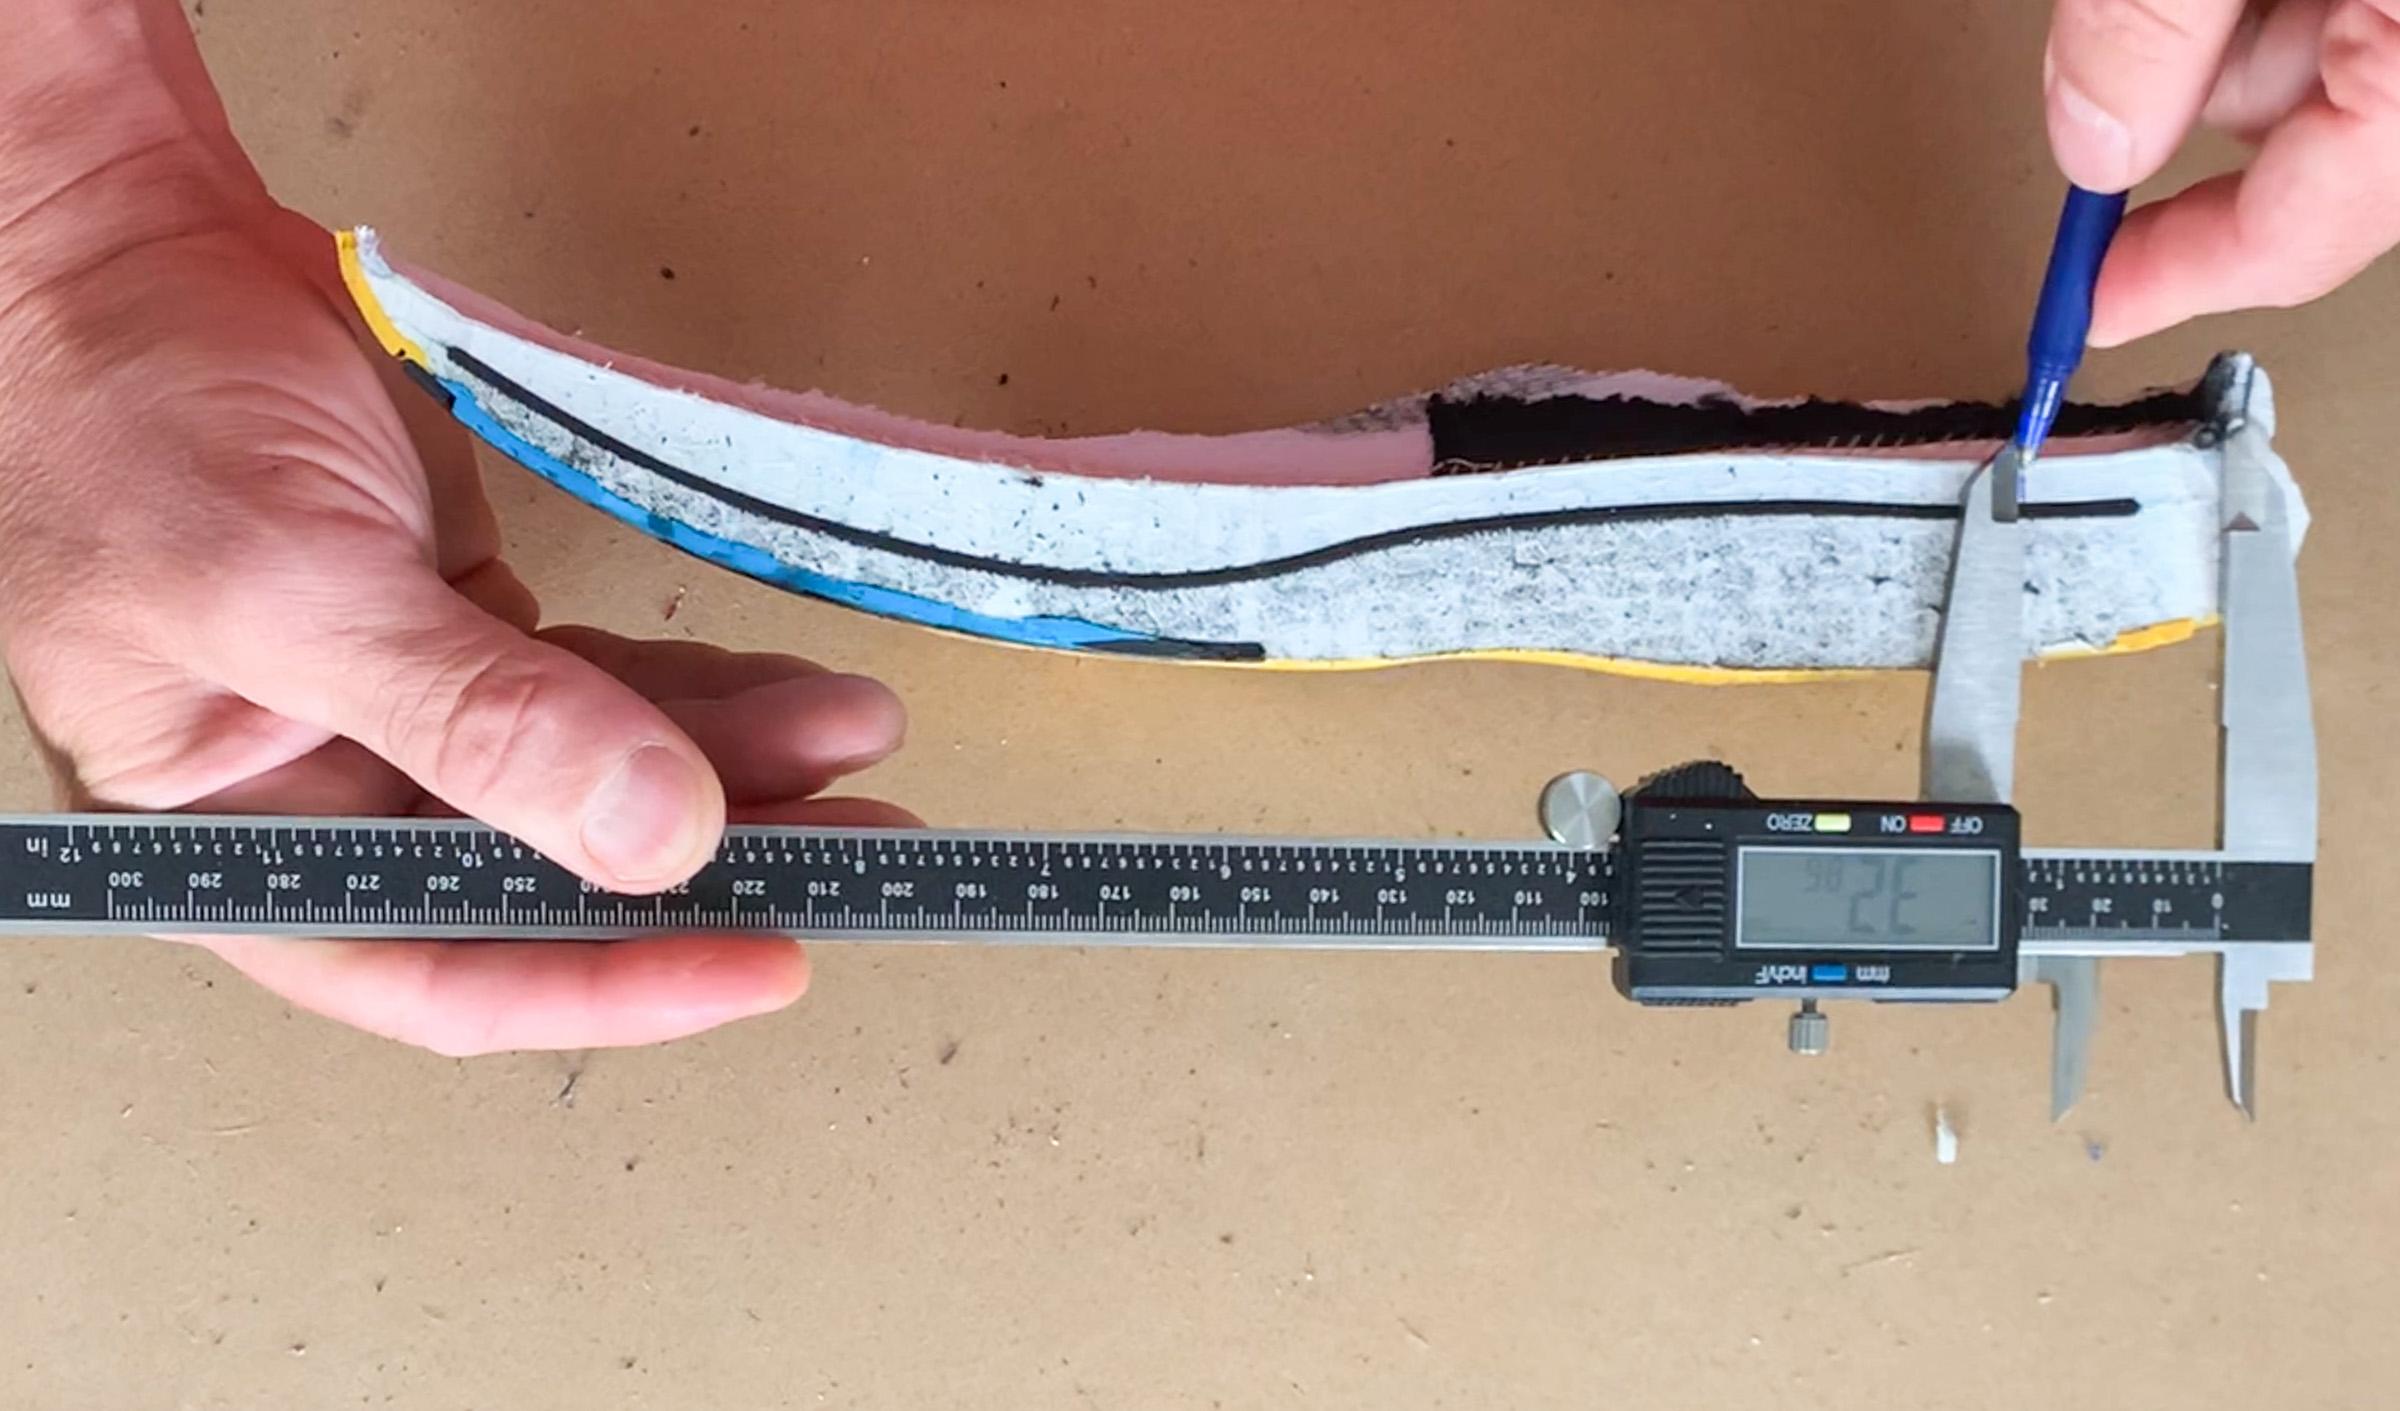
- Heel stack height is measured at 12% of the shoe’s internal length.
- Forefoot stack height is measured at 75% of the shoe’s internal length.
To achieve this, the shoe must be cut in half. After measuring the internal length, we mark both places on the foam itself at 12% and 75% of the length. You can see the straight lines in our images, it’s where we pressed our caliper to measure the heel stack height and forefoot stack height.

The heel drop is simply calculated: (heel stack height) - (forefoot stack height) = heel drop. And for us, it is that simple, thanks to our accurate measurements of the forefoot and heel stack height explained above.
We went down the rabbit hole, of course, and wrote a very in-depth guide: How brands' heel-to-toe drop measurements differ from reality. Spoiler alert: no brand provides accurate heel-to-toe drop measurements! This gives even more value to our test because you can always rely on it.
Why we put shoes in the freezer
Because we want to know what happens at winter temperatures. All of our other lab tests are done at room temperature. Putting the shoe in the freezer for 20 minutes allows us to simulate cold weather. Thanks to this setup, we’re able to tell how the shoe behaves in cold weather - how flexible and soft it is.
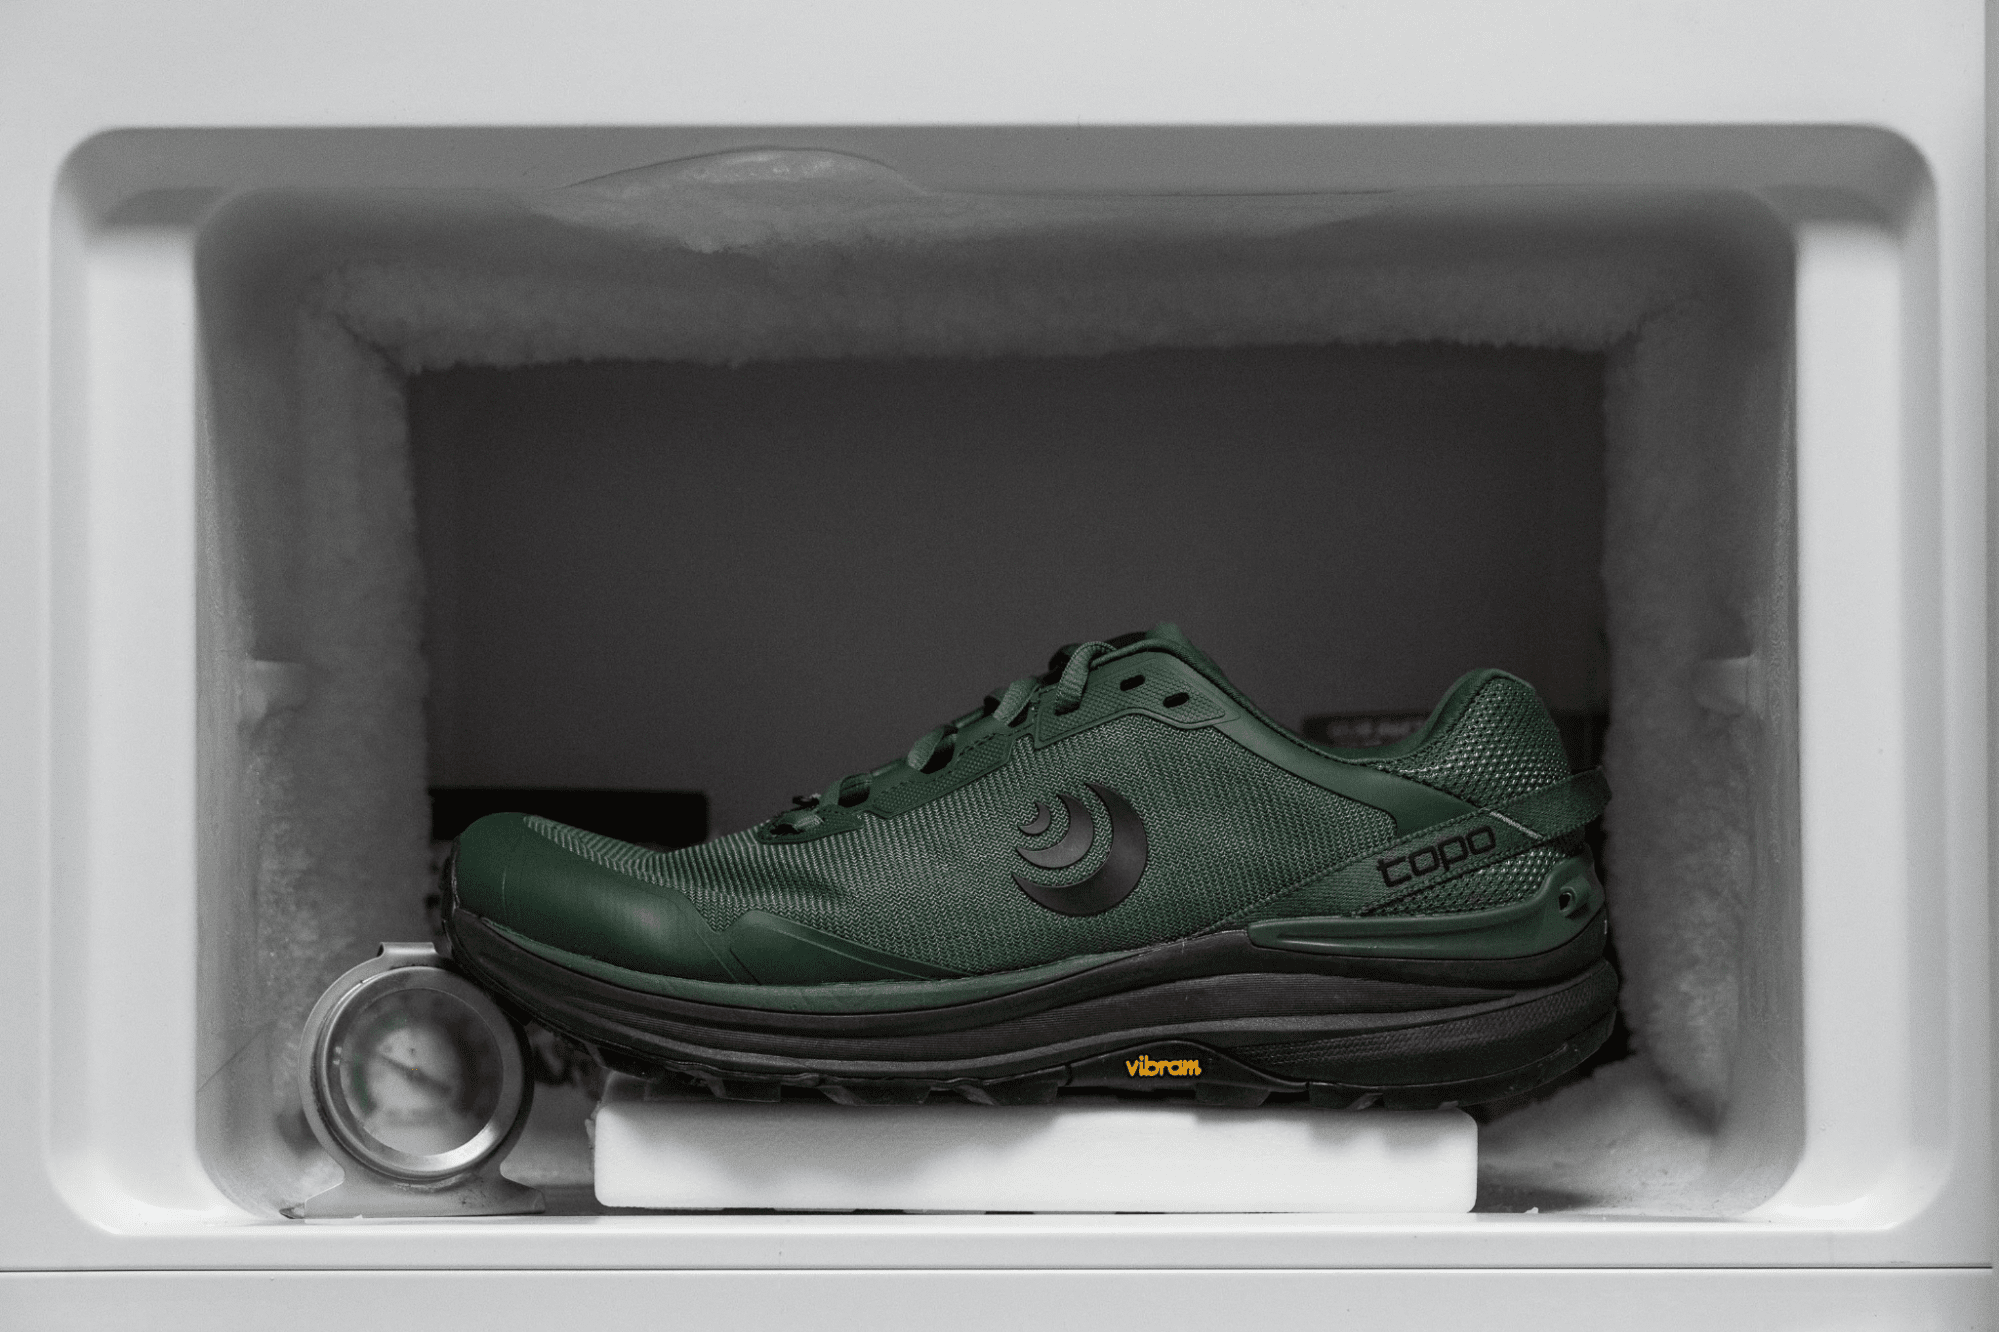
After the shoe has spent 20 minutes in the freezer, we use a durometer to check the softness of the midsole. We then compare this result to the one done at room temperature.
If you’d like to learn more about how shoes behave in different temperatures, head over to our guide Effects of temperature on running shoes.
How we measure the breathability of the shoe
We examine the upper of the shoe with a fine-tooth comb to give the most accurate breathability rating. This means we perform 3 tests to examine the breathability of the upper.
We wrote The definitive guide to running shoe breathability, which is the most extensive article on the topic the world has seen so far, and we invite you to have a look at it if this topic really interests you.
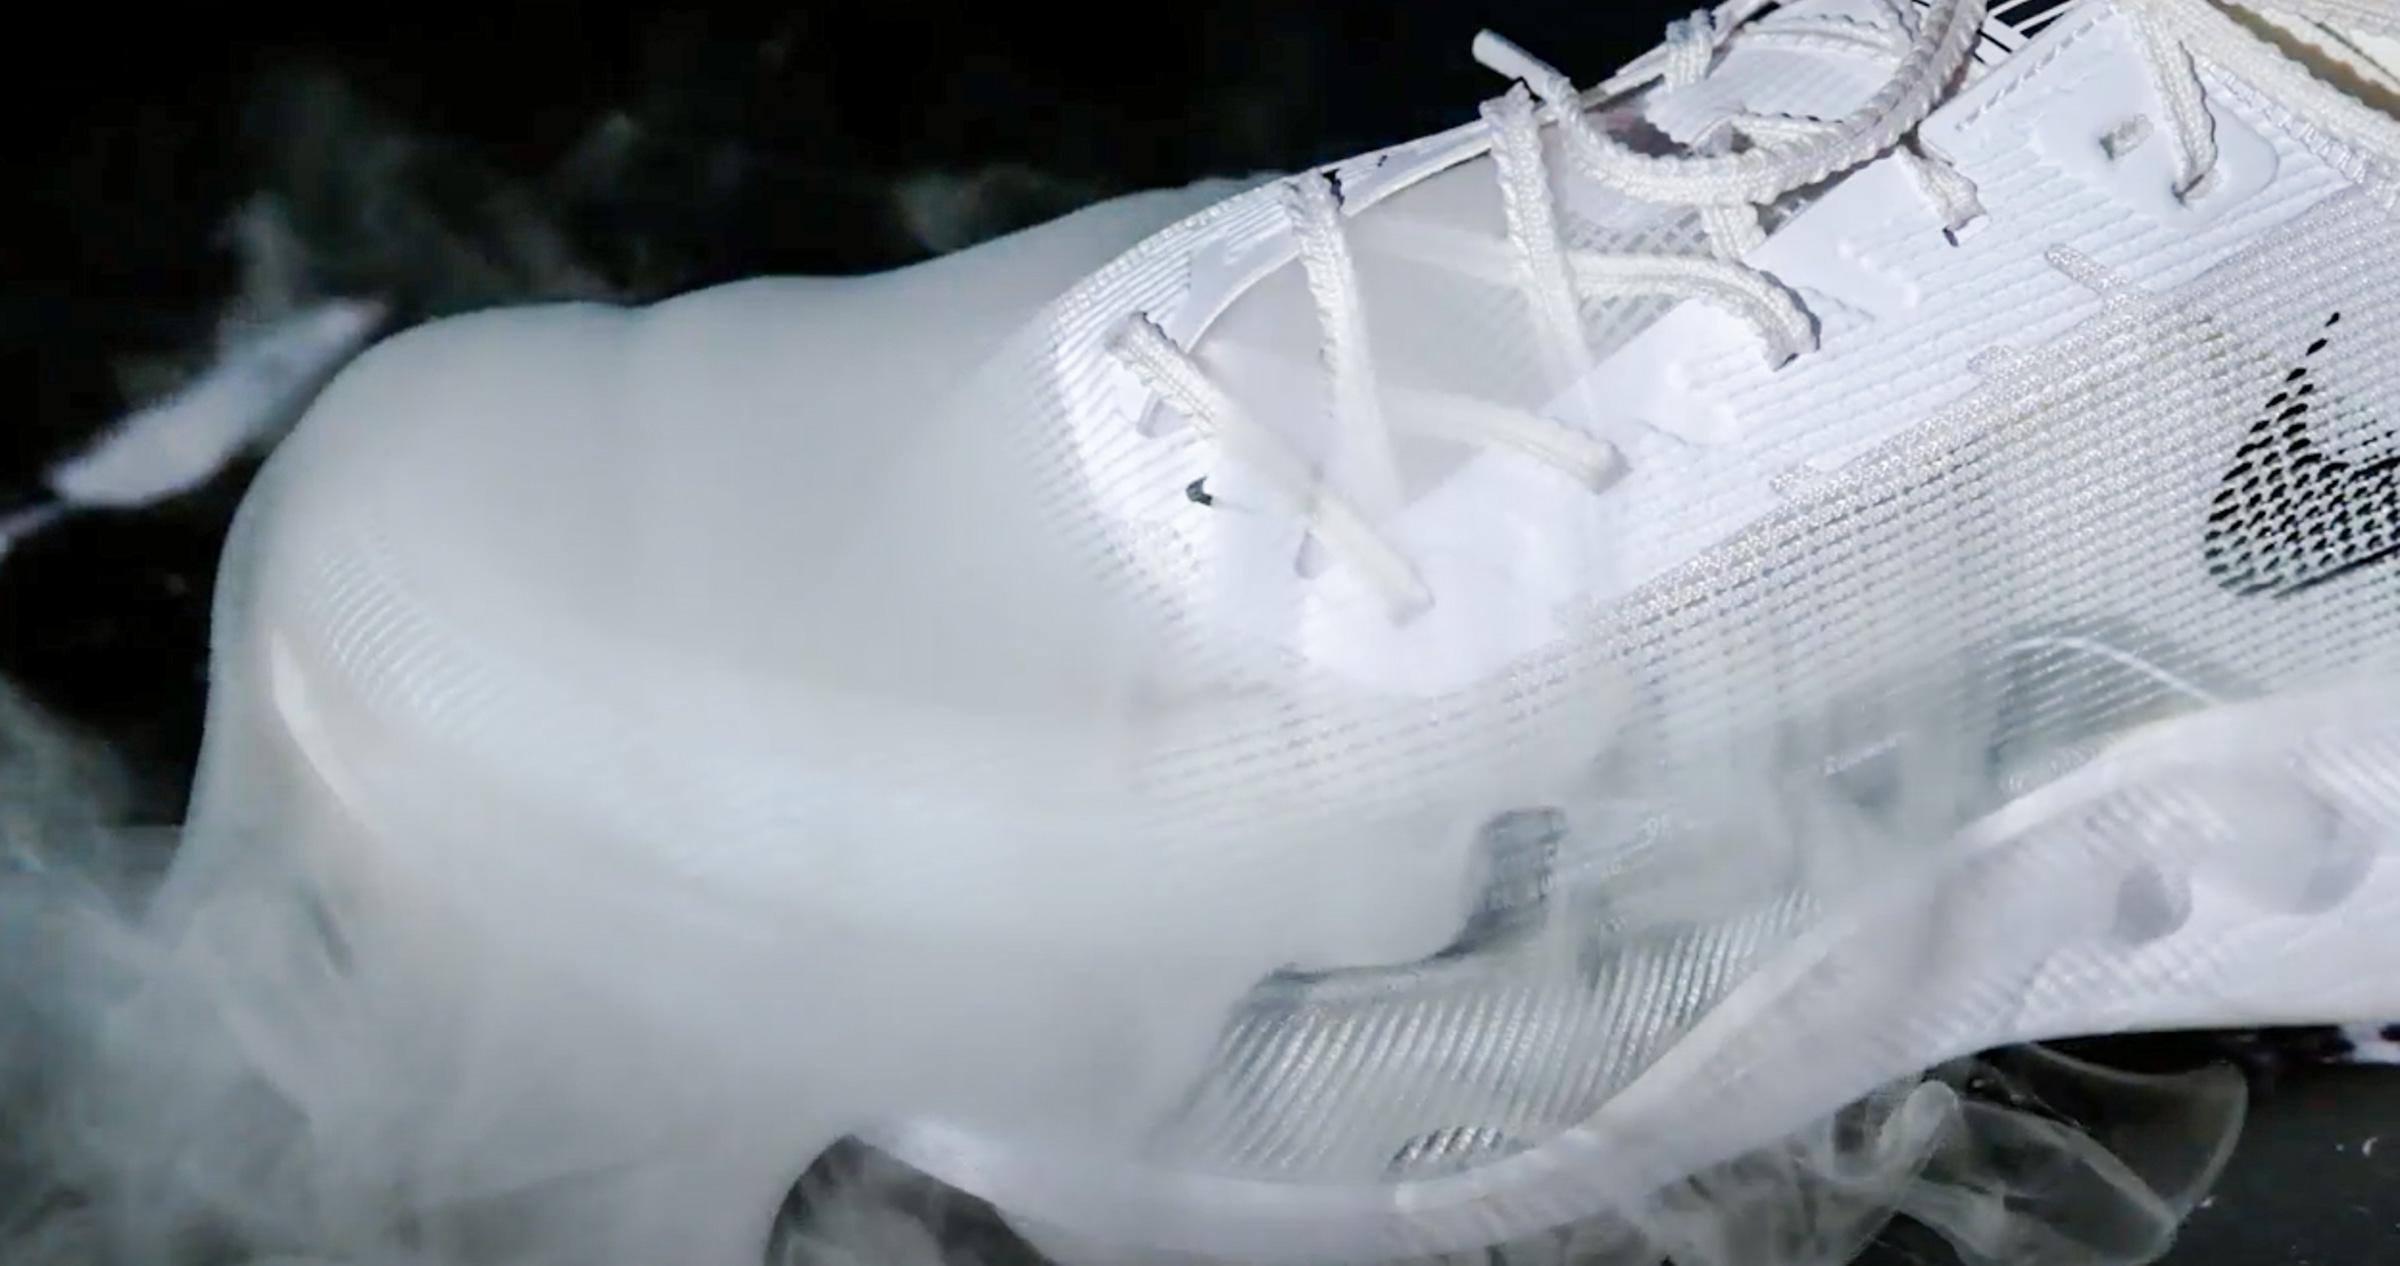
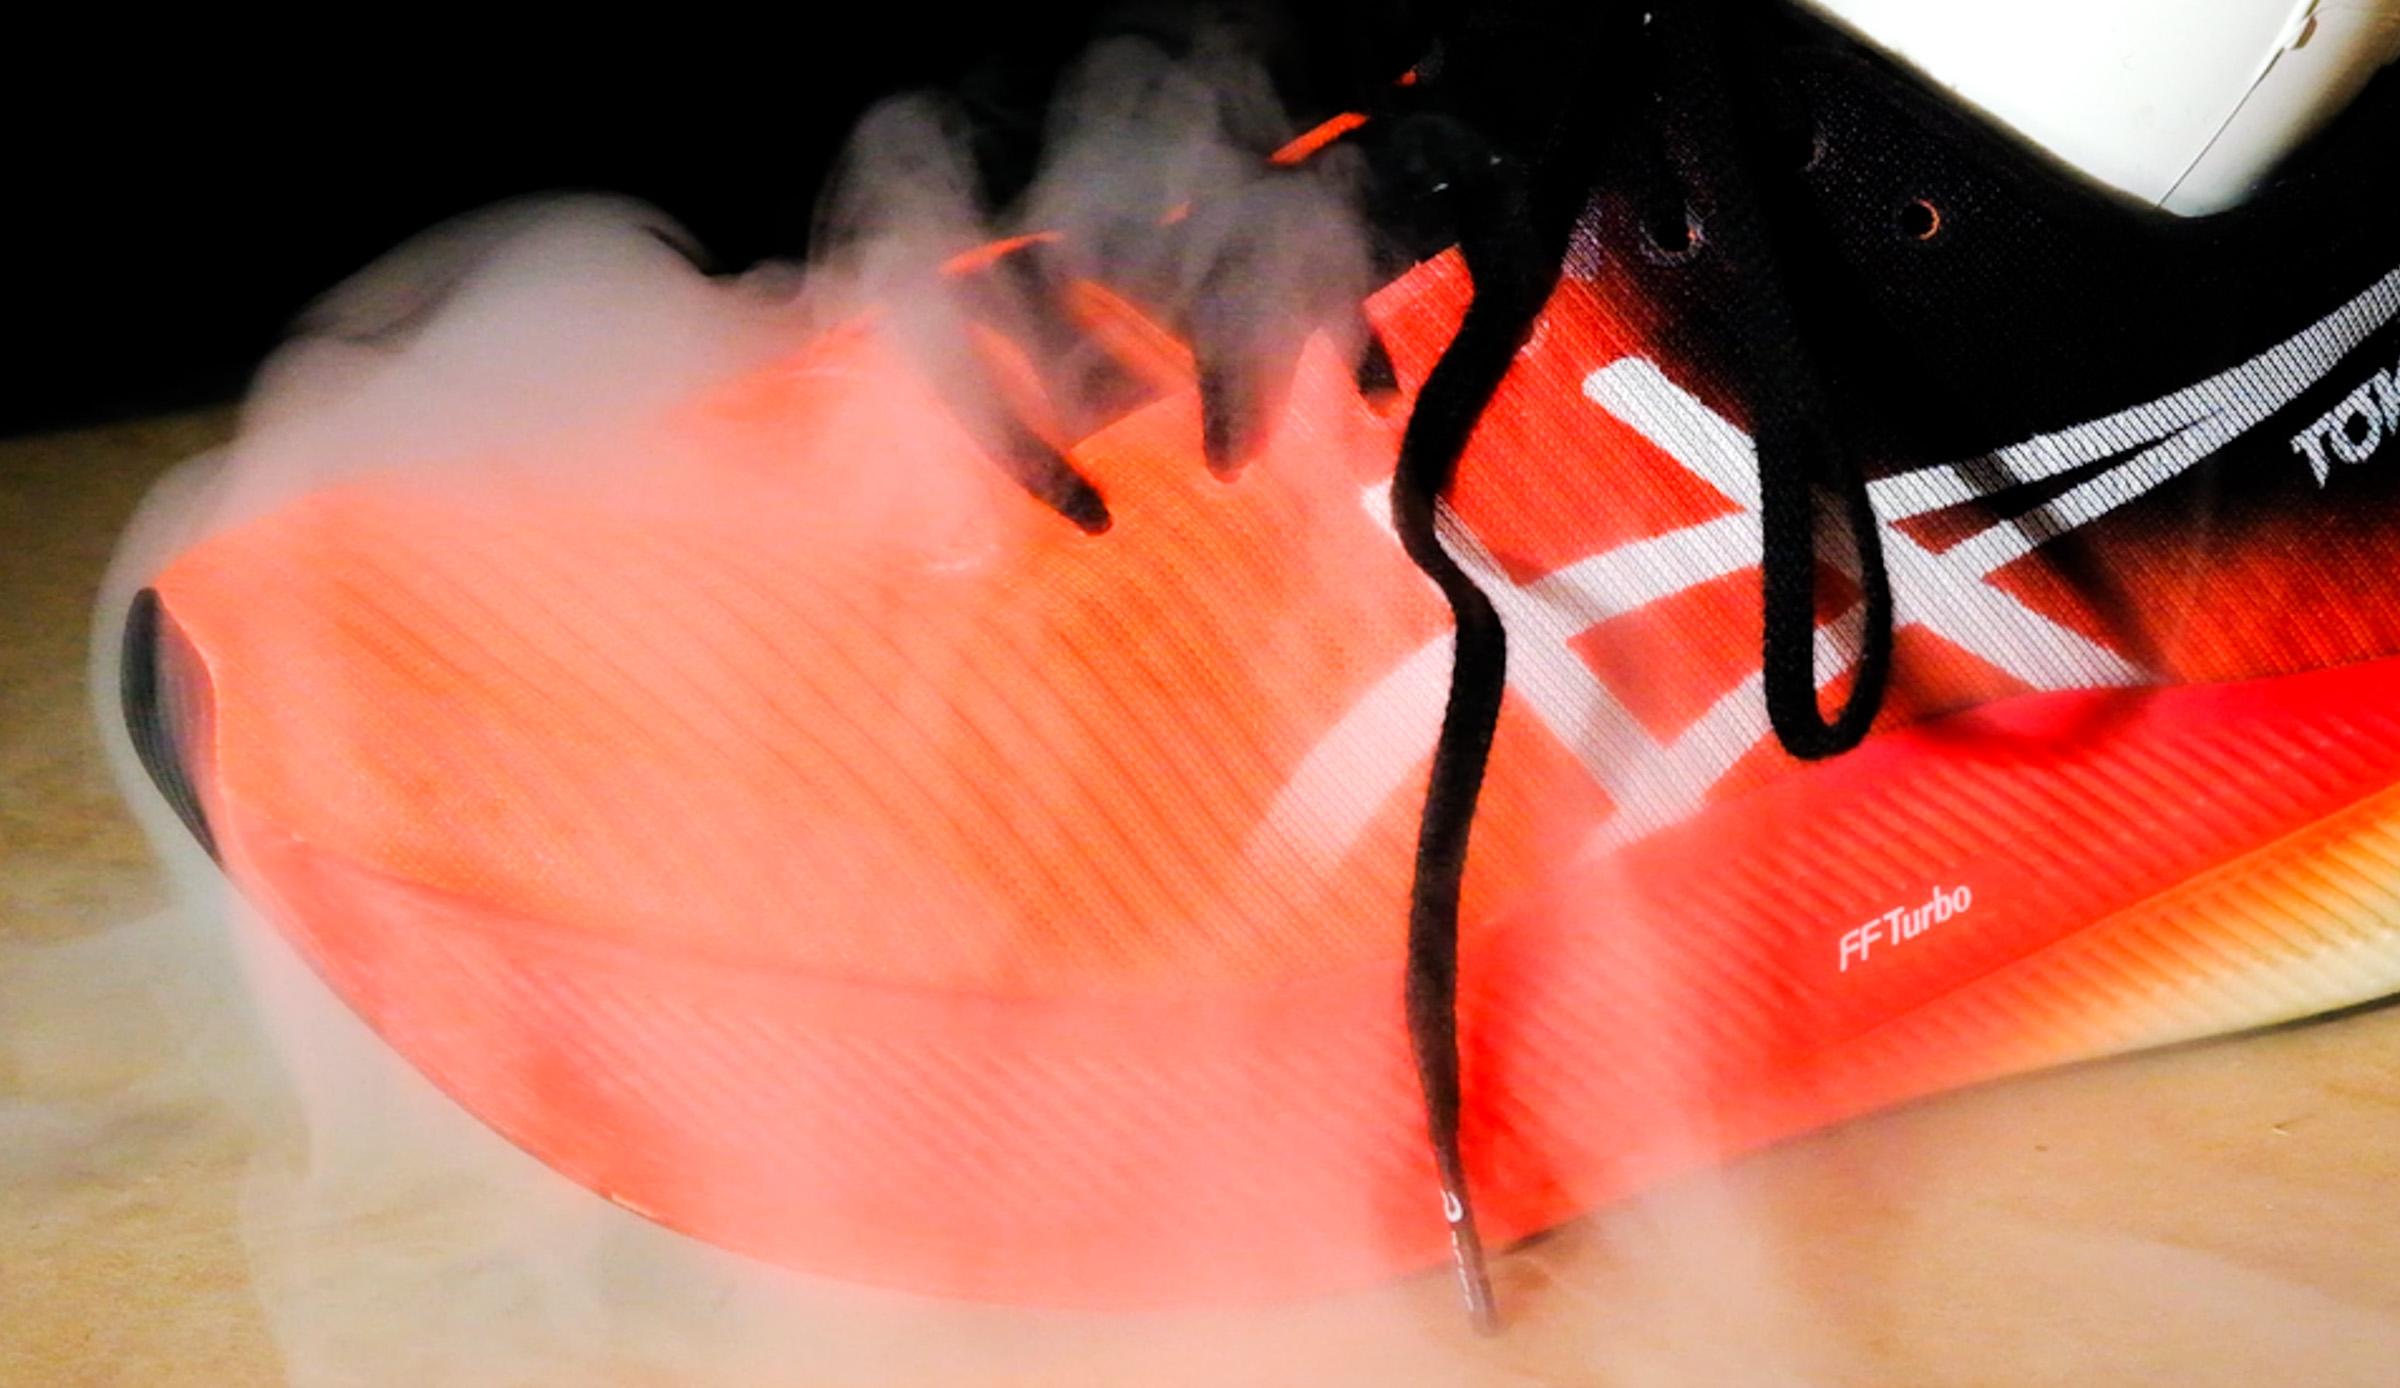
Smoke pump
We pump smoke into the shoe to see where the smoke comes out, which we directly correlate with where and how much the shoe breathes. Not all shoes breathe the same.
To ensure we test the breathability at the toebox, where it matters the most, we use 3D-printed casts of different sizes that direct the smoke into the toebox. This way, we avoid wrong breathability assessments that happen when smoke leaves the shoe’s interiors through eyelets, sides, or between the tongue and the sides.
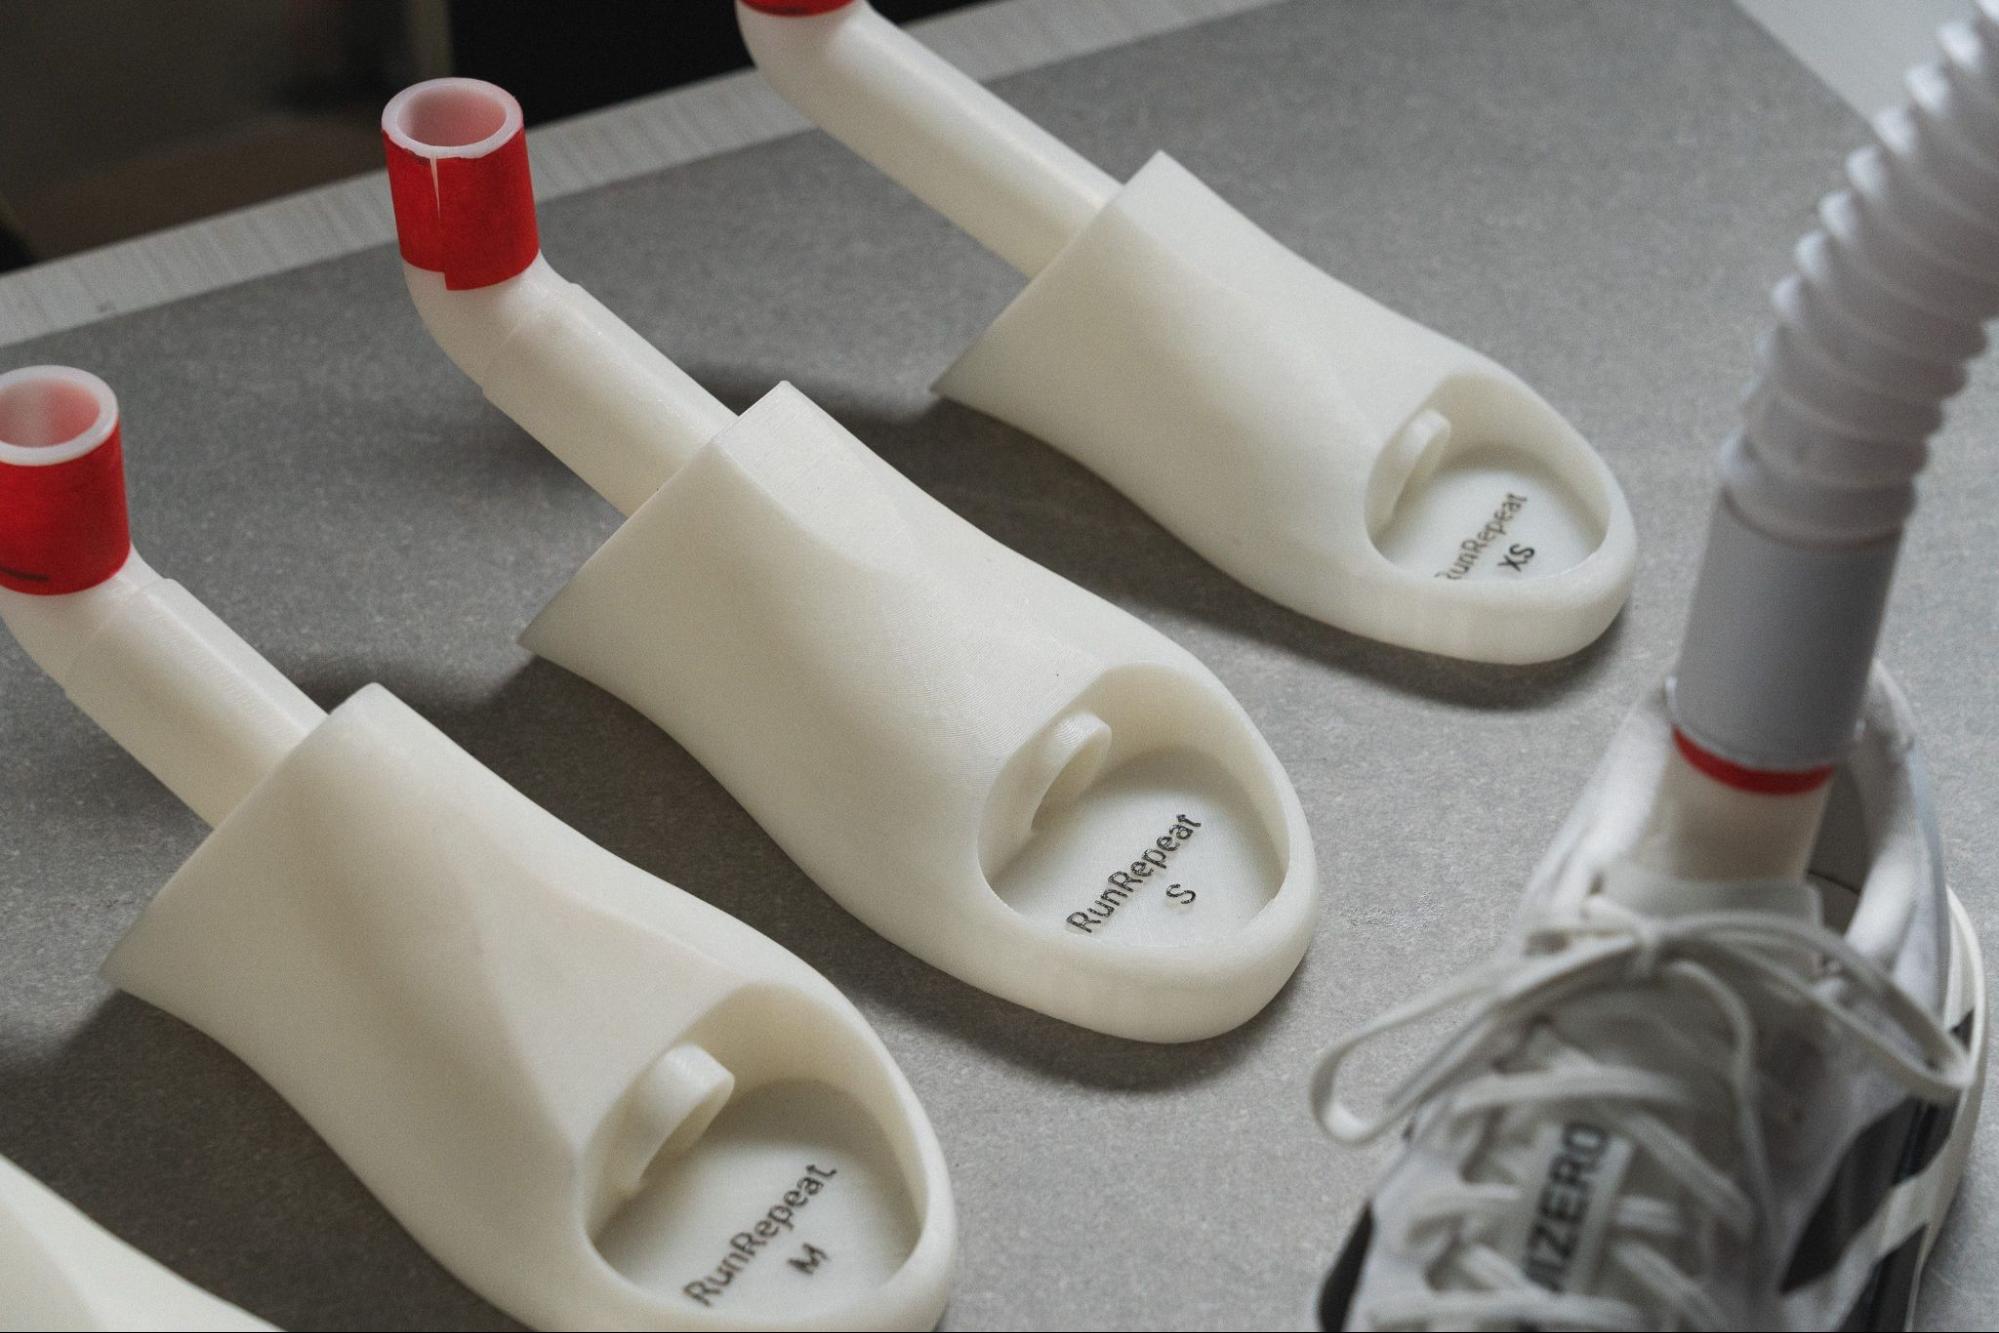
We rate what we see on a scale of 1 to 5, where 5 is the most breathable.
Flashlight
We put the upper material against the flashlight: to see where the upper gets thicker and explain why the shoe is less breathable there. The biggest value of this test lies in the fact that it allows us to see where overlays and reinforcements are present on the upper when we put the flashlight behind it.
These extra layers may not be easily noticeable at first, so this light test allows us to understand why smoke did not go through such areas.
Microscope
However high or low the shoe scores on our smoke breathability test, this is where we find out why:
- More breathable shoes have a lot of vent holes and/or the upper is very thin
- Less breathable shoes have very few or no vent holes and/or the upper is very thick.

If there are no perforations, the material has to be very thin for the shoe to breathe properly. However, the material can be very thin yet plasticky and therefore not breathable.

What we destroy with our Dremel and why
We use our Dremel to assess the durability of different parts of the shoe. We press it against the toebox, outsole, and heel padding.

Given that all of our tests are standardized, we always apply the same force and speed.
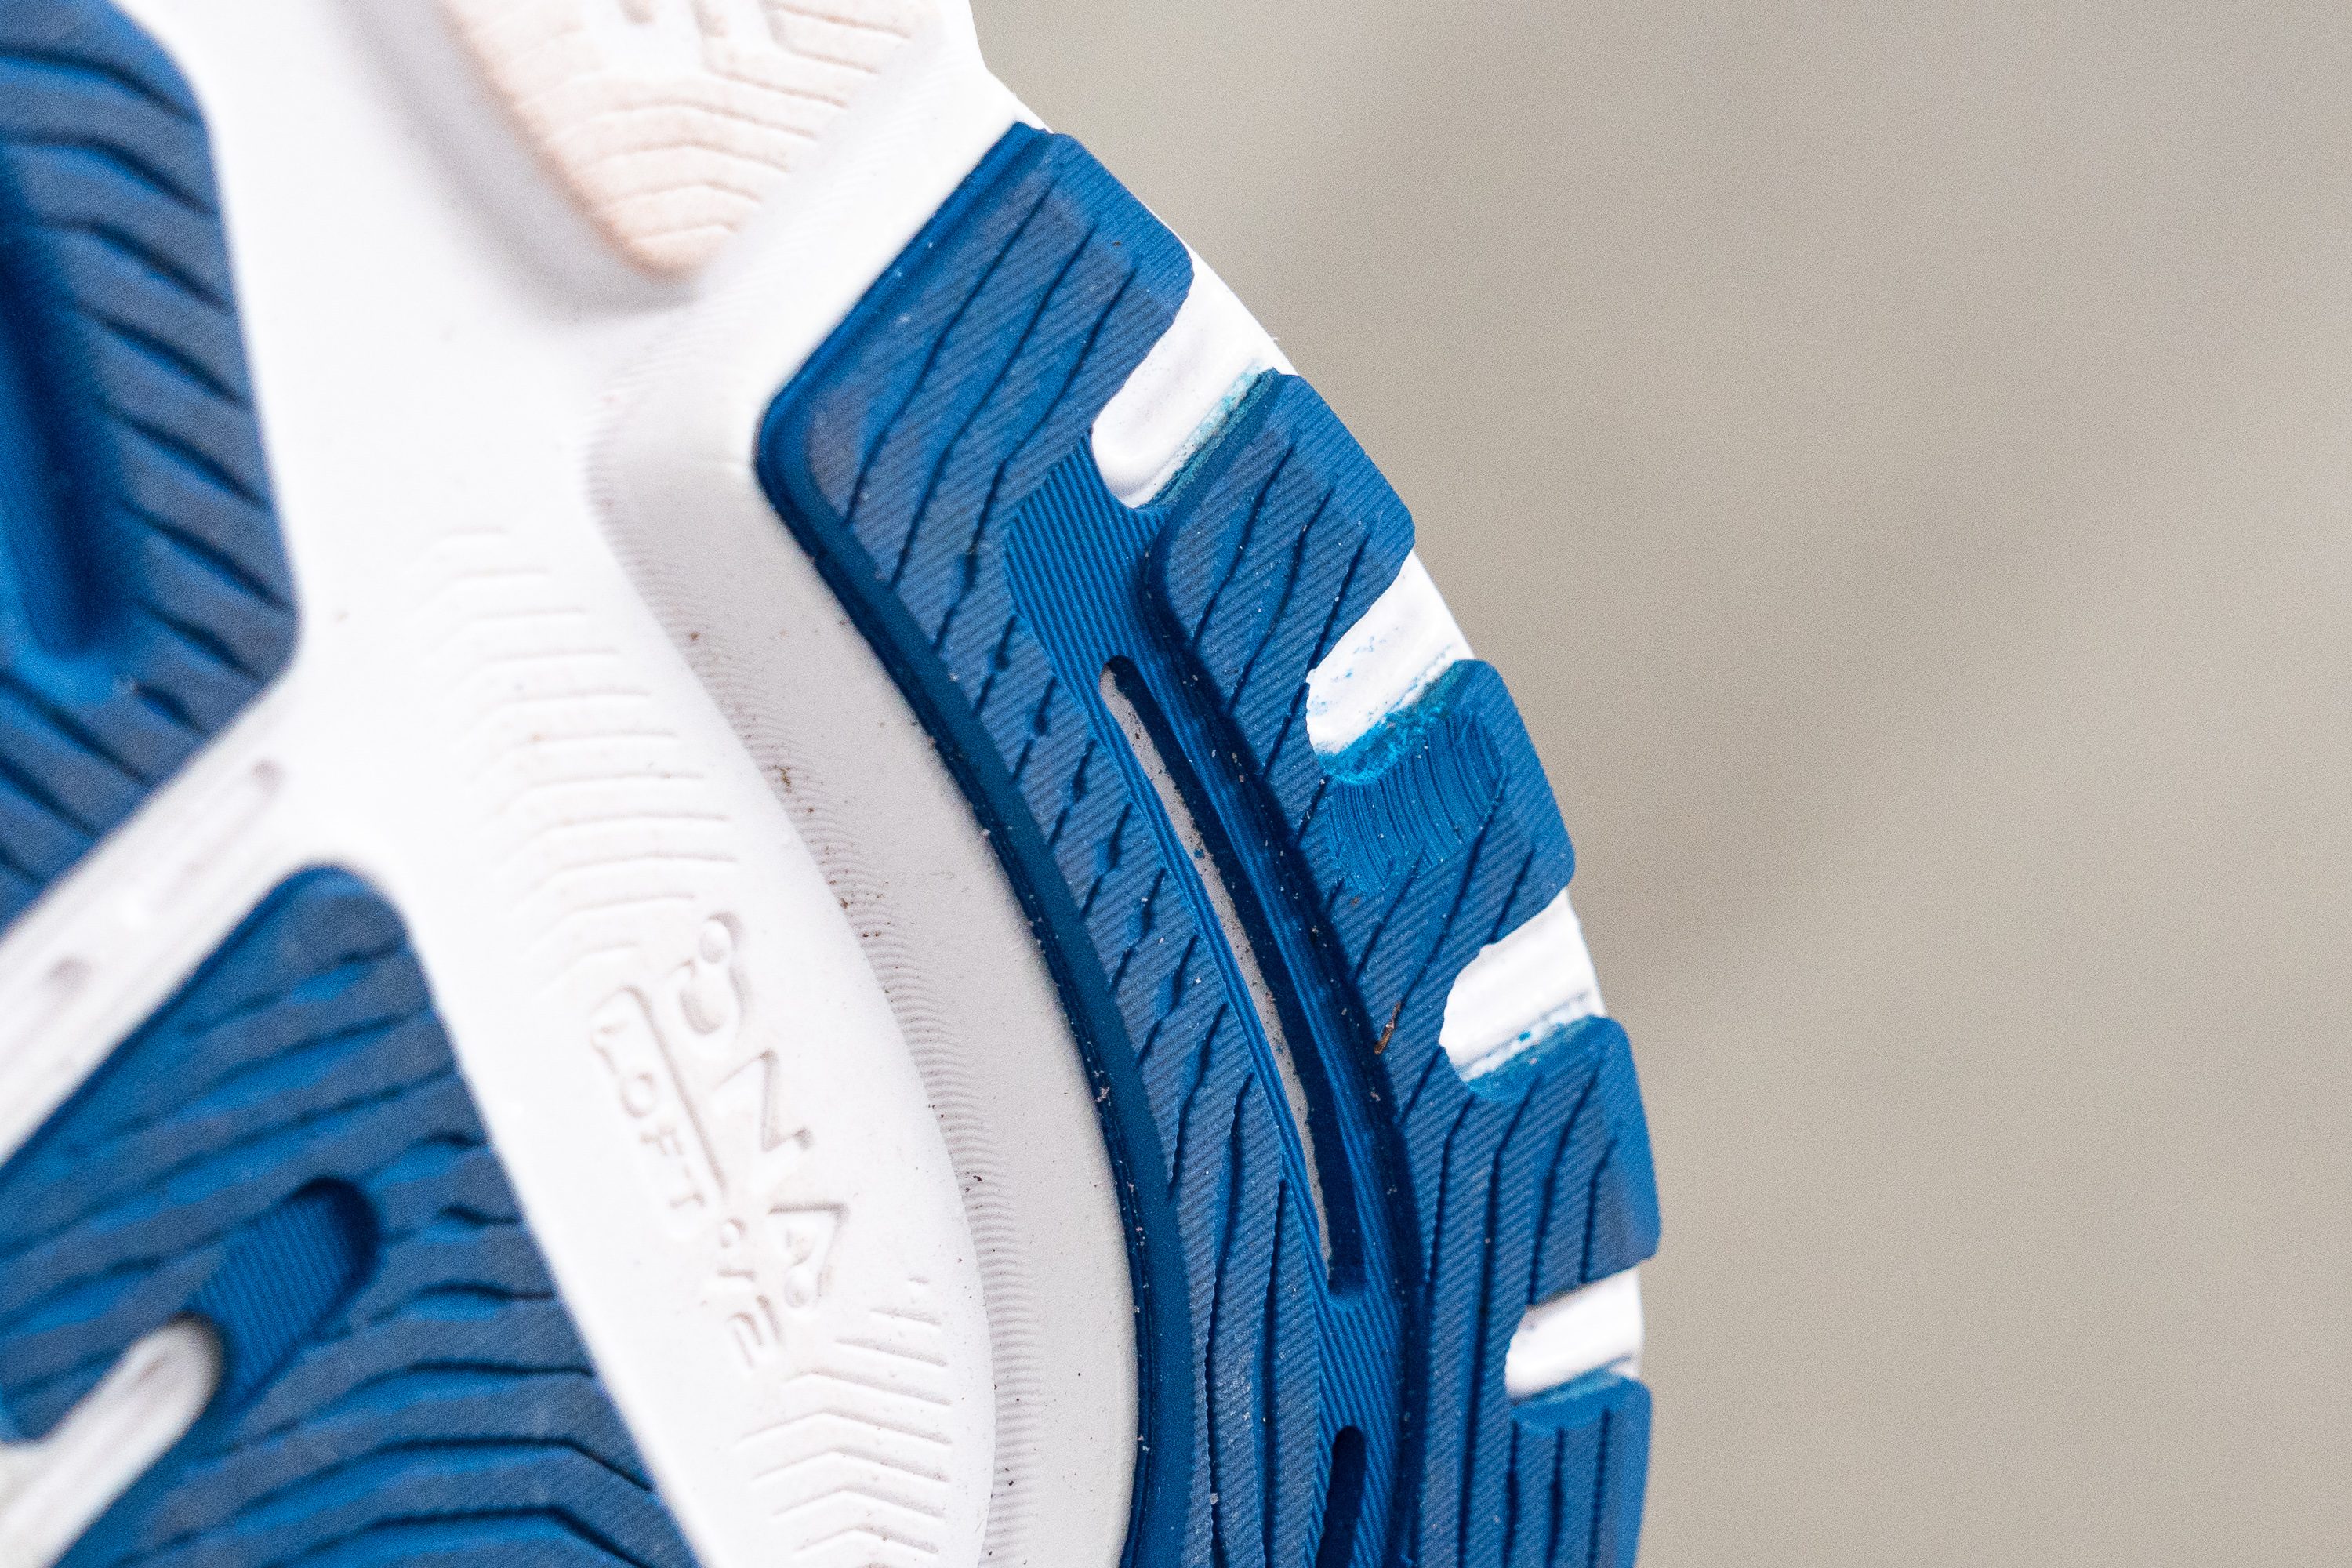
The durability of the outsole is correlated with the depth of the dent the Dremel has made. We measure the depth using a tire tread depth gauge.

When checking the durability of the toebox and heel padding, we visually assess the damage and assign it a 1-5 rating, where 5 is the most durable.
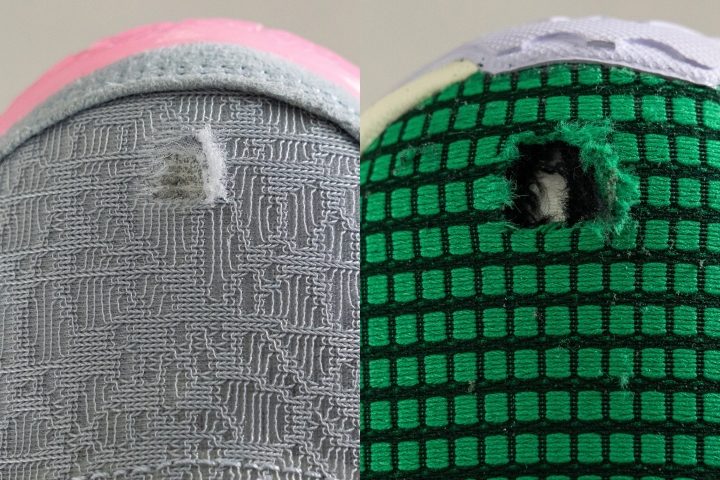
In this example, we pushed the Dremel against the upper. On the left: Nike Lebron NXXT GEN got the 3/5 rating for the toebox durability. On the right: Nike Lebron Witness 7 with a 1/5 rating (the least durable).
Above, we can see how Puma Magnify Nitro 2’s heel counter is destroyed within 5 seconds with threads flying around. It scored 1 out of 5 on this durability test. At the same time, on the right, we see how indestructible the Altra Rivera 3’s heel padding is, which is why it scored the perfect 5/5.
We’ve written more about the durability of the outsole (and grip and many other things) in our guide In-depth insights into running shoe outsoles (road and trail).
Why we torch the leather uppers
Torching the leather and scratching the burnt area allows us to check whether the leather is genuine or not.

When it bursts into flames and melts, usually discovering different layers, we know it’s a fake one. When it chars and merely gets scorched, and scratching it with our awl reveals only low-level damage, we notice it’s a dense, full-grain leather. It also smells like burnt hair.
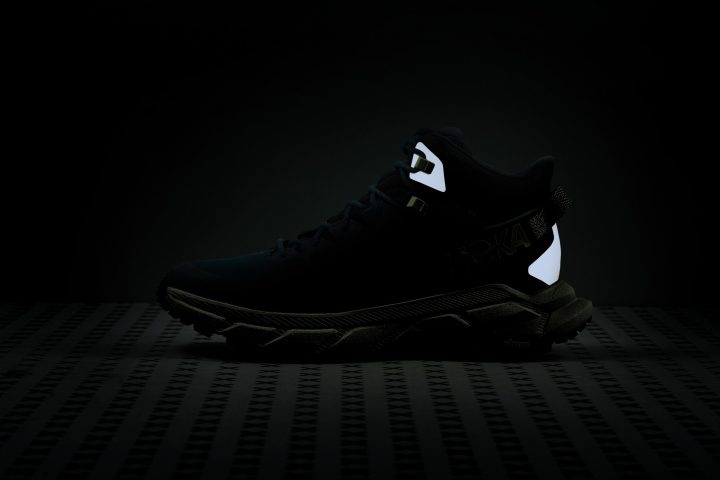
Why we turn the lights off in the lab
Nothing to do with romance. We do it to find out whether the shoes are noticeable in the dark or not. Look how shiny Hoka Trail Code GTX is in the dark!
How we decide which shoes to buy
When buying shoes, we consider the importance of the shoe and its availability. The importance is reflected in the shoe’s value and popularity. While popularity is obvious, the value is what also pushes the shoe to the top of the pipeline - it can be a shoe that’s a part of a collection or an important niche shoe (like mud or track spike).
 We buy the shoes in men’s US 9. If not available in that size, we wait until it is. You can always check out our Pipeline to see the list of shoes we purchased or just started testing.
Shoe pipeline: which shoe is next?
Once the shoes arrive, we decide on the next batch. Within 1 week, we always test shoes that belong to 1 category only. We don’t do the same tests for, e.g., running and gym shoes. There are variations in the type and number of tests we do for each category, so we don’t mix them up. This also means that sometimes, less popular shoes are tested together with highly popular shoes because they belong to the same category. For a clear overview of shoes we just bought, took to the lab and started testing, or finished reviewing, see our Shoe Pipeline page.

We also take the weather into account: when it’s really bad, we might do a batch of shoes that can be tested indoors, like gym shoes.
Shoes we do not test
We only test shoes that belong to these categories: running (both road and trail), track spikes, cross country, basketball, training, tennis, walking, hiking (shoes, boots, sandals), and sneakers. We don’t test shoes that belong to other categories.
We also do not test shoes that are released as a variation or a collaboration. We usually focus on the OG model. If there’s a new release that comes with an updated, more sustainable upper, recycled materials, or a collaboration, we stick to the OG shoe.
We buy all the shoes on our own
No sponsorships. This also means: no bias. We don’t have deals with brands, we purchase the shoes with our own money. Because of this, we’re able to test shoes only once they are widely available. We keep all the invoices and shoe boxes neatly stacked.
Wear-testing the shoes
We always test shoes in proper surroundings to truly understand how they feel and perform.

|
Category |
Wear test location |
|
Road running |
Mostly roads, we might give light trails a try as well. |
|
Trail running |
Trails, different surfaces. If lugs are smaller, we include roads as well. |
|
Hiking |
Trails, different surfaces. |
|
Walking |
Different surfaces, depending on the shoe. |
|
Basketball |
Basketball courts (indoor/outdoor). |
|
Track spikes |
Track |
|
Cross country shoes |
Different surfaces, depending on the spikes. |
|
Training |
Gym |
|
Tennis |
Tennis court, different surfaces |
|
Sneakers |
All-around, mostly casual walks around the town. |
These tests help us understand shoes better so that we can deliver more in-depth and objective reviews.
Just knowing that, in the lab, the heel counter scored 4 out of 5 for stiffness does not always tell us everything. It can mean that the counter is harsh on the runner’s heel or that it is exceptionally stable. Or that it allows for heel slipping. Because we’re aware of all the nuances, we never skip the wear test.
2.0 Methodology update
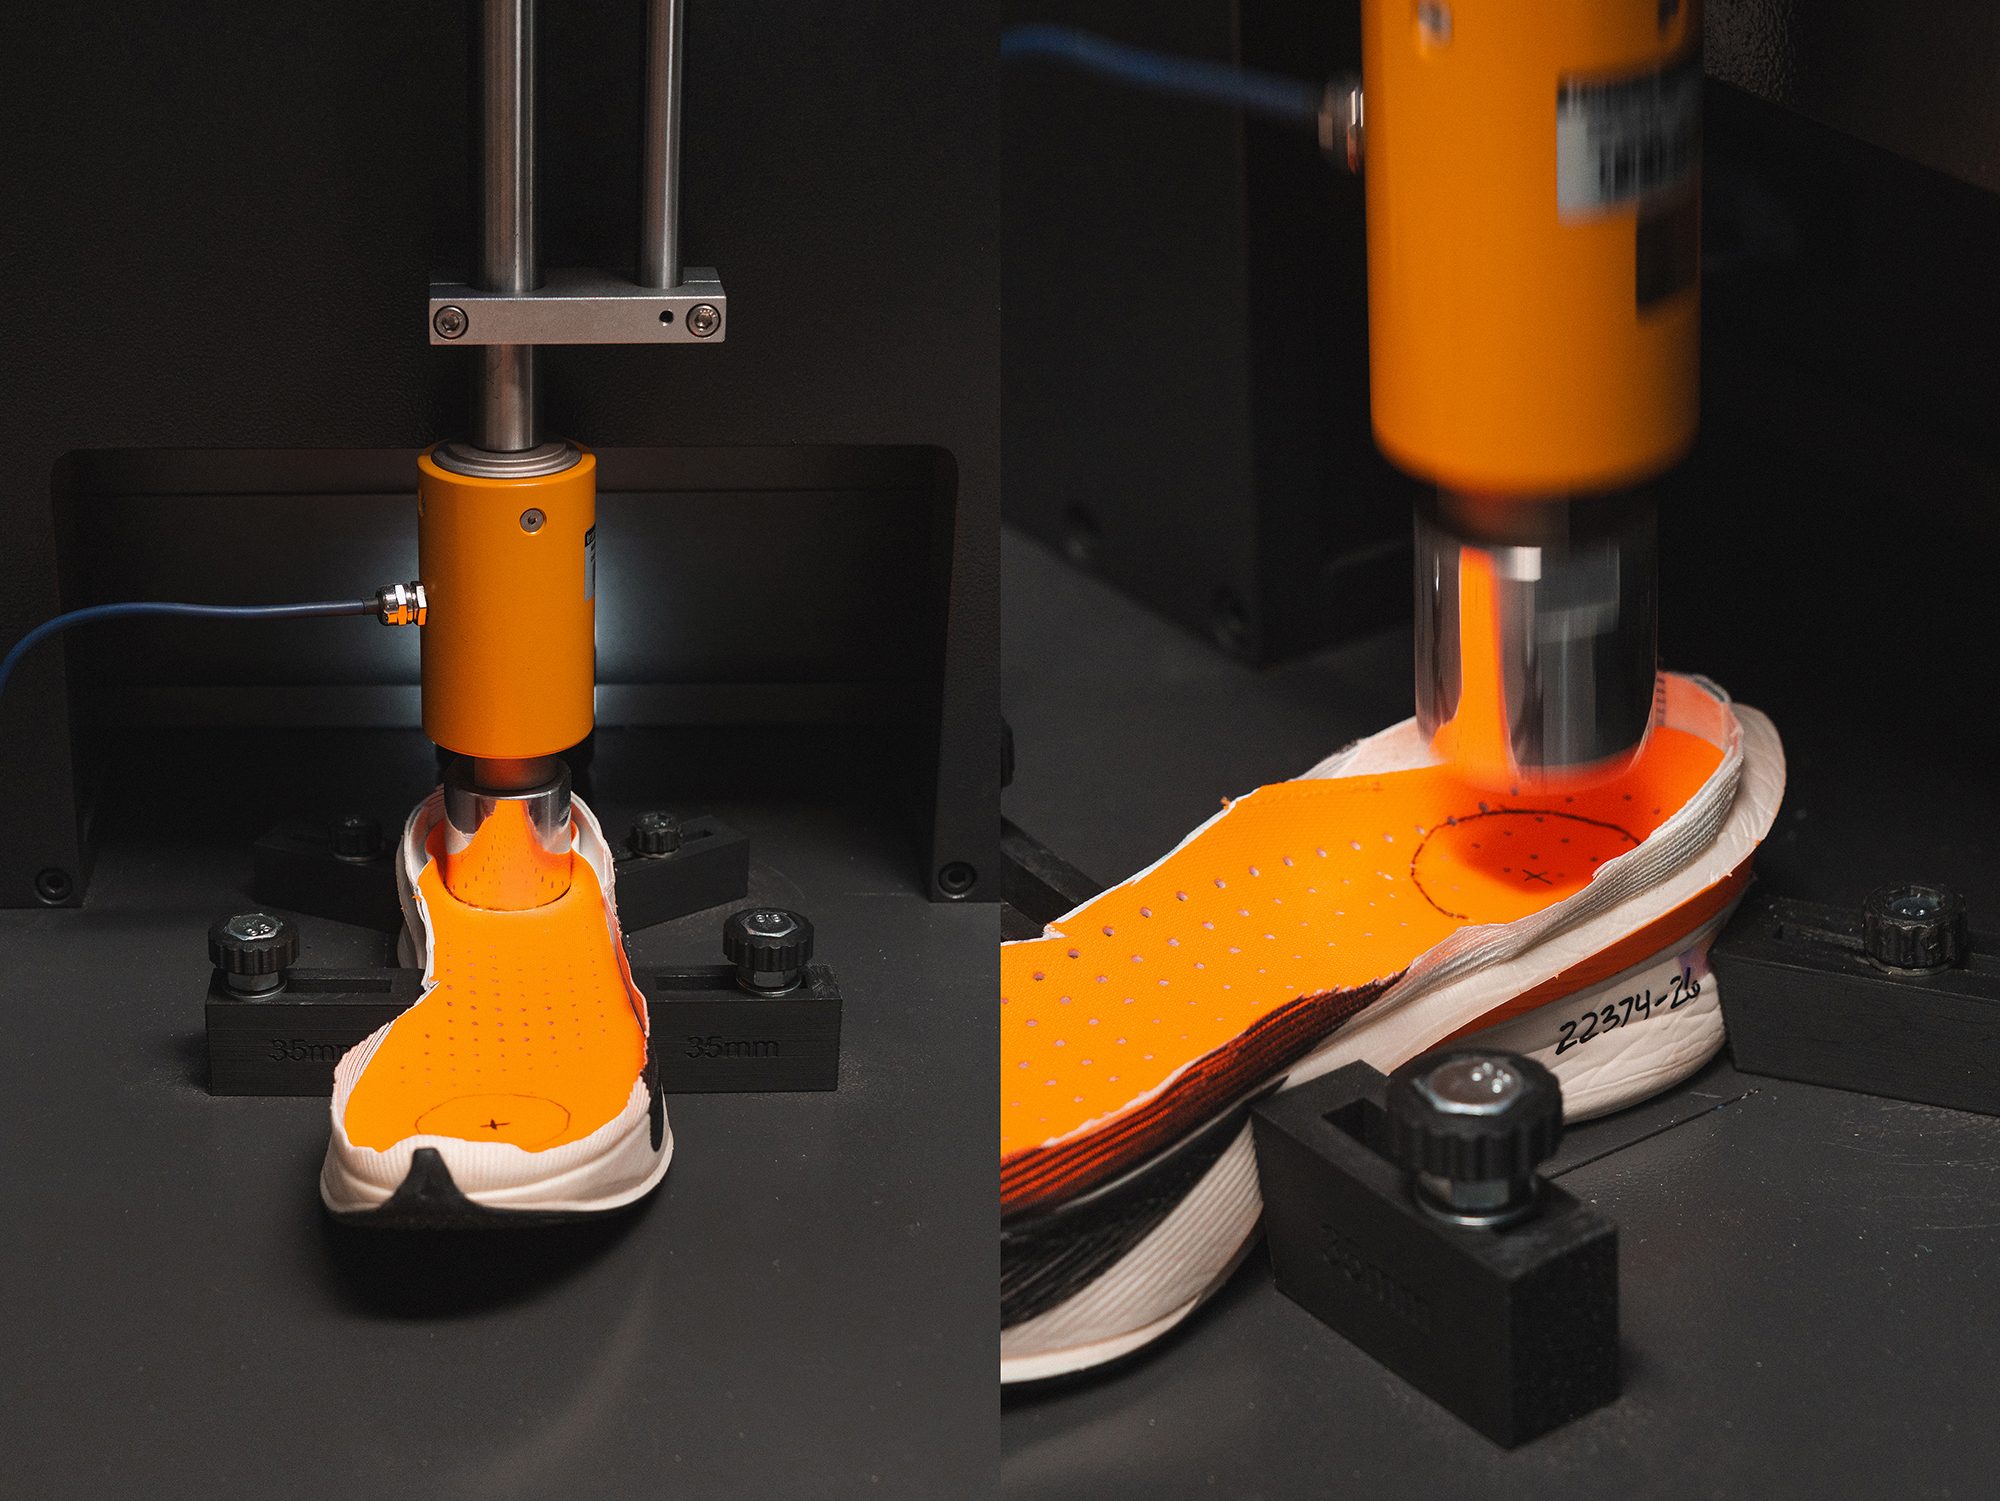
Big update! Energy return and shock absorption test [ASTM F1976-13]
When testing energy return and shock absorption, we decided to follow ASTM F1976-13, which is the gold standard.
This is our testing process:
- Remove the upper so that the machine can reach the heel and the forefoot freely.
- Fix the shoe in place.
- Drop an 8.5 kg mass from a height of 50 mm, resulting in a total energy input of 5 J.
- Perform the test at the heel, at exactly 12% of the inner shoe length, and/or at the heel, at 75% of the inner shoe length.
- Perform 30 repetitions per location, out of which repetitions 1-25 mimic a natural break-in, while repetitions 26-30 are used to calculate the average energy return and shock absorption values. There is a 2-second pause after each drop.
- Export and publish the results.
Marking the 12% and 75% of the inner shoe length spots, exactly where we test energy return and shock absorption
Introducing the dynamic coefficient of friction test
We bought a machine that allows us to test the dynamic coefficient of friction (CoF) following the SATRA TM144 methodology. Depending on the activity, we test the traction at the forefoot or at the heel. To replicate the real-life activity, we press the shoe with a force of 500N against the surface at a 7-degree angle.
The surface for road running, trail running, hiking, walking, sneakers, and training is wet concrete. It’s dry when we test the traction of tennis shoes. This concrete surface is continually replaced with a new one to avoid inaccurate results due to wear and tear.
When measuring the CoF for basketball shoes, we smash them against the actual basketball surface. The surface we use is Junckers' Pro Complete 44 sports floor system, which is used for FIBA EuroBasket, FIBA World Cup, and Olympic Basketball Tournaments, among many other events.
The result of this test is a dynamic coefficient of friction in the 0.01-1.20 range. The higher it is, the better the traction.
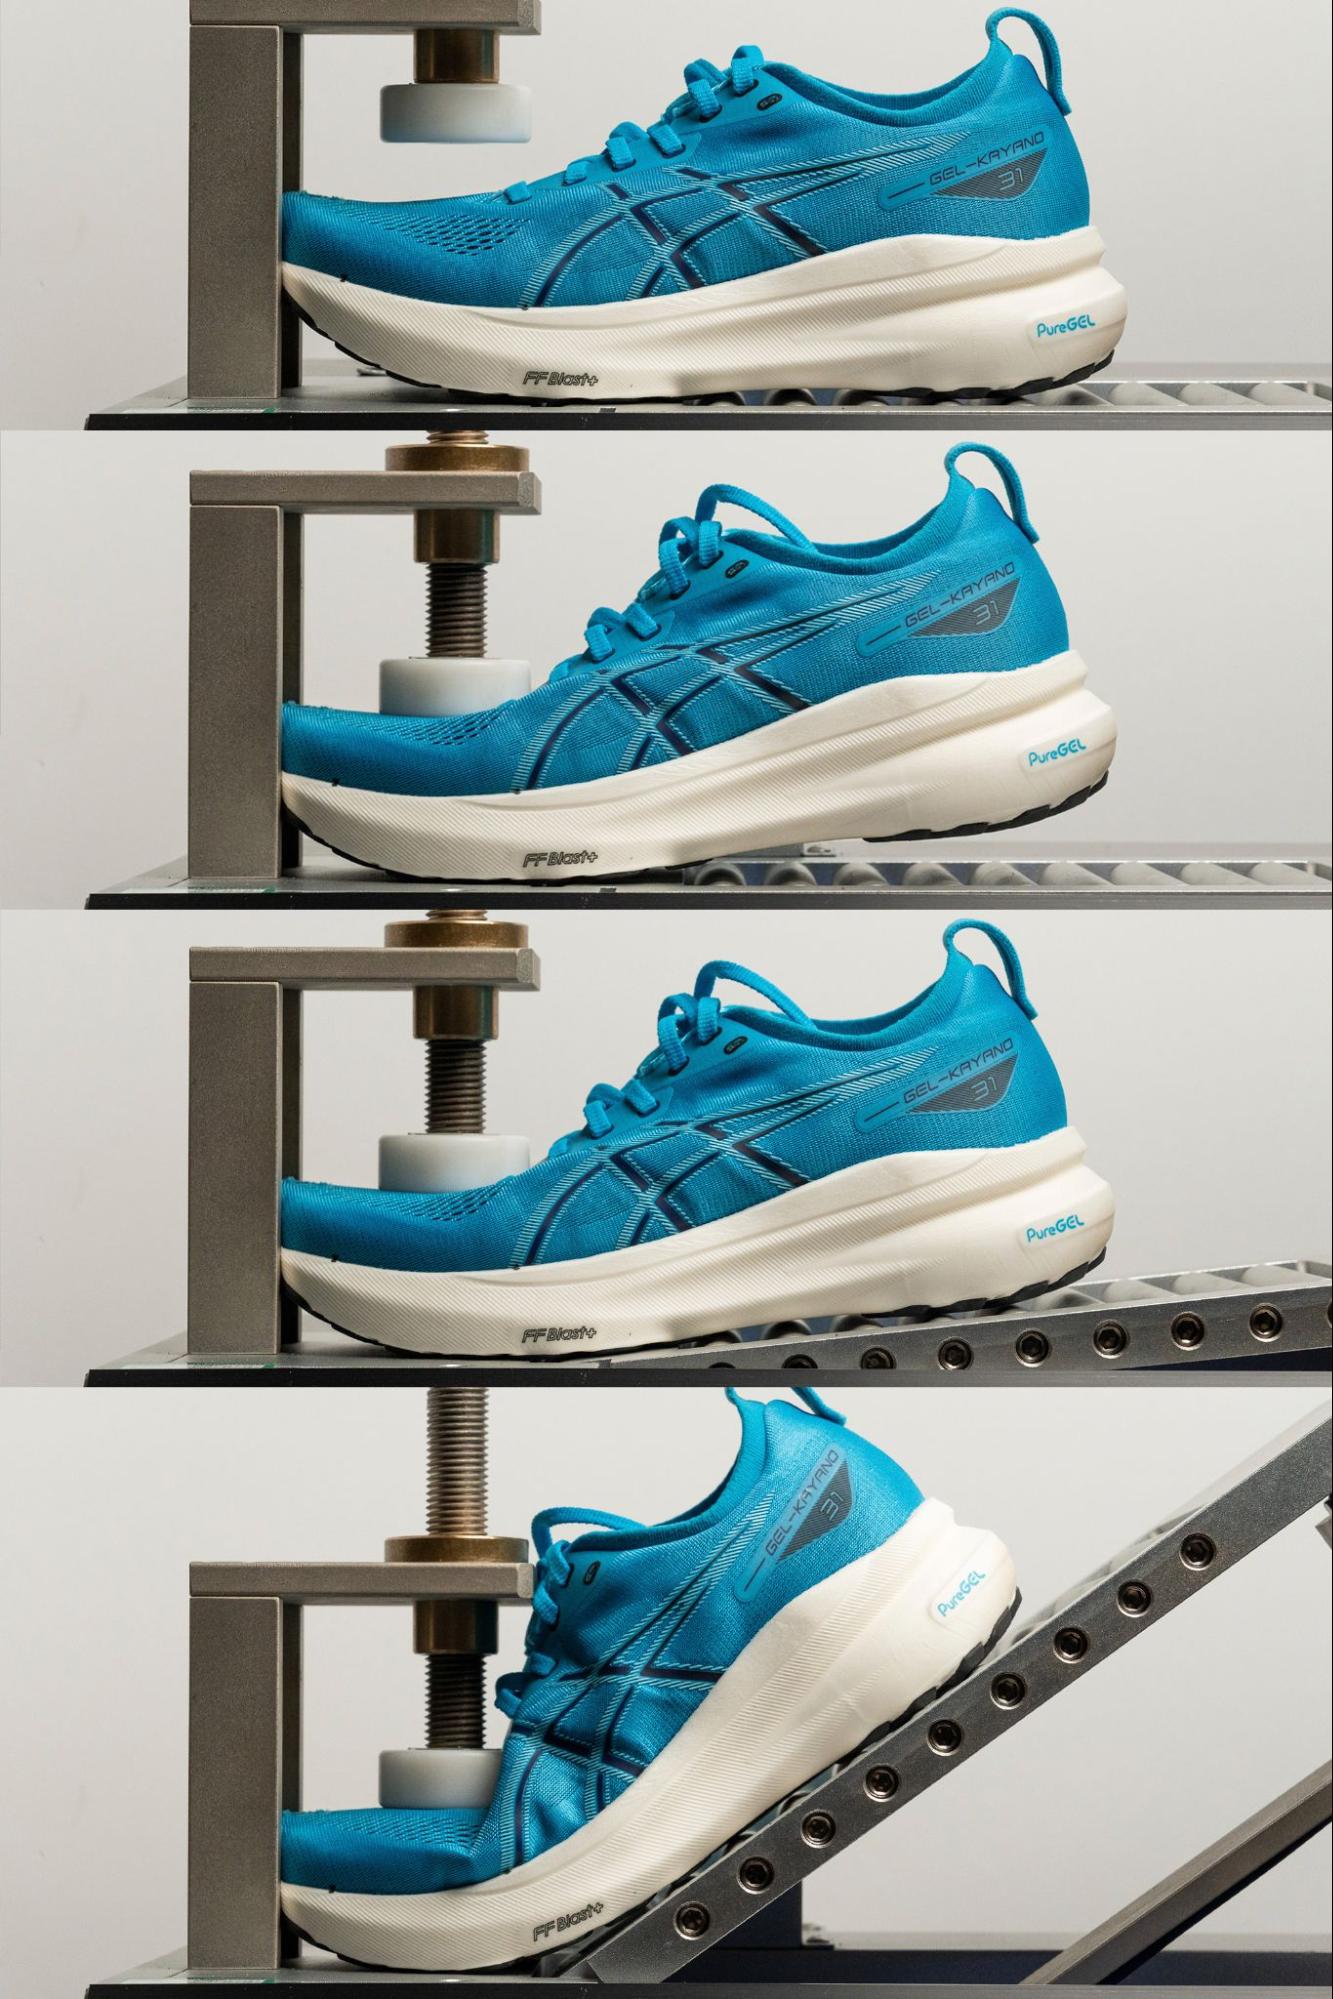
New machine test: Stiffness
We bought a machine to test the stiffness of the shoes. This is a significant improvement when compared to how we used to perform the stiffness test, using a force gauge and bending the shoes to 90 degrees.
This is a standardized test in which:
- The shoe is fixed to the ground at the forefoot.
- This results in the heel being lifted from the surface due to the toe rocker. The more aggressive the toe rocker, the higher the starting angle will be.
- The plate is then lifted until it touches the heel, which is the starting point for the test.
- We then run the stiffness test by bending the shoe 30 degrees and measuring the force needed to do so in Newtons.
Stiffness test in cold is discontinued
When assessing the shoe’s performance in cold weather, which we replicate by putting the shoes in the freezer for 20 minutes, we decided to focus on the softness of the midsole. We test the stiffness of the shoe at room temperature only.
Improved rocker assessment
Previously, we focused on the toe rocker, and we took photos of the forefoot against a horizontal and a vertical ruler. Given the importance of the rocker technology as a whole, we now look at both the forefoot and the heel.
1.8. Methodology update: January 2025
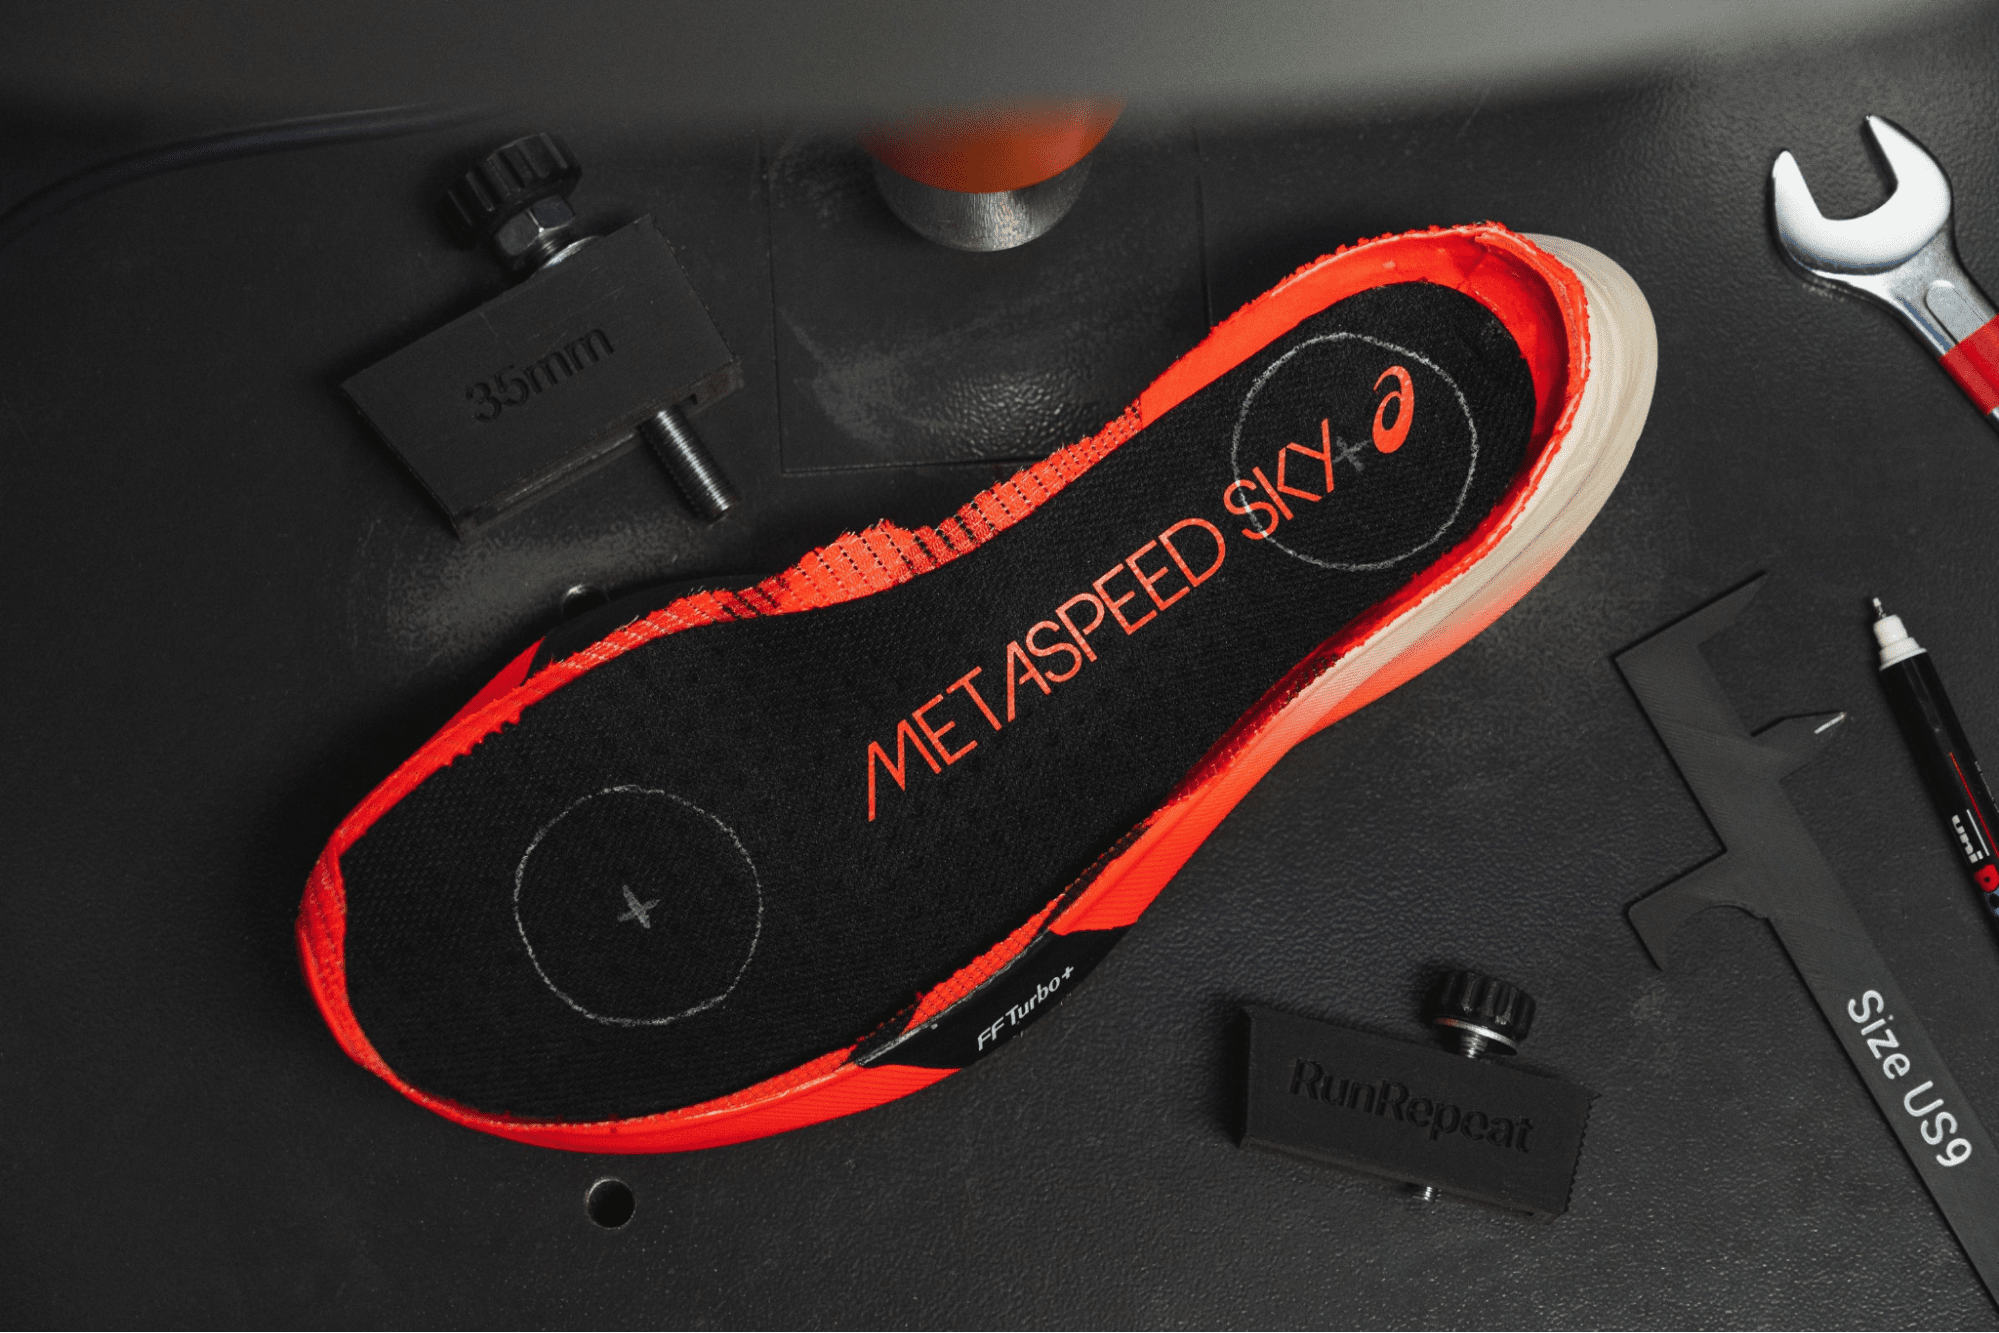
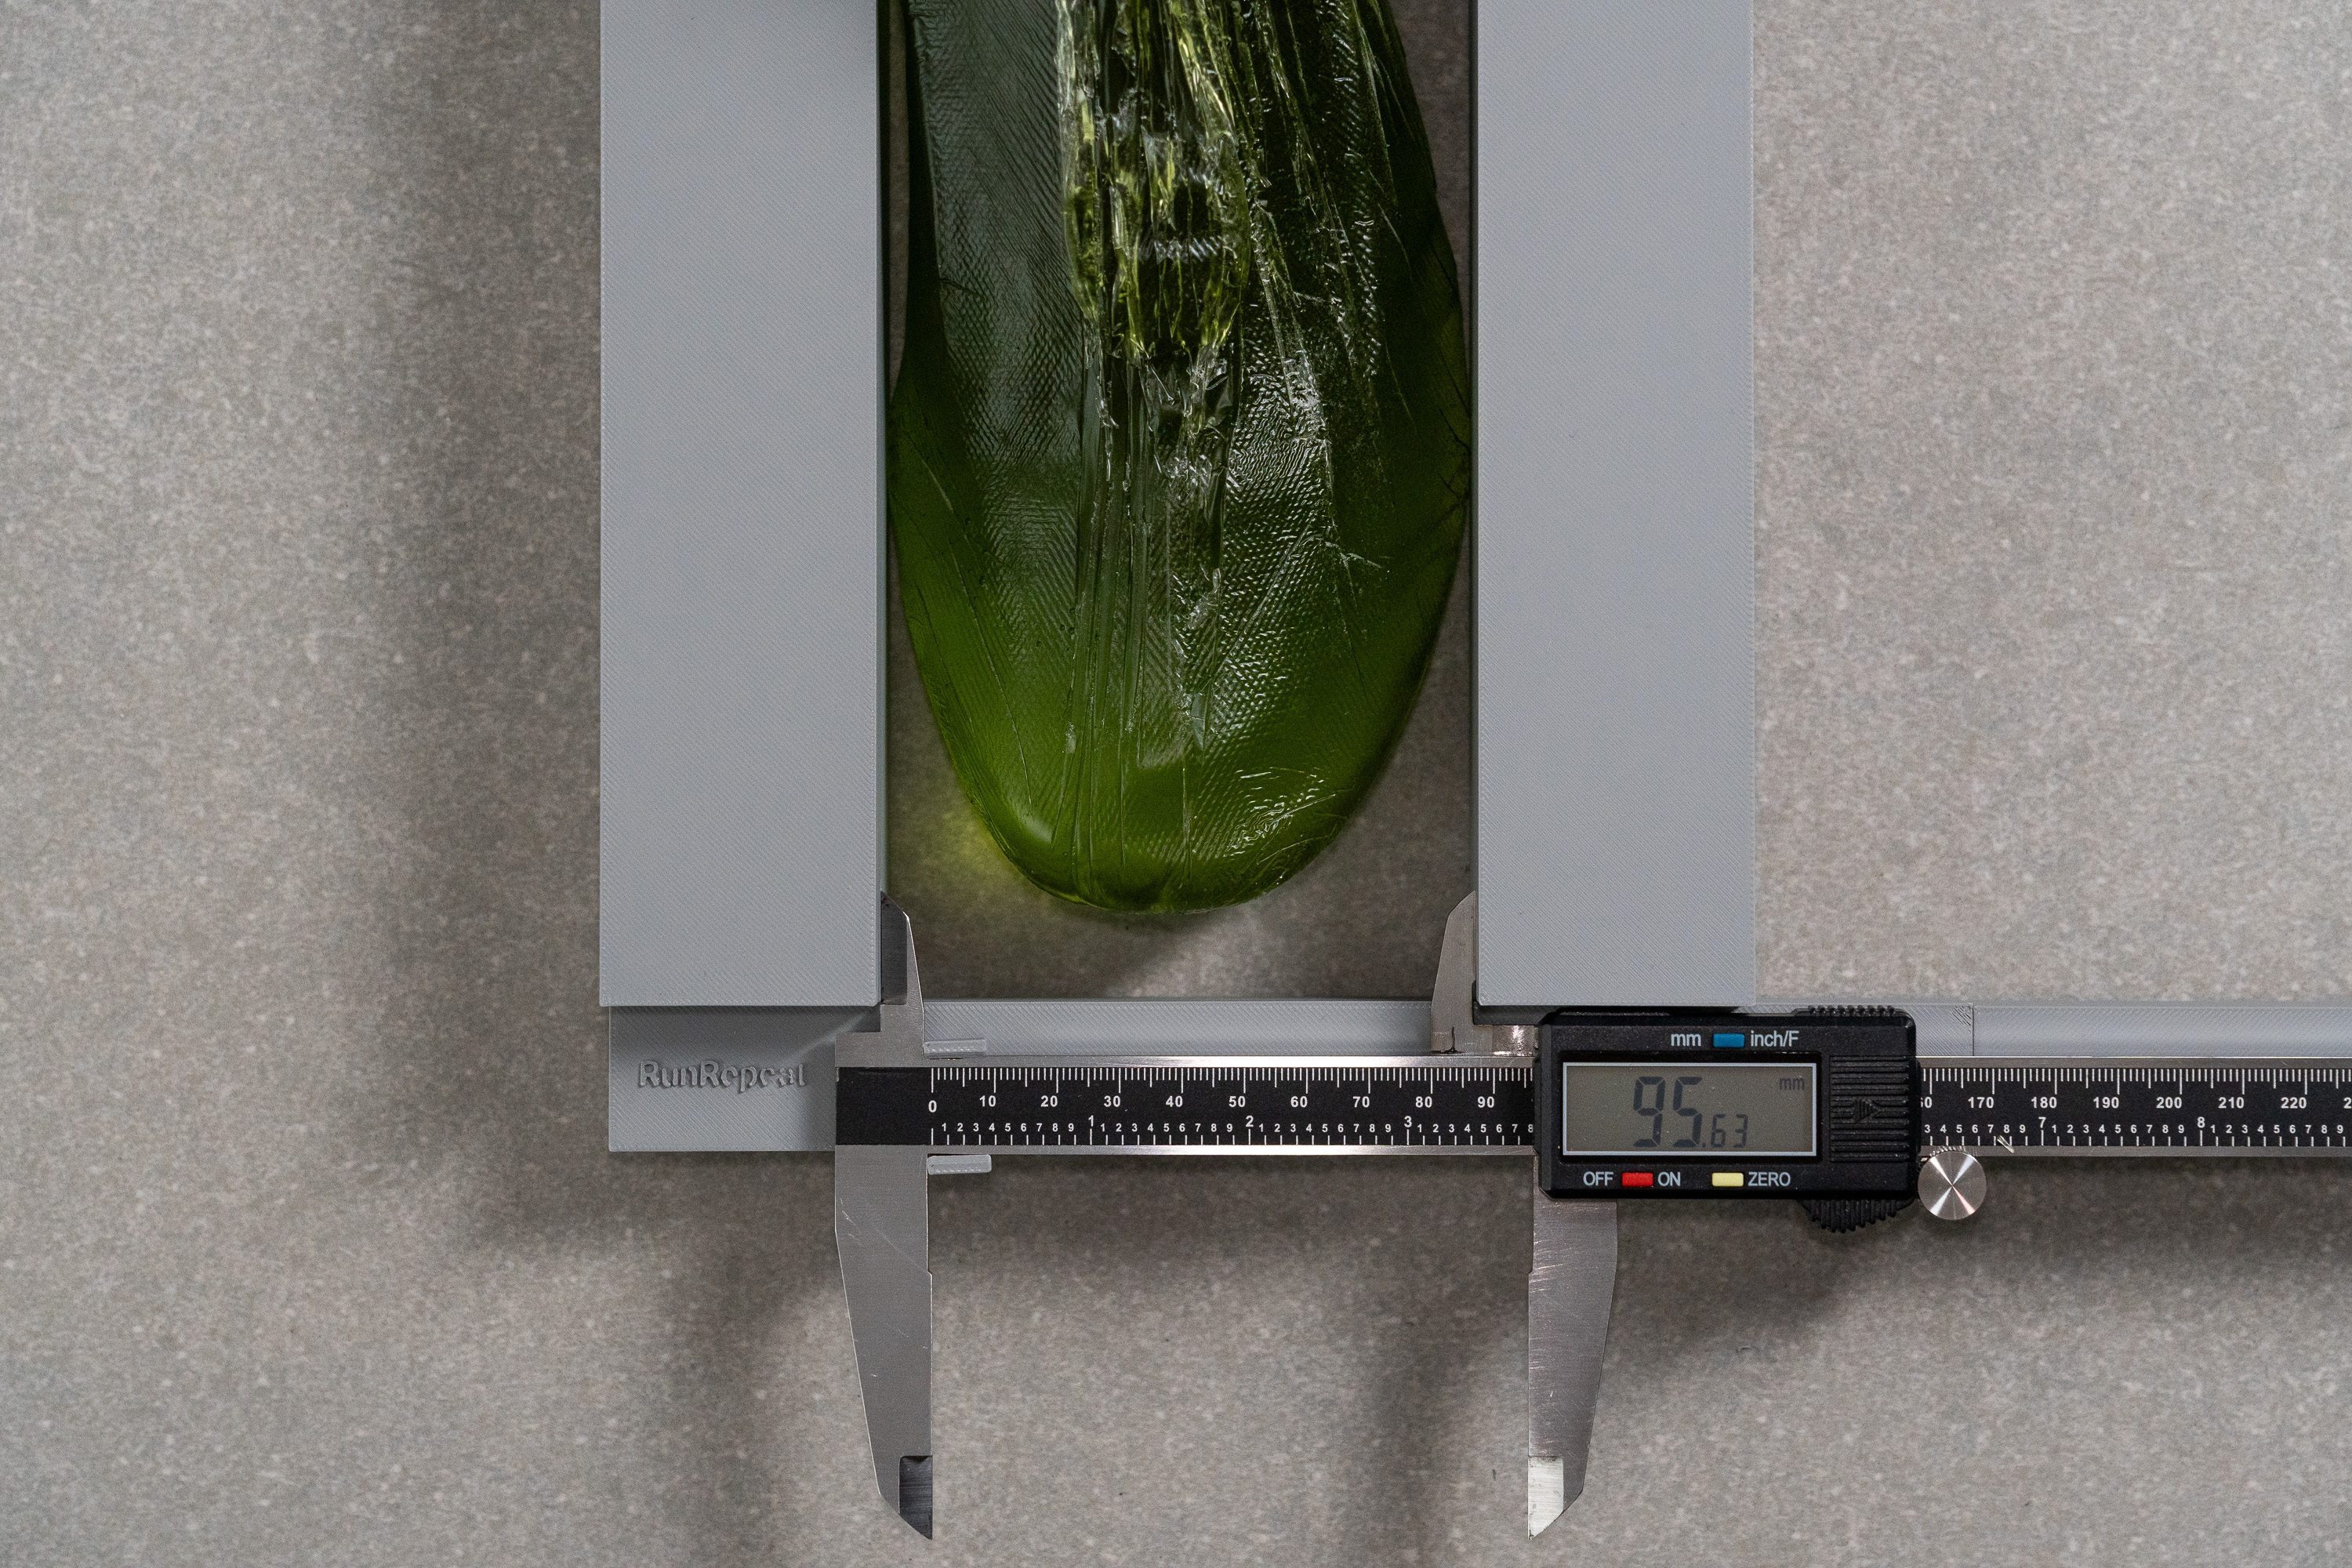
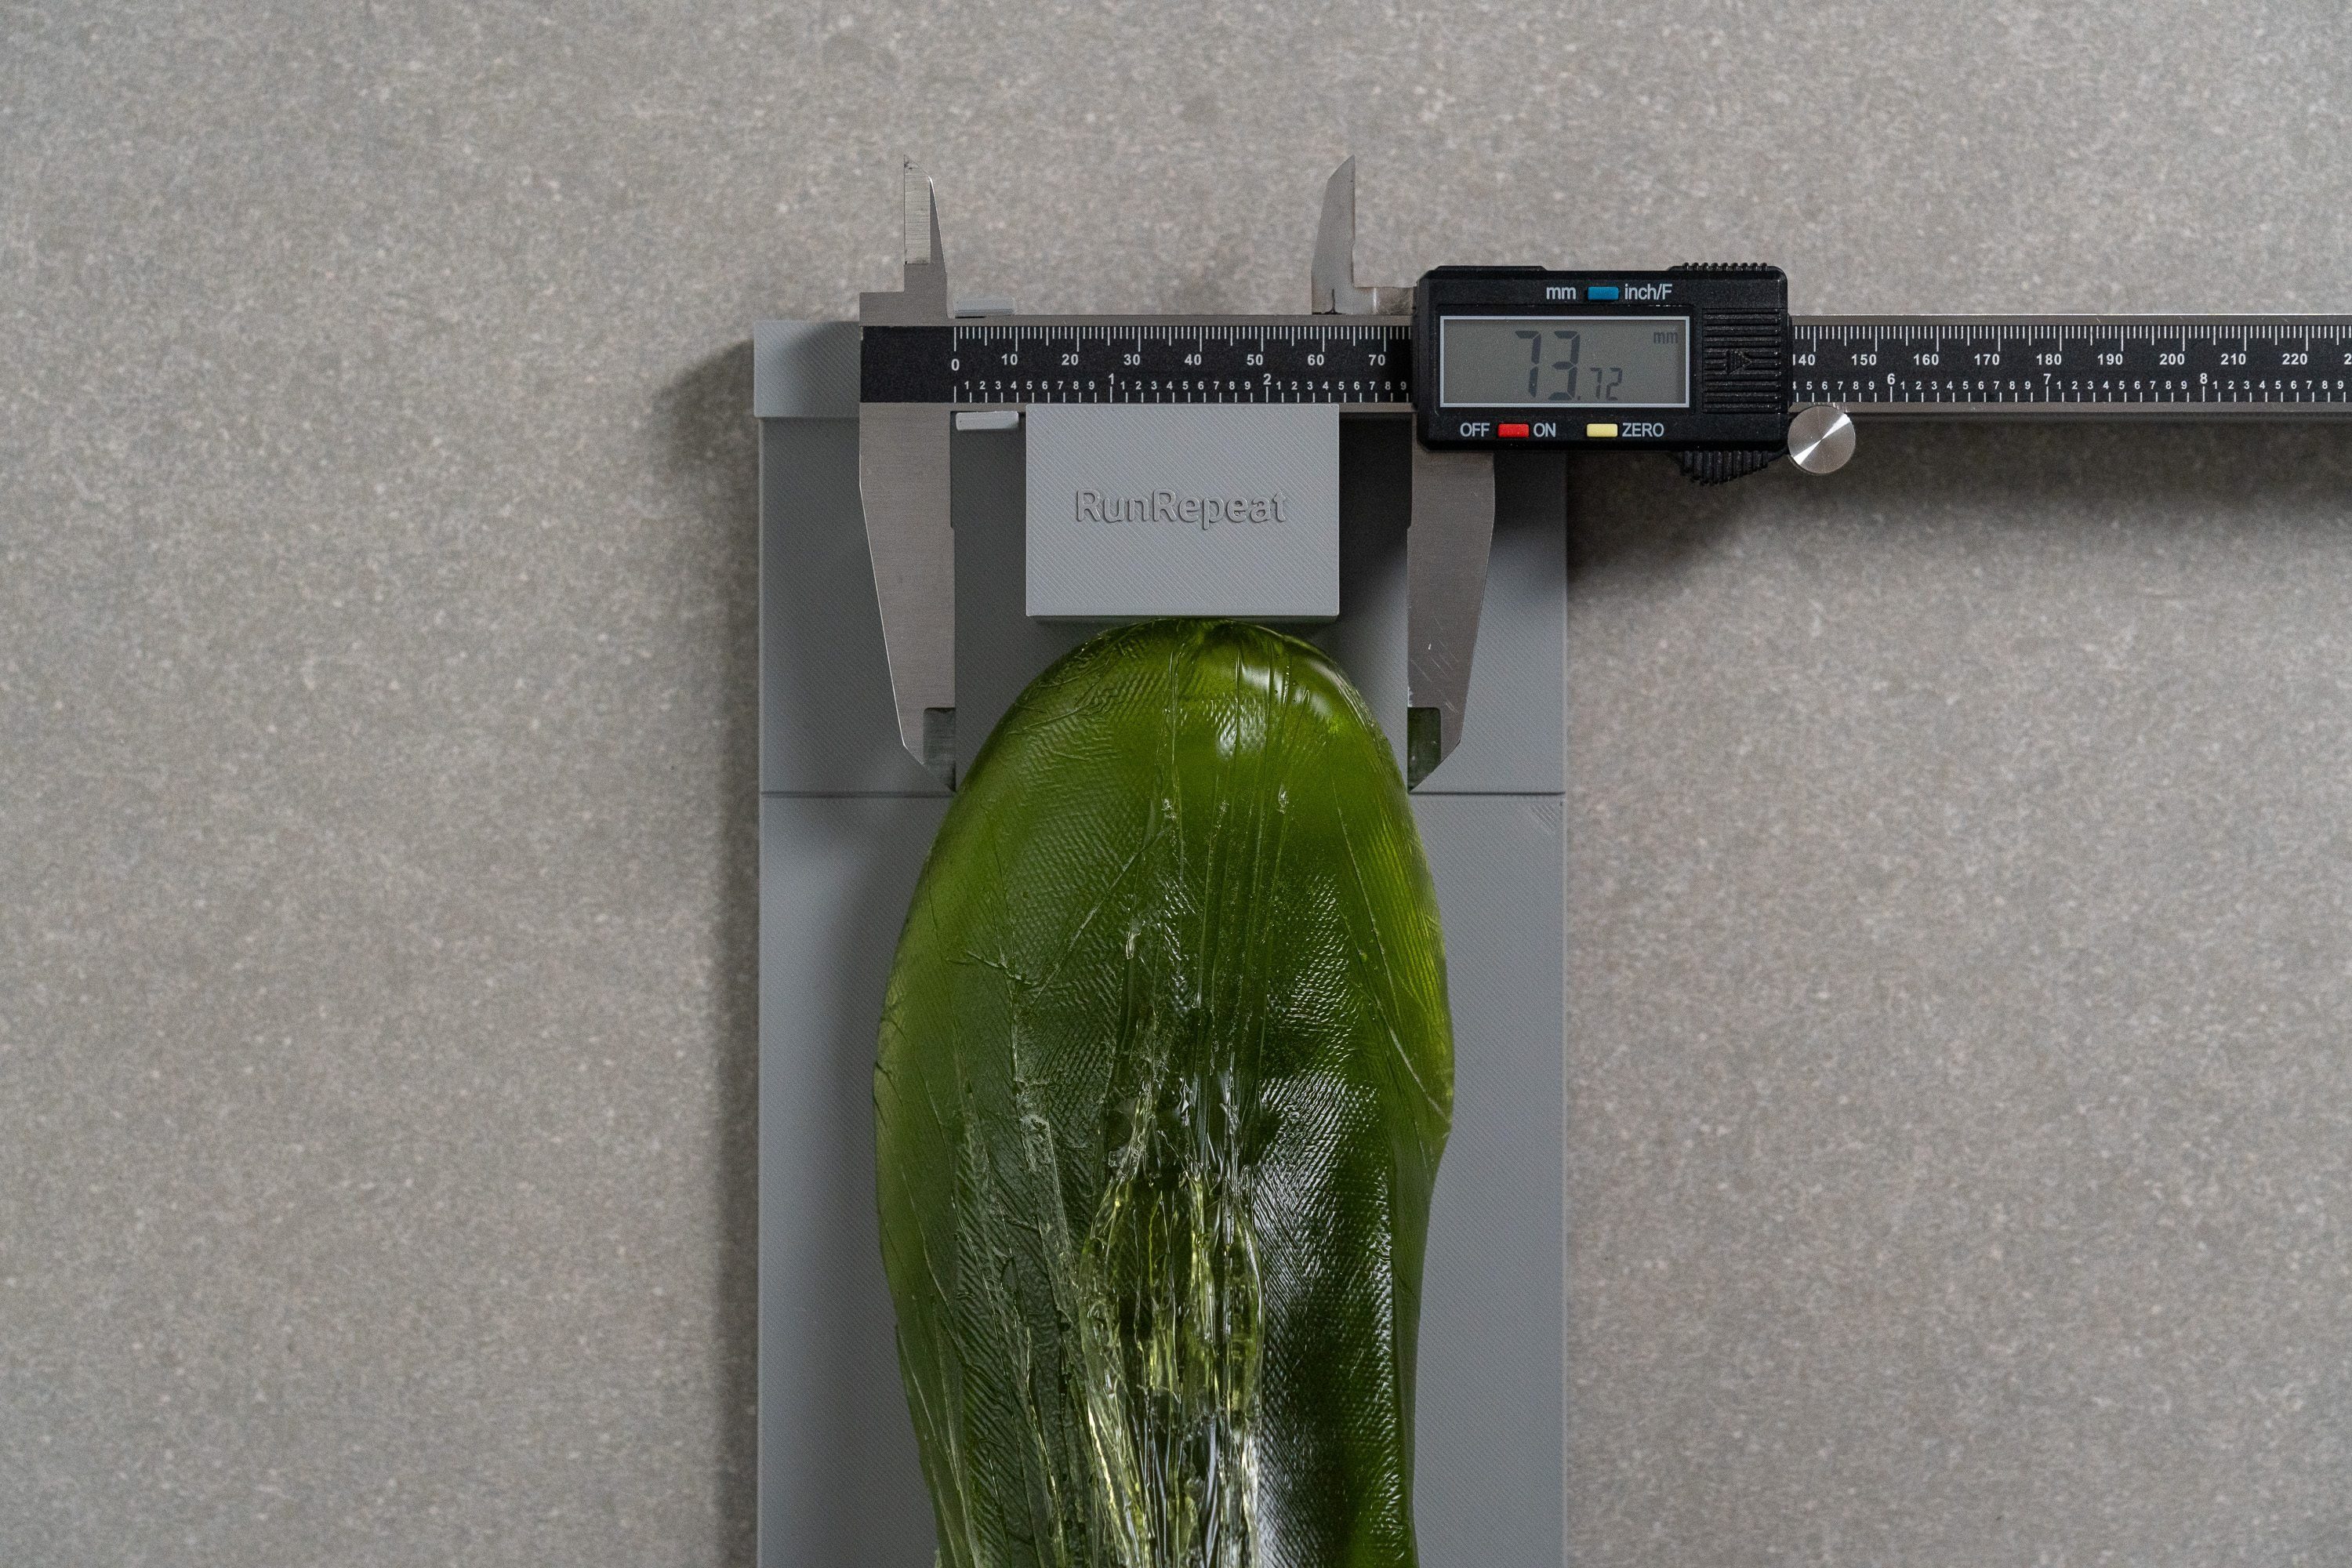
Measuring shoe dimensions with the help of gel molds
After several months of development, we achieved a more accurate approach to measuring shoe dimensions. We now pour a proprietary liquid into each shoe and put it in the fridge for 2 hours to retrieve a gel mold of the interiors.
Instead of applying our caliper to the outside of the upper, we now get to measure its inner width and height. These measurements are more accurate because they no longer include the thickness of upper materials and overlays and take into account the stretchiness of the shoe’s upper material.
Here are the three caliper measurements we take using the gel mold:
- The shoe width
A custom-made shoe holder allows us to locate the widest points of the mold. This corresponds to the area between the first and fifth metatarsophalangeal joints.
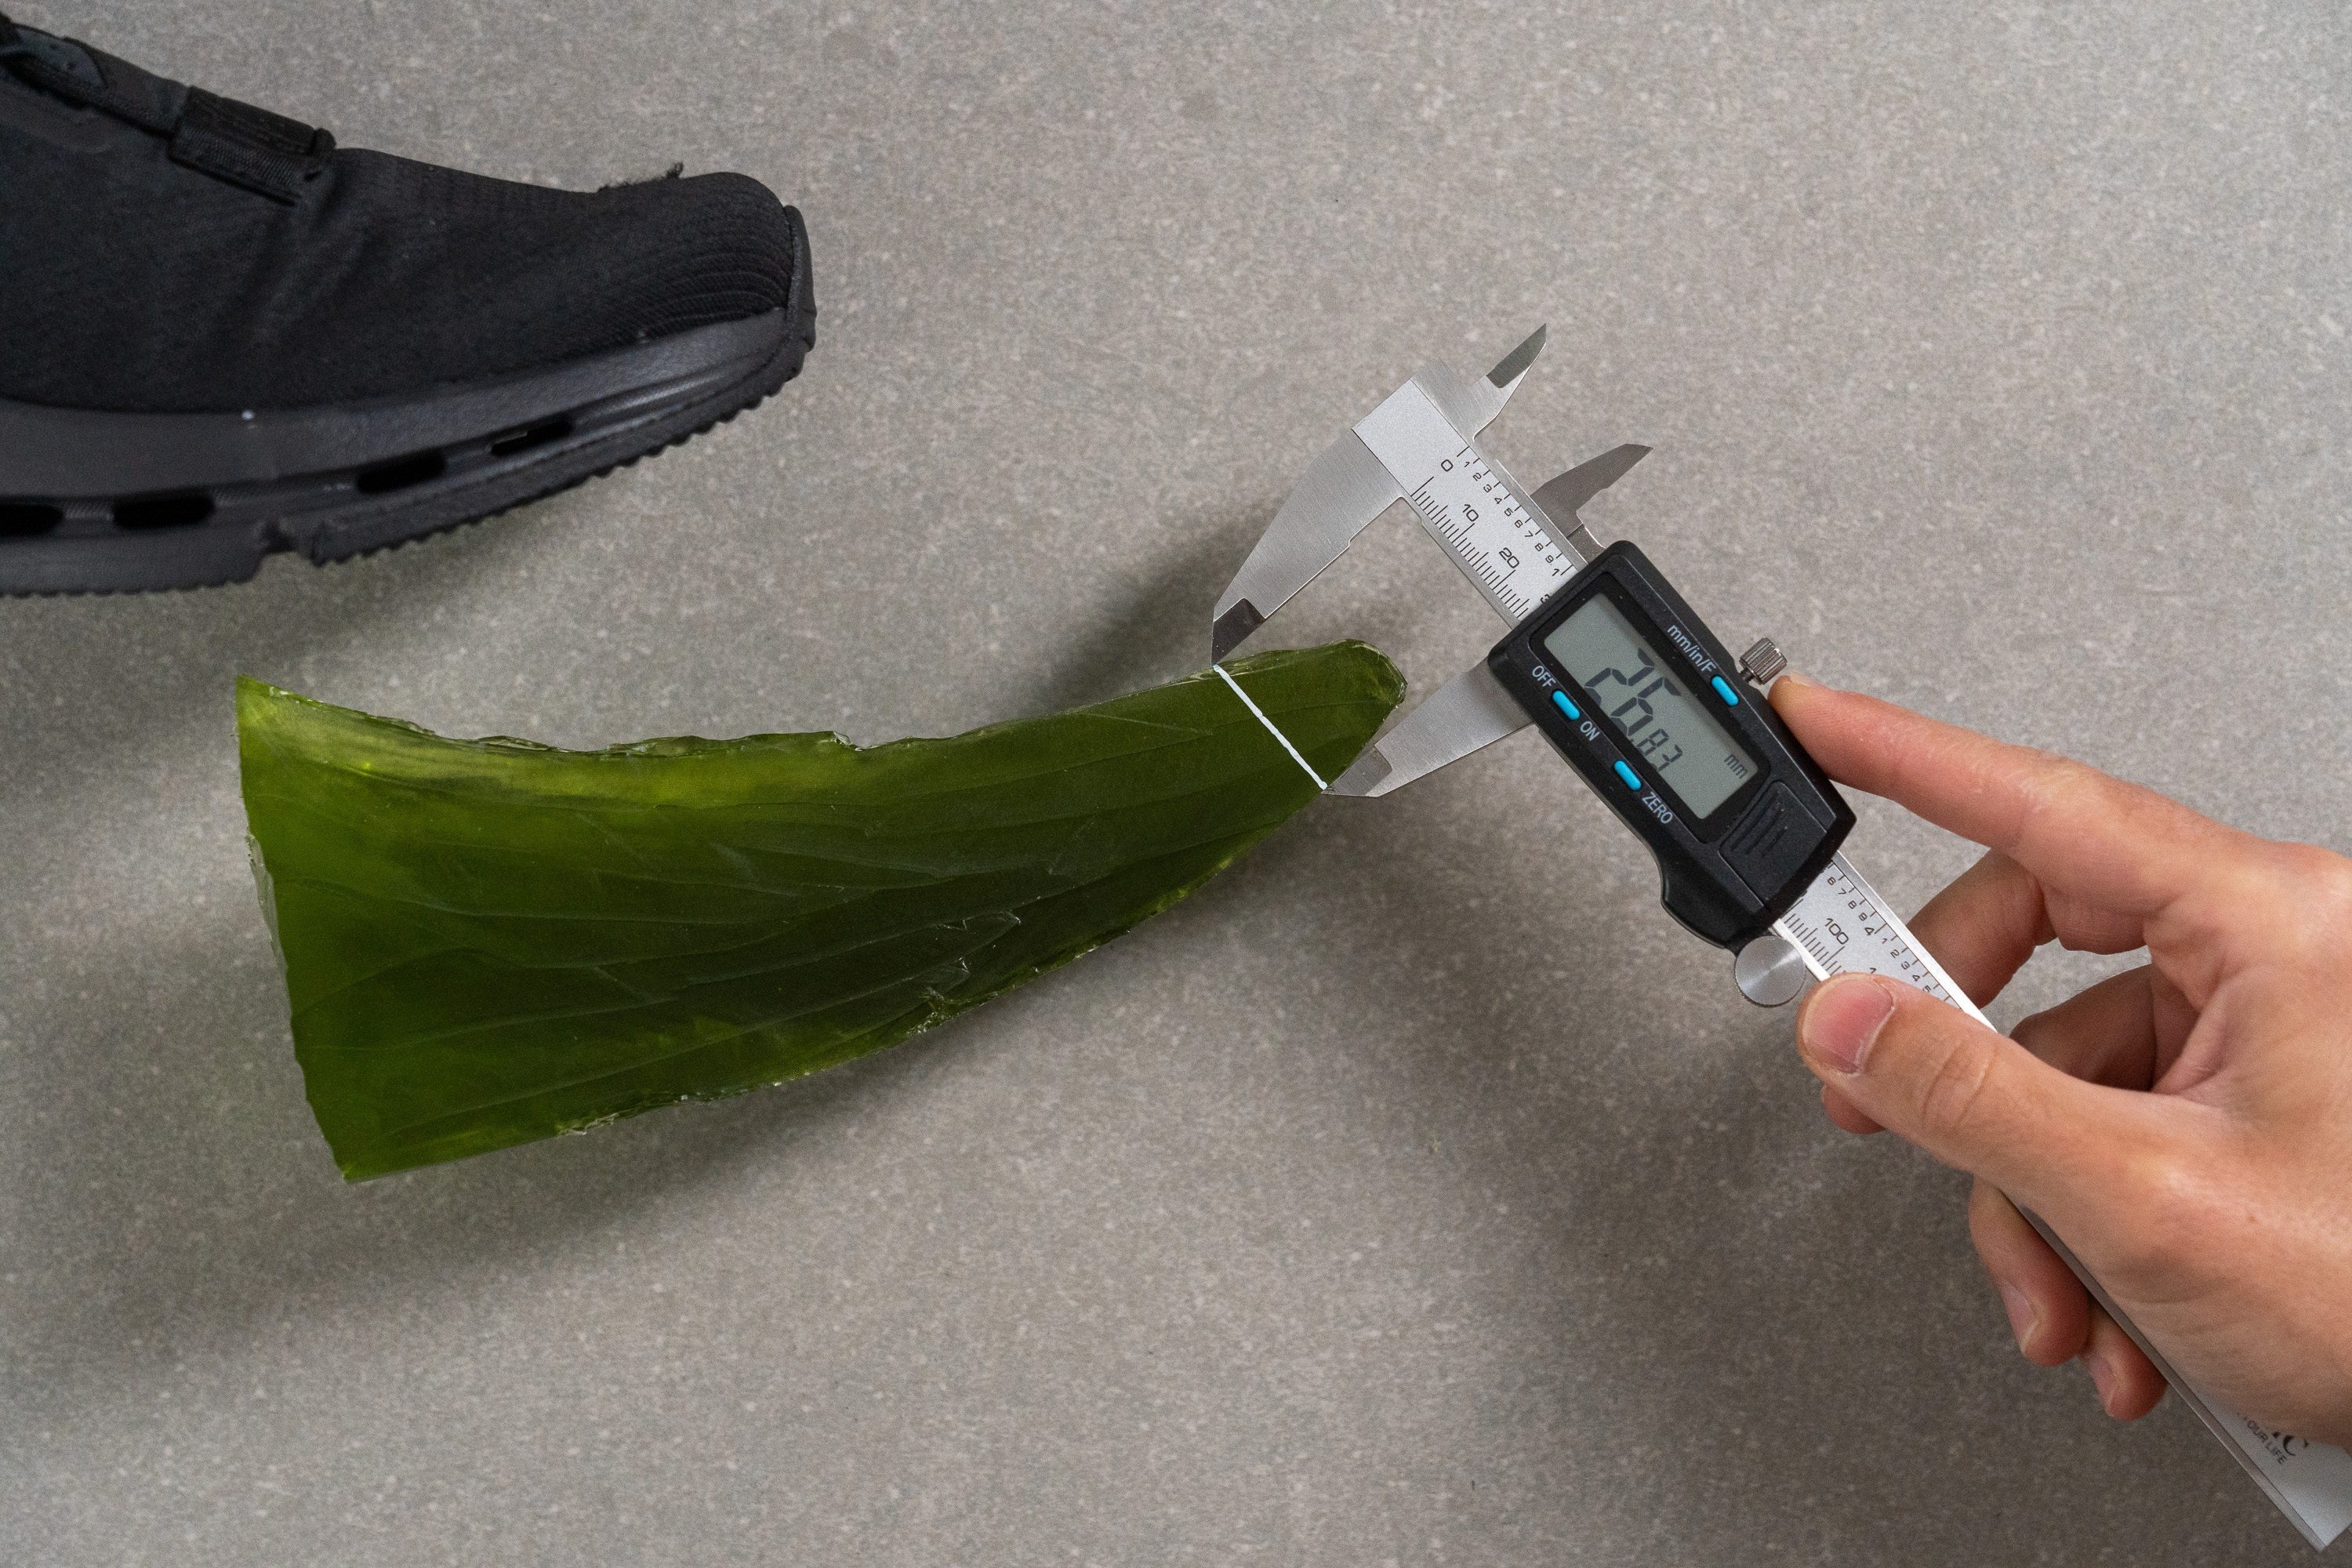
- The toebox width
For consistency, this measurement is always taken at the same distance from the tip of the mold. The line on our shoe holder is drawn precisely at 28.3 mm from the tip of the shoe. This measurement shows how wide the shoe’s toebox is in the area where the big toe normally ends. It also indicates how mild or aggressive the taper angle is (how rounded or pointy the toebox gets towards the toes).
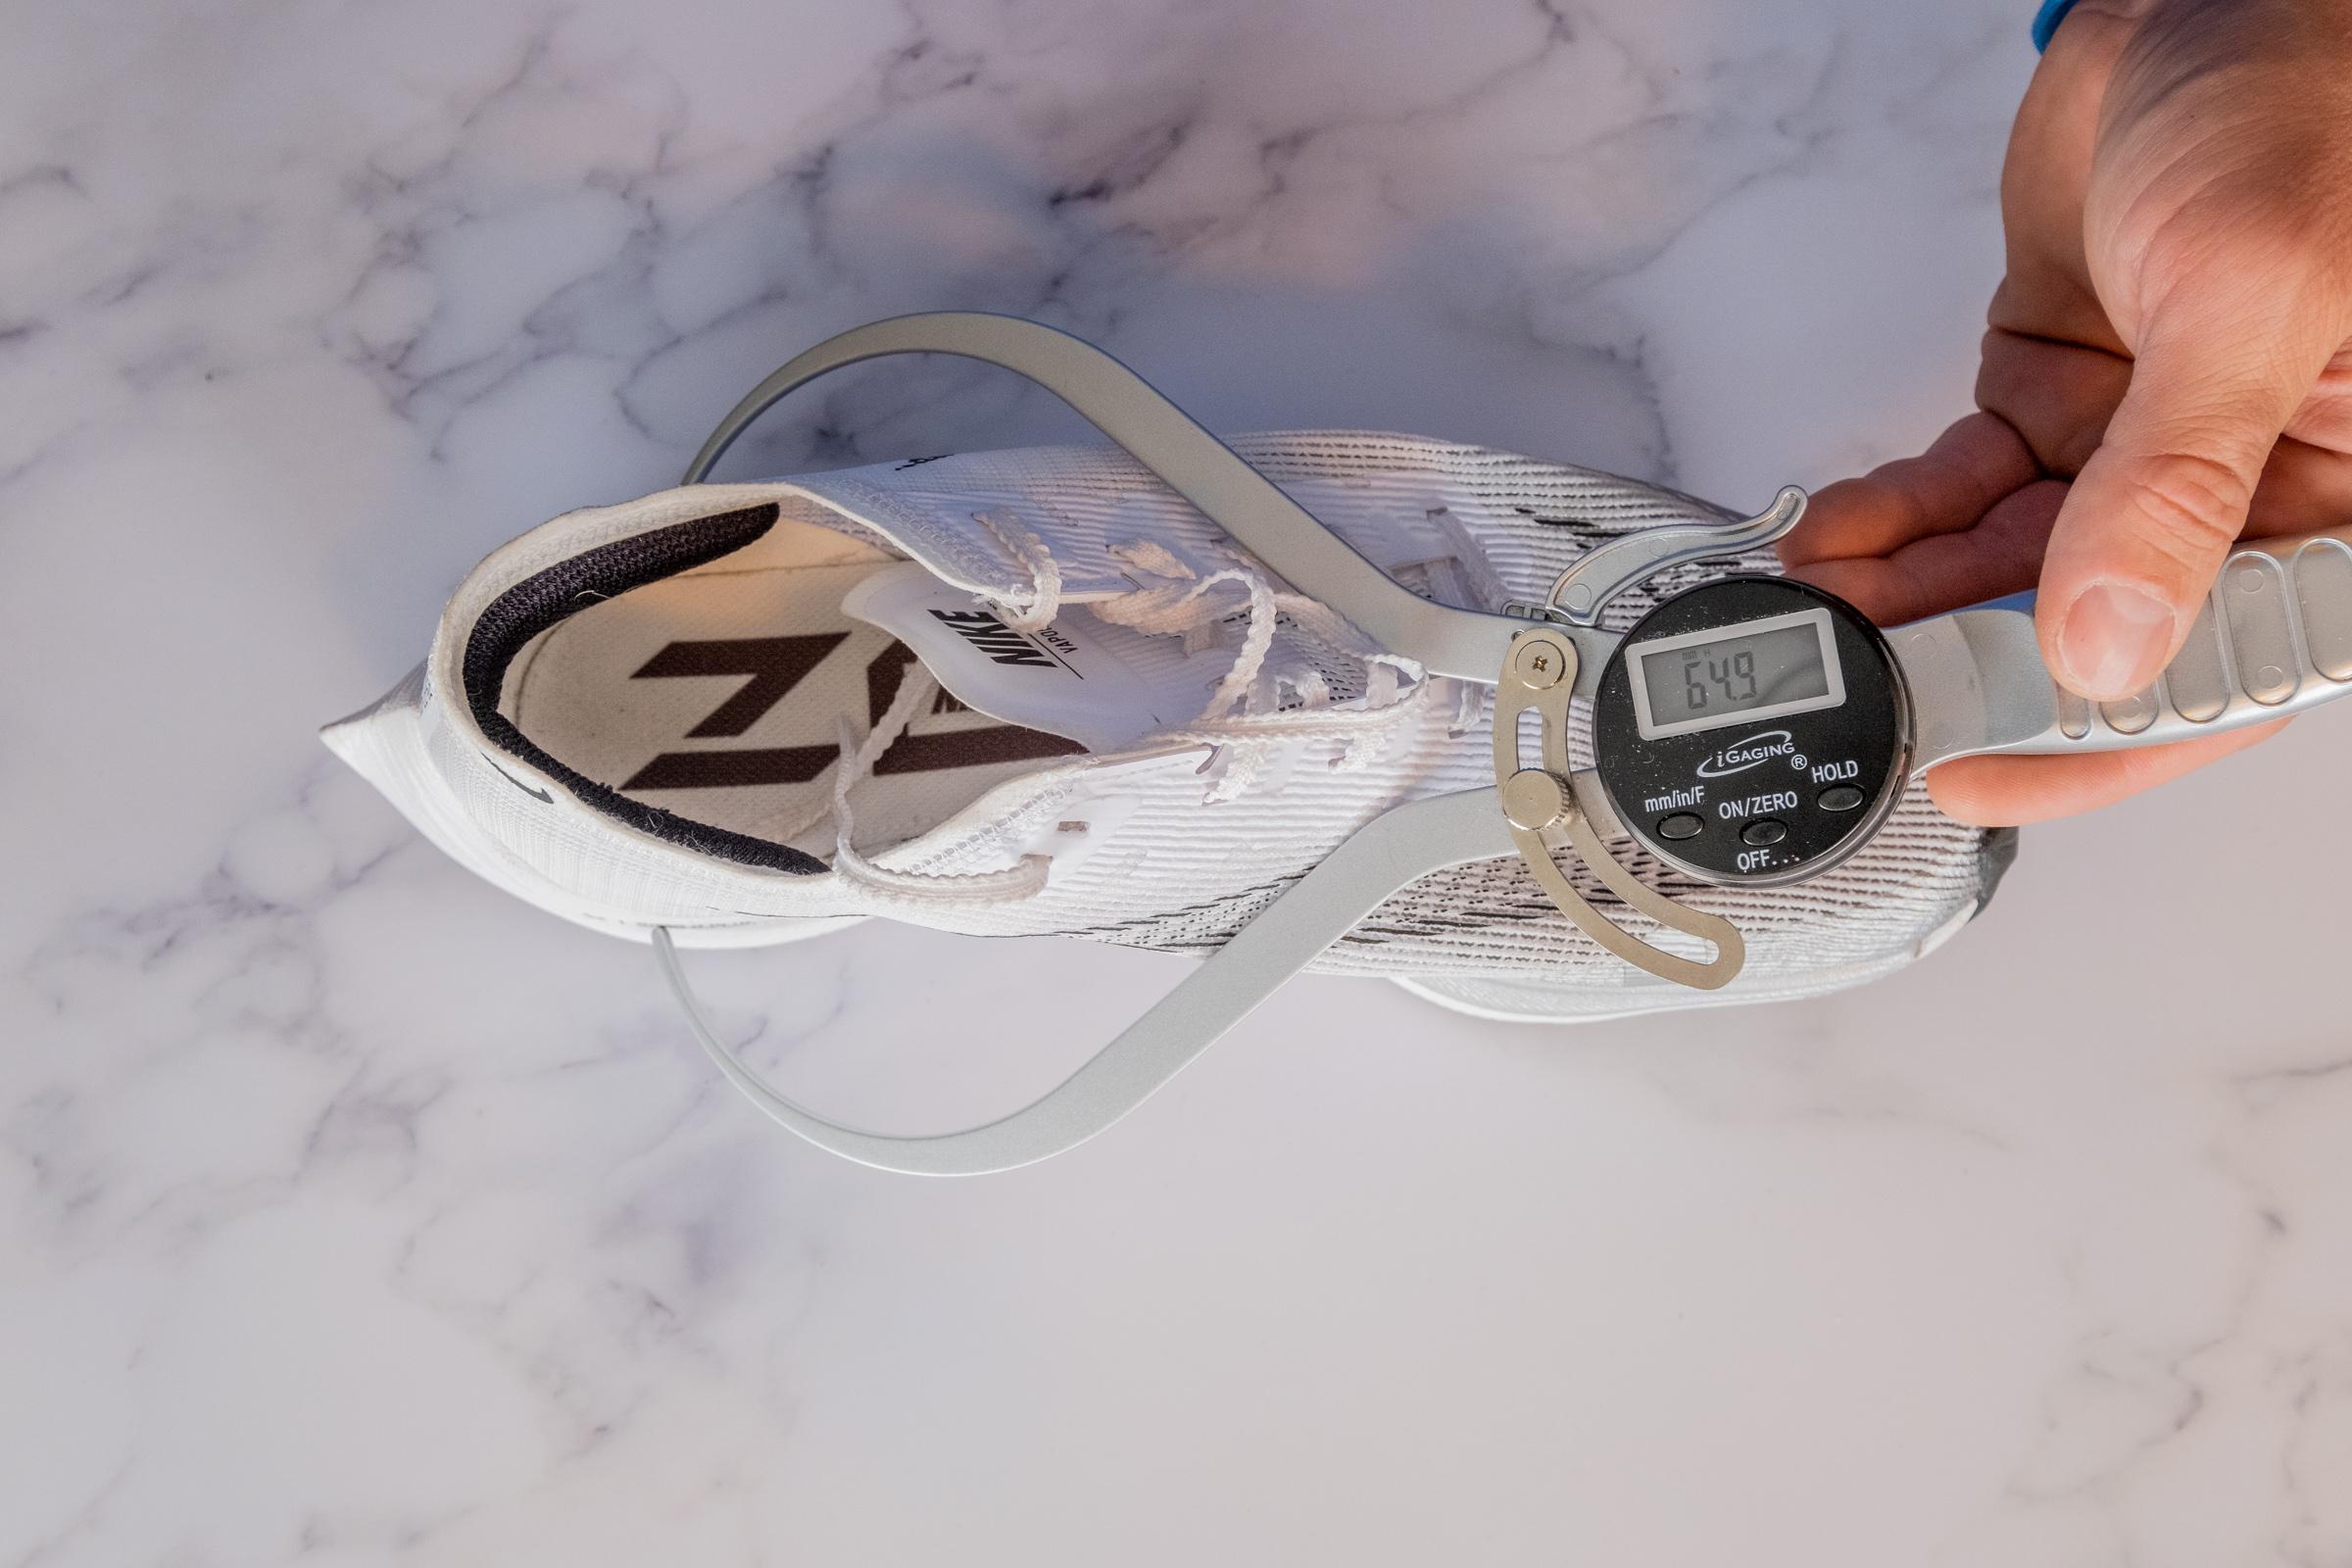
- The toebox height
This represents the vertical space available in the shoe’s toebox. It is measured at the same distance as the big toe - 28.3 mm from the tip of the shoe.
Updated Dremel test conditions
Because our new and improved version of the Dremel is more abrasive, we had to apply less force in our durability tests.
The pressure went from 3.2N to 2N in all of our durability tests. Additionally, the drilling time shortened from 22 seconds to 18 seconds for the outsole durability test.
The changes are minor because we still want our new and old results to be comparable.
Additional durability test for tennis shoes
Each tennis shoe in our lab now undergoes an additional Dremel test where we check the durability of its toe drag guard.
Because it is often made of tough rubber and sustains abrasion similar to the shoe’s outsole, we test the toe guard in the same conditions as the outsole. The Dremel speed is set to 10K RPM, the pressure is at 2N, and the exposure lasts 18 seconds.
We apply the sandpaper tip of the Dremel to the same spot on the inner side of the shoe’s forefoot. This is the area where most abrasion occurs during the on-court toe drags.
Based on the severity of the damage, we rate the shoe’s toe drag guard durability on a 1-5 scale, where 5 stands for most durable.
Microscope shots of premium foams
We take special interest in the newest and most innovative types of running shoe foams.
That's why we now cuut out sample of these foams and use a microscope to study them at cellular level. This allows us to understand how the foam’s cell structure is connected to its energy return and other cushioning properties.

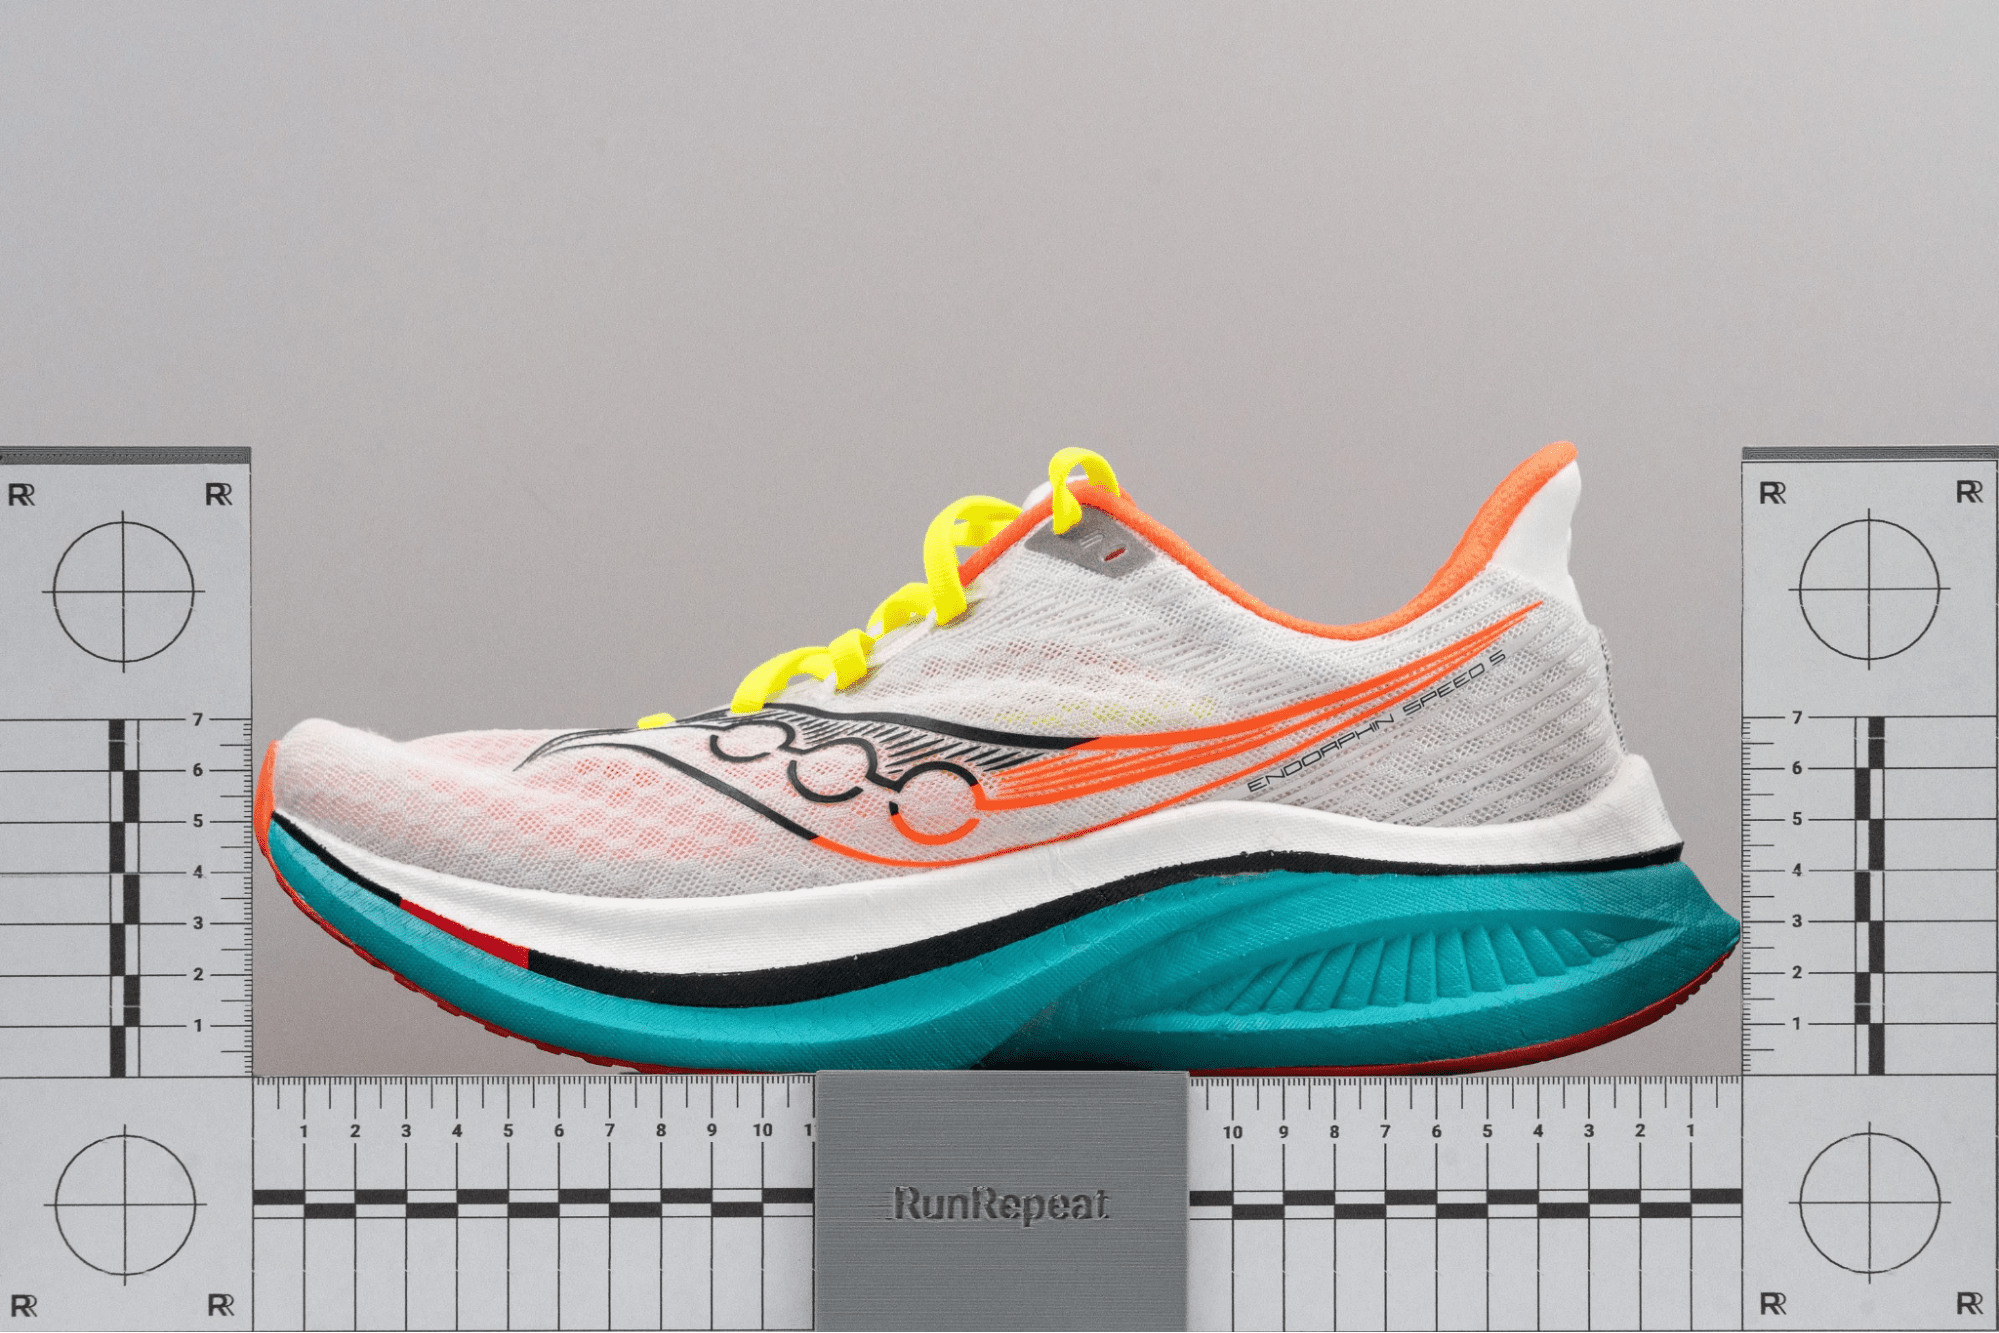
Toe rocker demonstration
Running shoes with pronounced toe rockers are put against our XY-axis ruler. While we do not take any numerical measurements of the rocker angle yet, these photos act as a visual demonstration of each shoe’s curvature and how it compares to similarly designed shoes.
Improved breathability test
We made our smoke-pumping machine test more accurate with the help of a 3D printed shoe last with an open toebox.

It creates a controlled outlet for the smoke by isolating the toebox from the rest of the upper. The problem with filling the shoe’s entire upper with smoke was that it escaped through the gaps on the sides of the the tongue. This gave us inconsistent results due to varied tongue designs and the fact that it tends to slide around, leaking smoke in the instep area.
1.7 Methodology update: June 2023
Our lab reviews are now presented in a standardized, clear-cut layout where each section is dedicated to a particular aspect of a shoe such as breathability, durability, cushioning, etc.
Each section includes multiple lab and field tests that give an in-depth look into what the shoe feels like and how it performs. We interpret every lab test result to make it clear to a beginner athlete or someone who is not geeky about shoes.
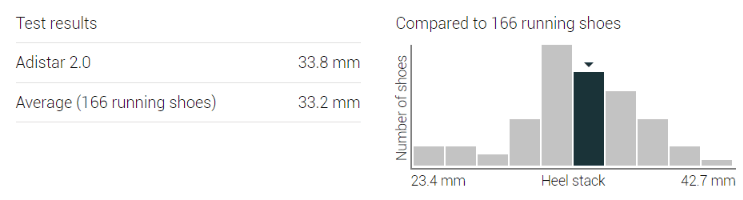
We measure and assess over 20 parameters for each shoe in our lab. These measurements are then compared to the average in a given shoe category.
In the example below, we measure the heel stack height of a road running shoe and present it in a table and a graph in comparison to the average heel stack of road running shoes.
New durability tests with a Dremel
Following the success of our toebox durability test, we now apply the Dremel to the shoe’s heel padding and outsole.
We chose heel padding because it is another area on the upper that is most prone to abrasion due to constant chafing against the ankle. We make sure that the Dremel always touches the padding with consistent force (3.2N) and speed (10 RPM). Due to the material’s fragility, we only hold the tool for 4 seconds. The damage is then assessed on a scale from 1 to 5.
When it comes to the rubber outsole, we hold the Dremel for 12 seconds with the same force (3.2N) and speed (10K RPM).
We then measure the depth of the dent with the help of a tire tread depth gauge.
New test to check leather and suede quality
Whenever a brand claims to use real leather or suede in its shoe, we equip ourselves with a butane torch to test that statement. We hold the fire against the corresponding parts of the upper for a few seconds.
What we look for in genuine material is for it to char and emit a smell akin to burnt hair. That is an indication of real leather and suede whereas melting or catching fire is a sign of fake (synthetic) material.
1.6 Methodology update: April 2023
Durability tests with a Dremel
To check the upper’s resistance to abrasion, we now perform a Dremel test on one of the most sensitive parts of the upper - the toebox fabric and the heel collar lining.
The shoe remains in a fixed position as we apply the Dremel to it. The following conditions are applied to all shoes for consistency:
- 3.2N of force
- 4 seconds
- 10 000 RPM [August 2023 update: we lowered the speed to 5000 RPM]
To prevent the shoe’s color from creating bias, we put a piece of contrasting white plastic underneath the textile.
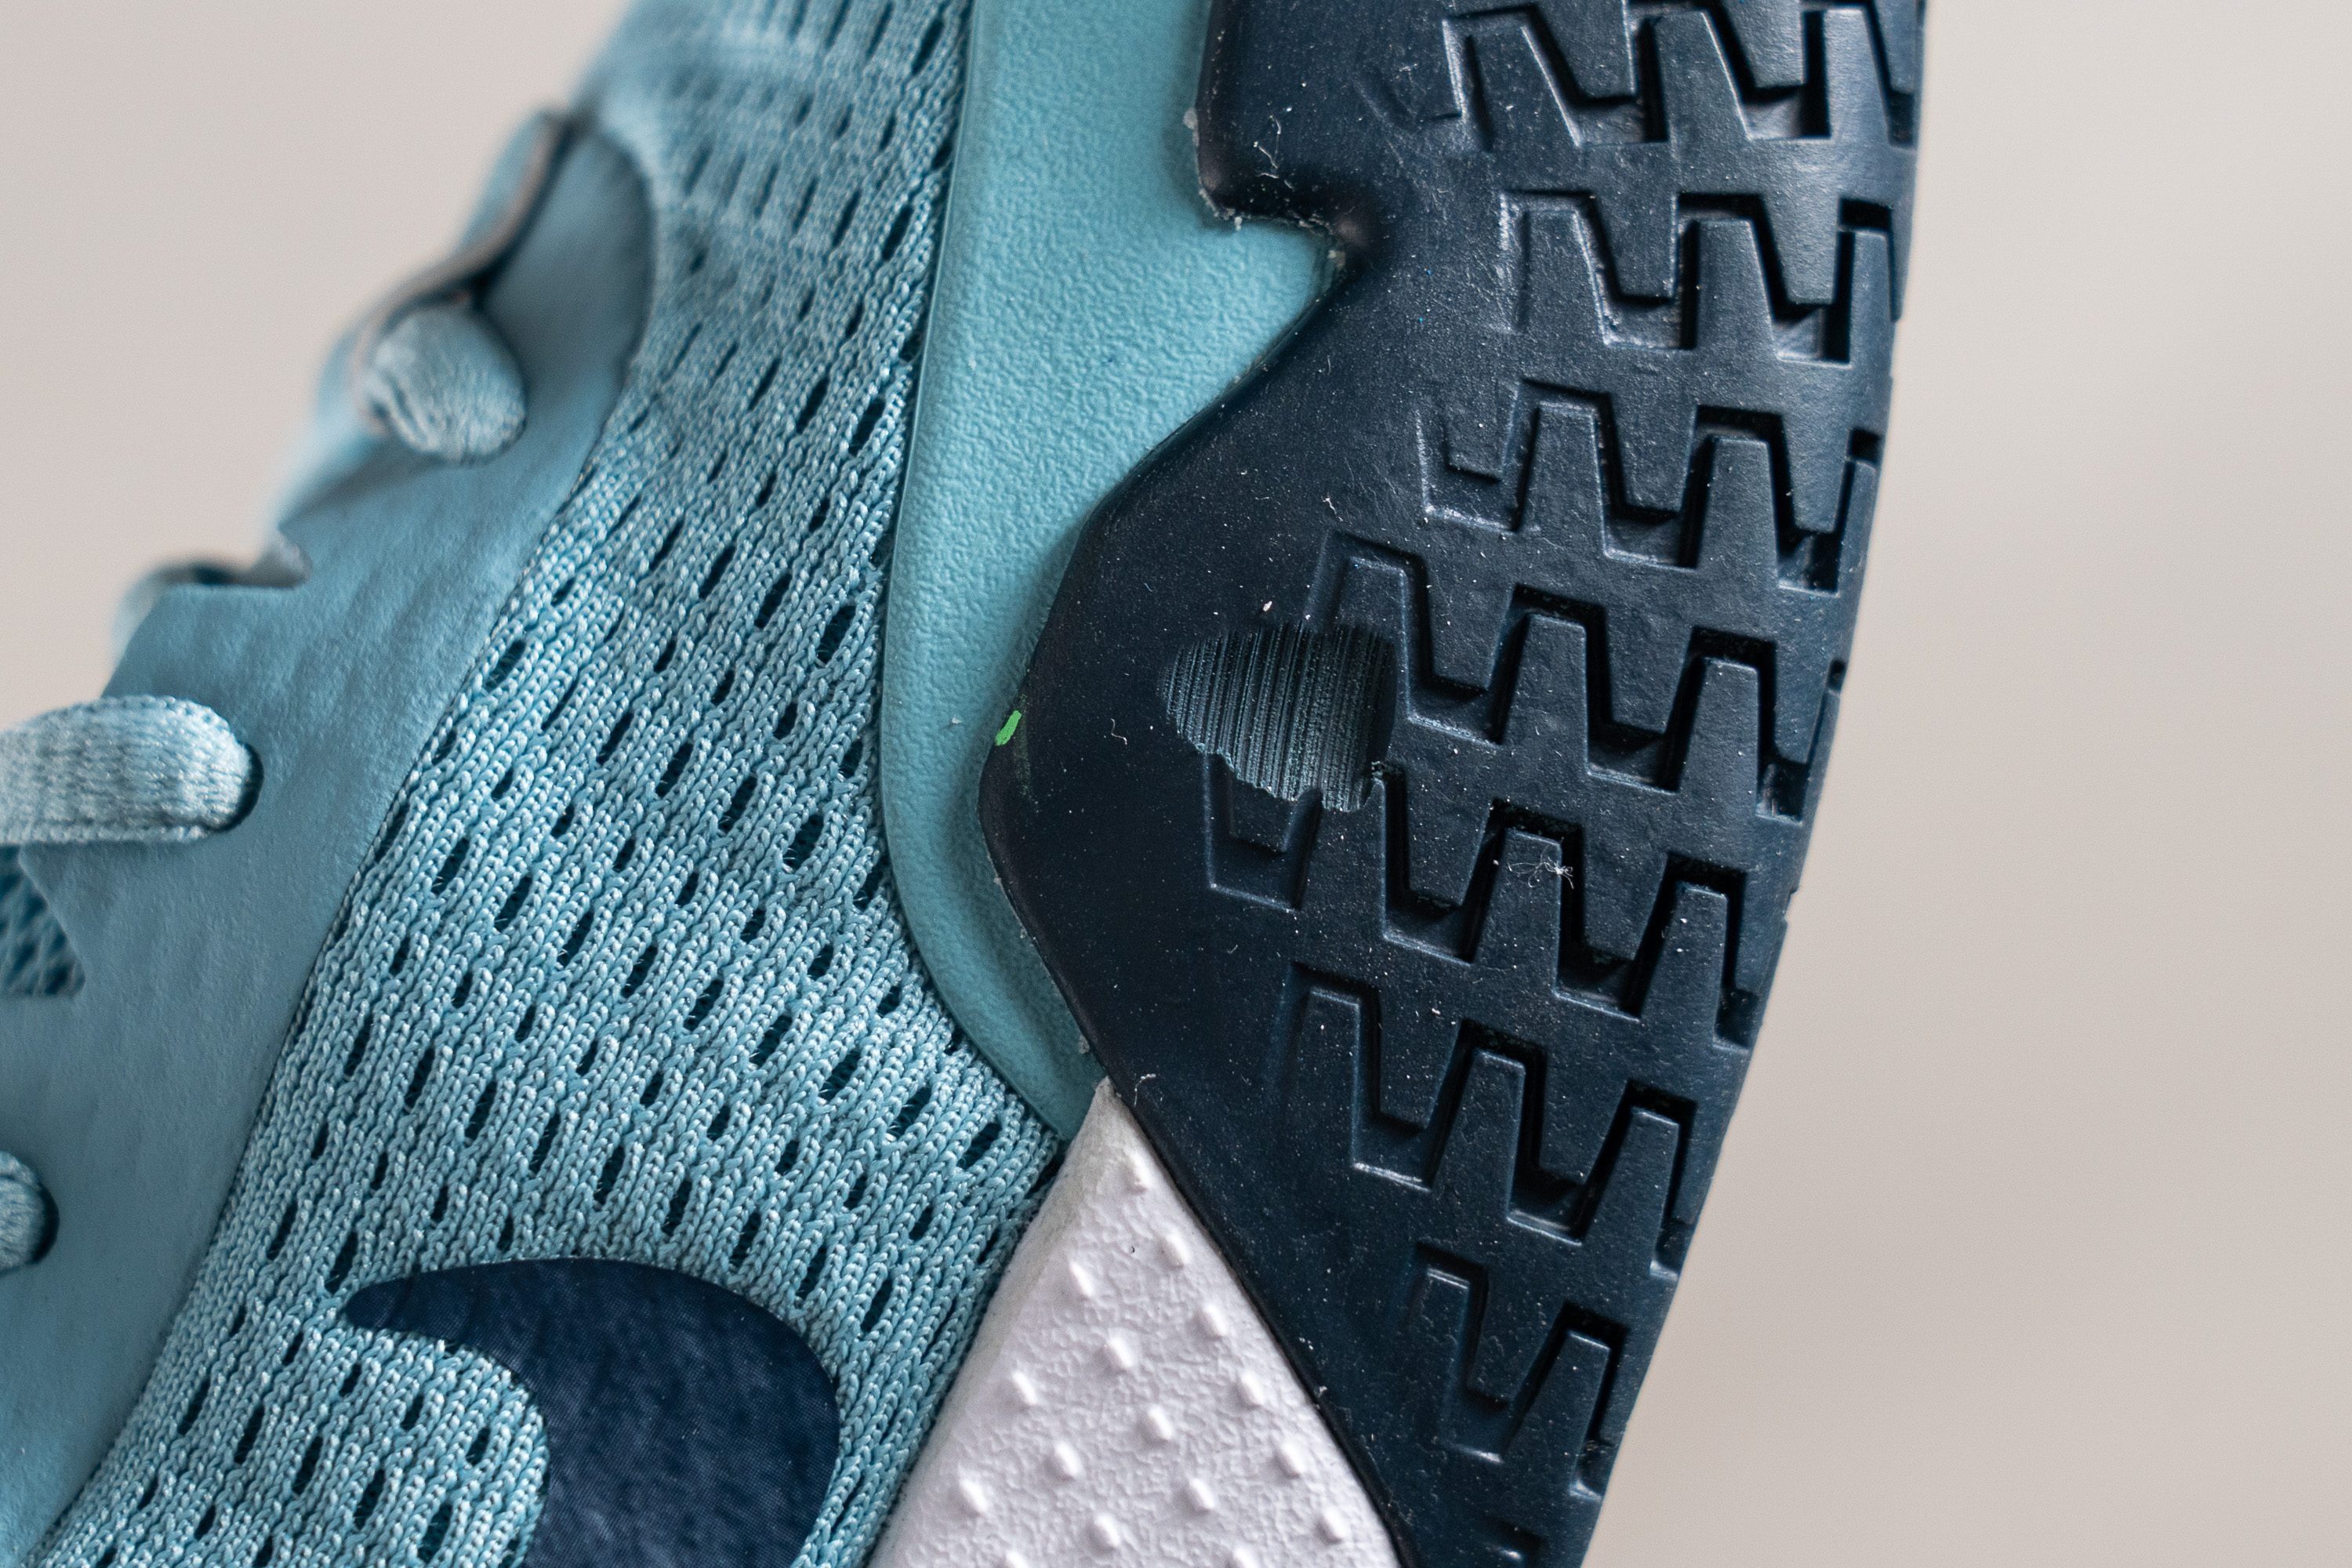
Close-up photos with a microscope
Having added a microscope to our lab, we are now able to take a much closer look at each shoe’s upper fabric and other parts.
Close-up shots of the upper, for example, help us support statements about the shoe’s breathability, waterproofing capacity, and durability.
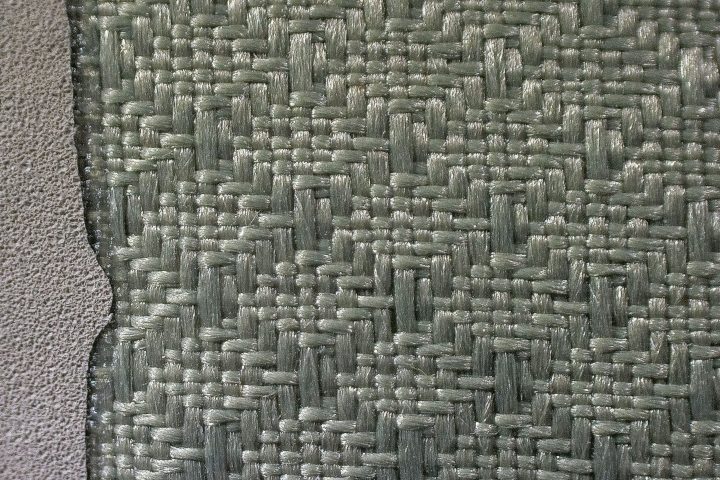
Sample of a waterproof textile
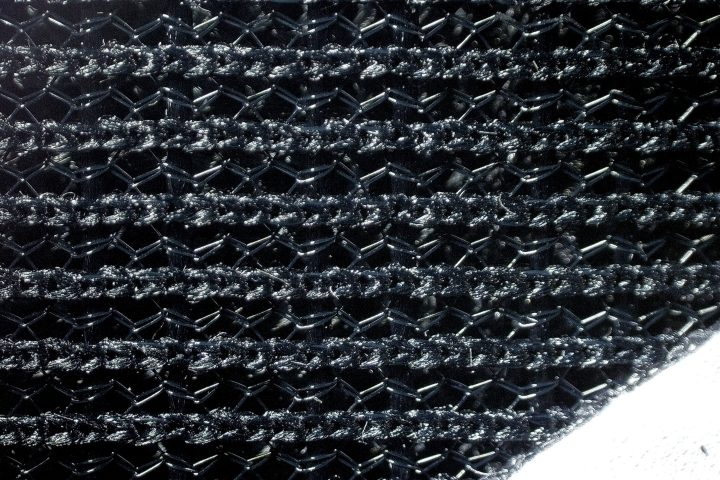
Sample of a breathable mesh
Shoe rocker visualization
We added a visual demonstration of how much of a rocker is present in each shoe’s design. Initiating movement in the heel, we aim to replicate the heel-to-toe transition of the foot for heel strikers.
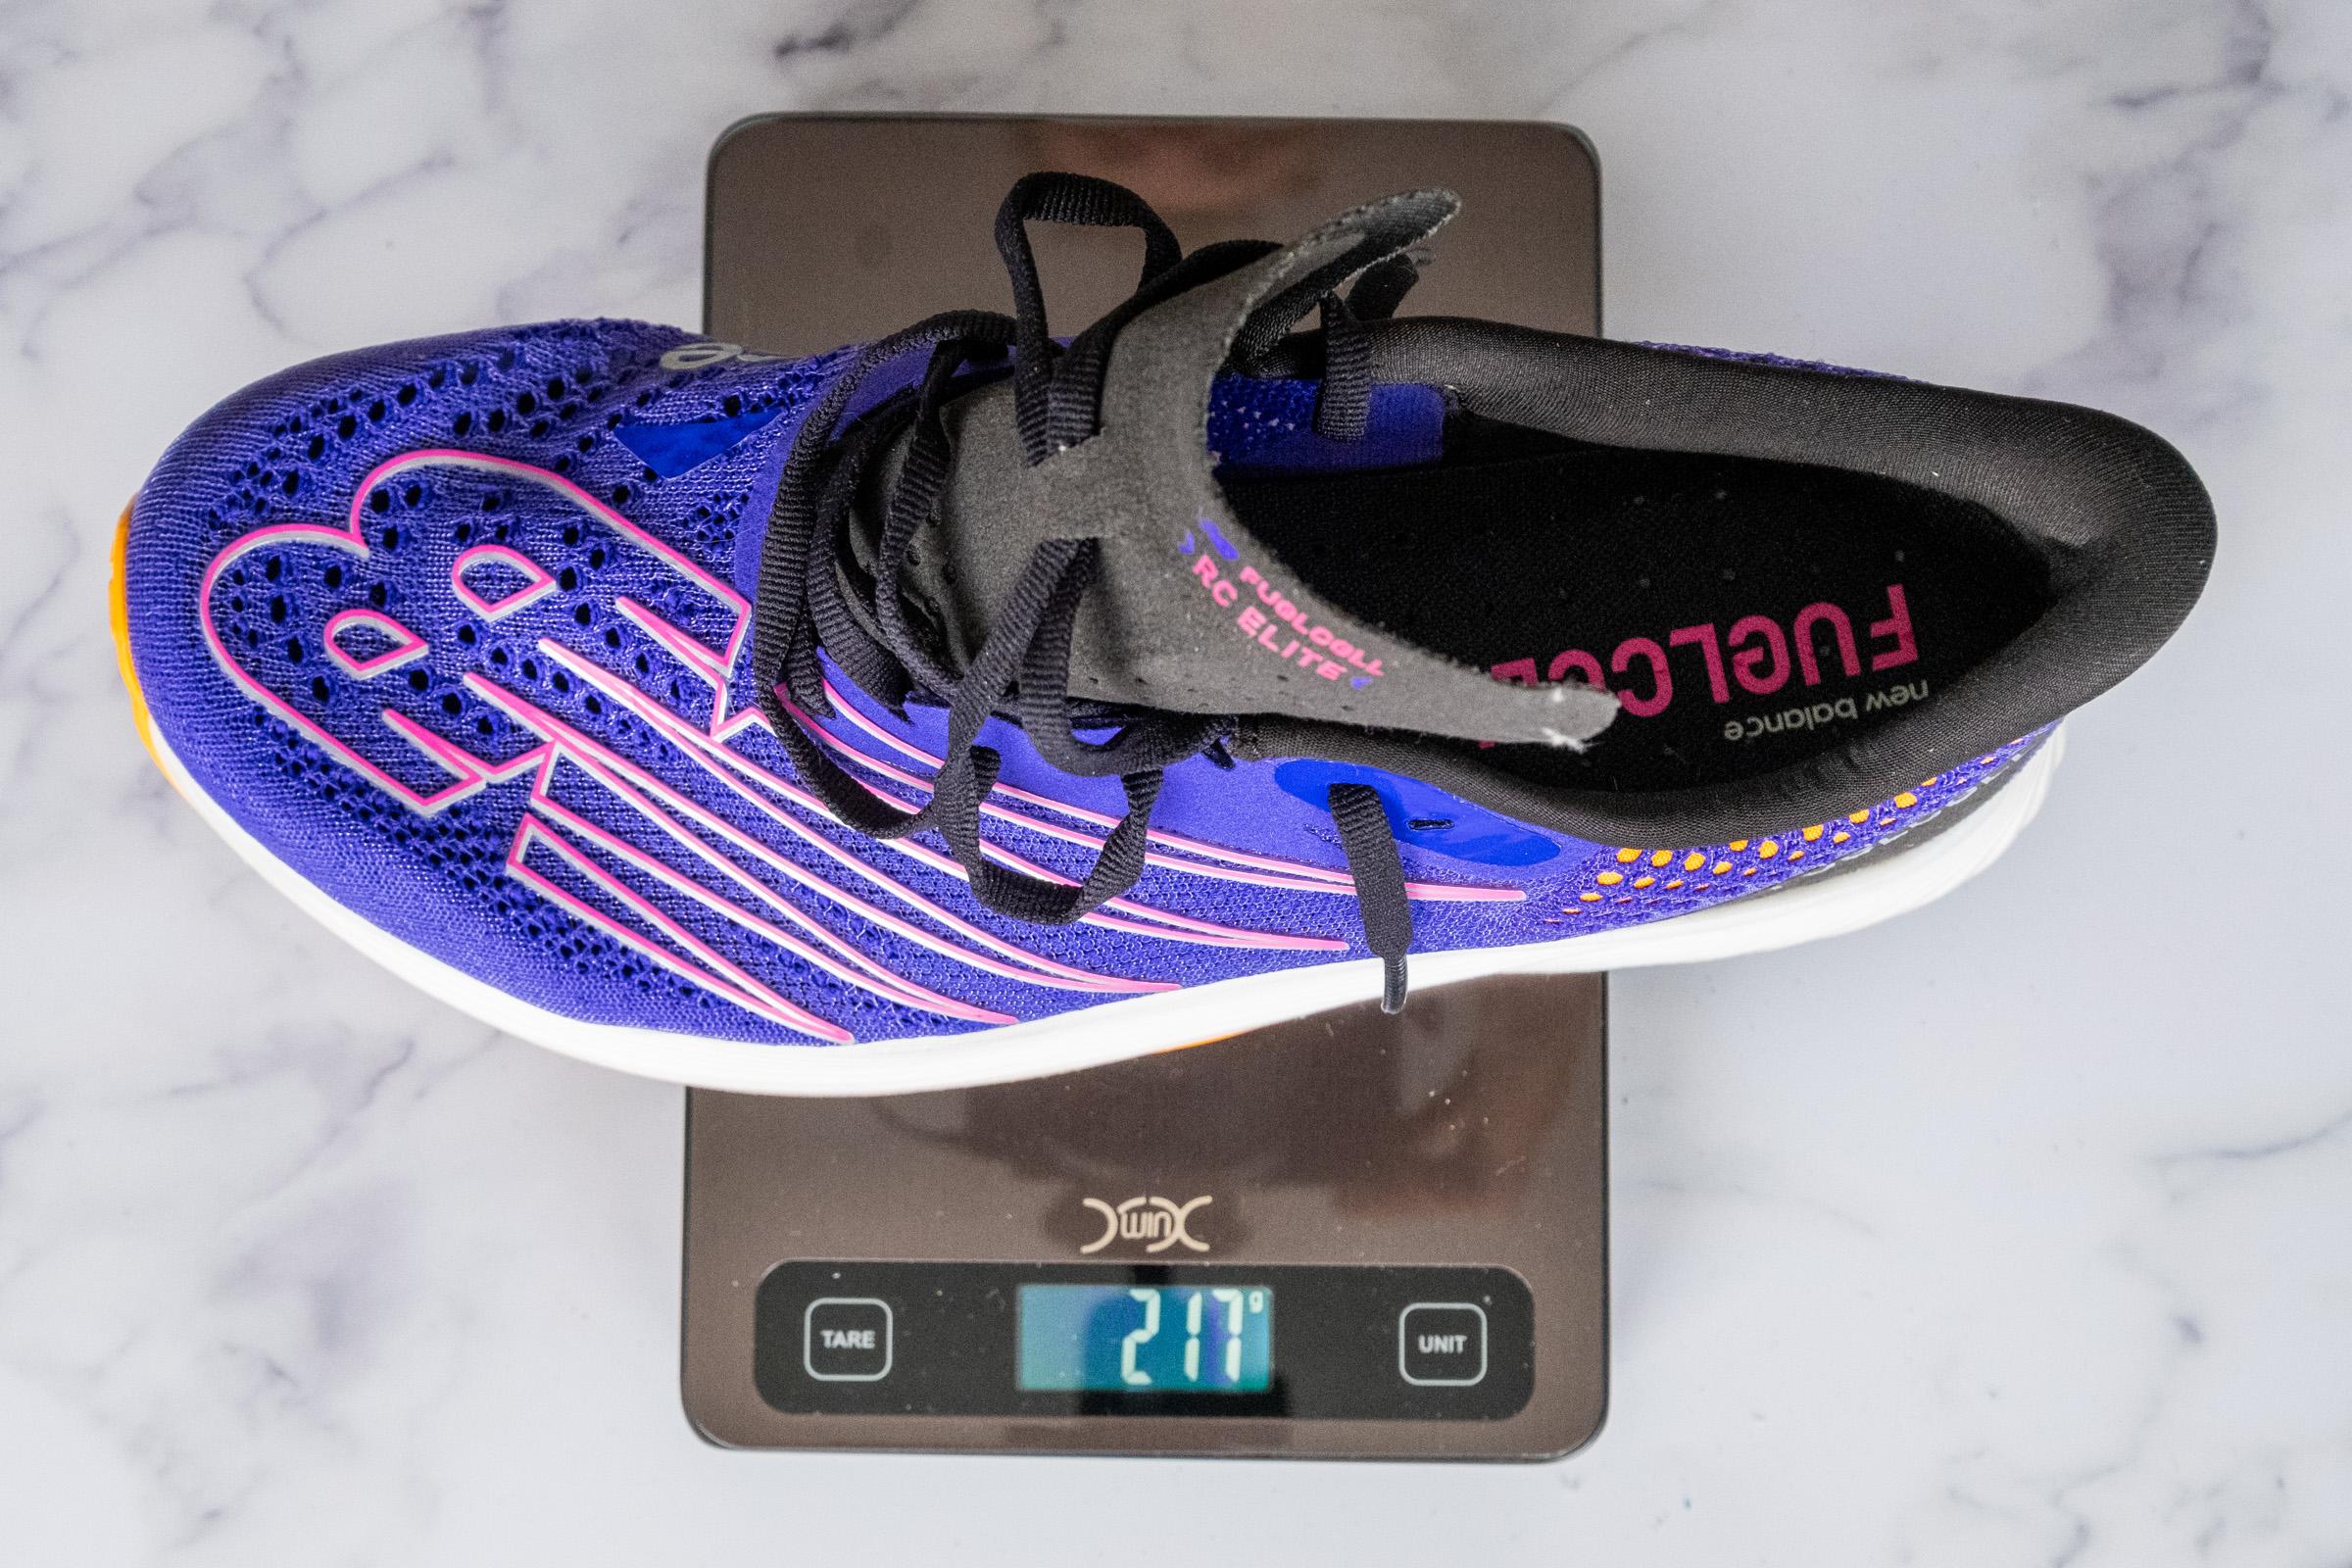
All shoe weights are presented in men’s US size 9
To make our data consistent, we measure every shoe’s weight in a men’s US 9. That’s because it is the most common shoe size and brands often provide shoe weight in this particular size.
However, in cases where we cannot get US 9, we buy US 8 or 8½ and use a proprietary formula to calculate for US 9.

Nike ZoomX Invincible Run Flyknit 3 was measured at 9.4 oz (267g) in a US 8. It corresponds to 10 oz (284g) in a US 9.
The formula we use is based on the weight measurement of 4 different shoes from different brands measured in 10 different sizes.

The measurements were kindly provided to us by Running Warehouse.
Improved toebox measurements
Previously, we only measured the toebox in its widest part (around the metatarsal joints).
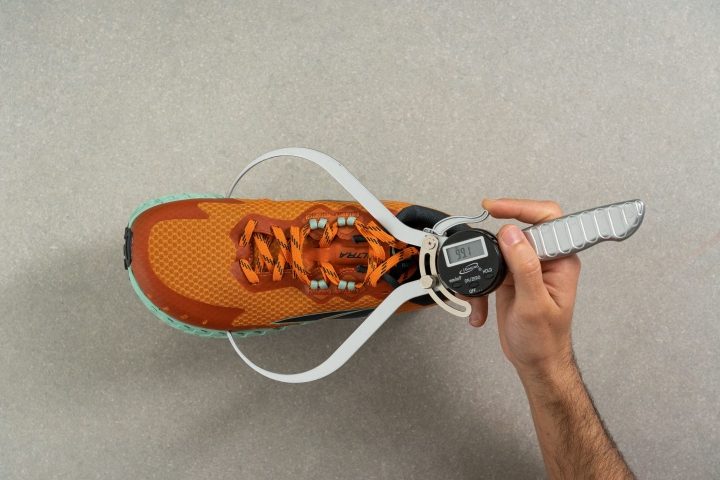
But now we also measure the width near the toes (at the top of the shoe).
This allows us to check how much narrower the toebox gets toward the toes. It is possible that two shoes will have the same width in the metatarsal area but one of them would get much tighter around the toes.
1.5 Methodology update: August 2022
All the reviews tagged as Lab reviews consist of 2 things:
- doing lab tests
- field-testing the shoe
We start by taking the initial measurements in our lab, such as weight, width, flexibility, etc. Then we test the shoe properly by going for a run, hike, to the gym, or by doing any other activity that the shoe is intended for. Finally, we come back to the lab and finish up by cutting the shoe in half and doing the rest of the measurements including stack height, midsole softness, and more.
Knowing how the shoe scores in the lab gives us a more in-depth layer of objectivity. By doing the so-called Fact Check, we compare the brand’s statements to the lab results. Our members of the editorial team give an explanation of the comparison and recommendations, thanks to their extraordinary lab and sports background.
Example of a Fact check:

There have been a few changes to our lab testing process as we added more tests to check various characteristics.
Improved breathability test
We now assess how breathable the shoe upper is with the help of a smoke machine. We cover up the shoe mouth entirely and pump smoke inside the shoe. The amount of smoke and the speed at which it’s coming out of the upper demonstrates the shoe’s ventilation potential.
We also enhanced this test with a transparency check. The cut half of the shoe is put against a source of bright light. It allows us to see which areas of the upper are the most transparent and consequently, breathable.
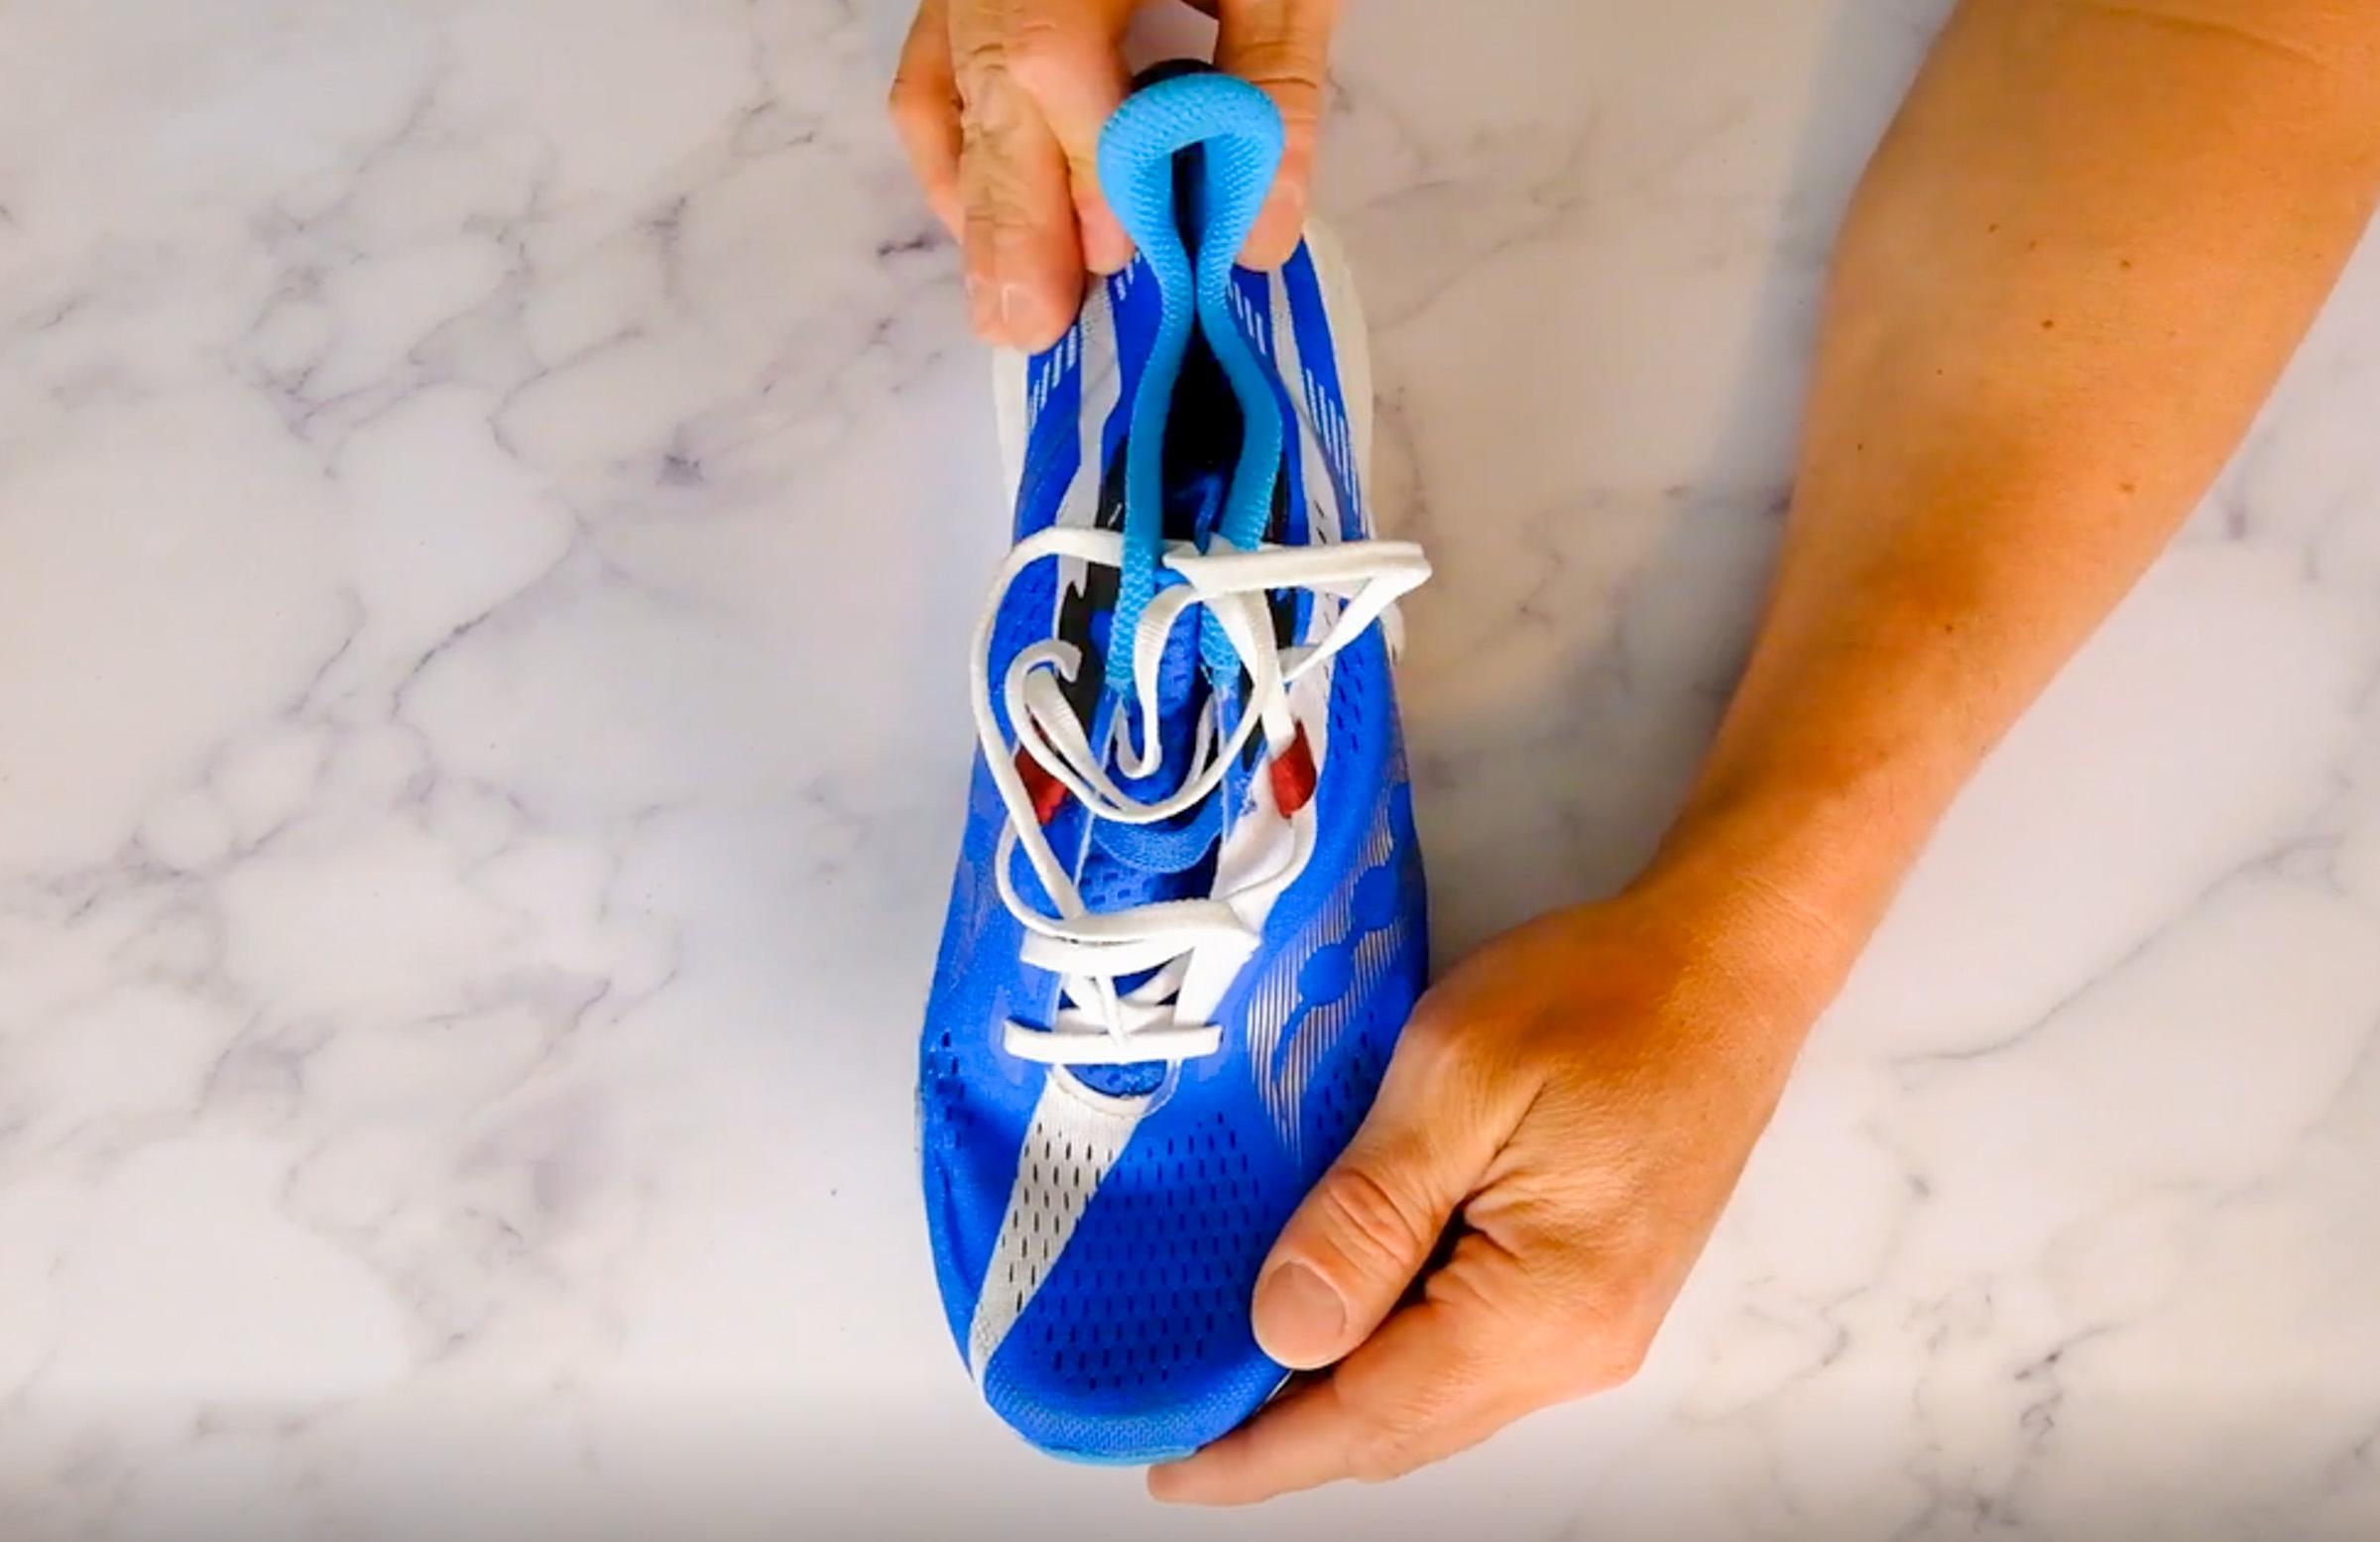
Ditching lace stretch and lace slip tests
We no longer measure how stretchy or slippery the shoe’s laces are. The reason is we do not find them useful enough.
1.4 Methodology update: July 2021
When we test shoes in our lab, we follow a standard testing methodology to ensure that lab data is comparable across all shoe reviews. On this page, you’ll find an explanation of the lab tests and instruments (equipment) we are using. All the shoes that we test in the field and in the lab are tagged as Lab test.
We dissect, cut, and tear shoes apart in our lab tests because minute details are what separates great shoes from the rest, and it’s our mission to help consumers buy the best shoes for their needs which requires us to know the details no matter how small. Why this works: Thanks to both field and lab tests, we're able to experience the shoe in full and write about its fit, performance, and looks covering both personal experience and lab data.
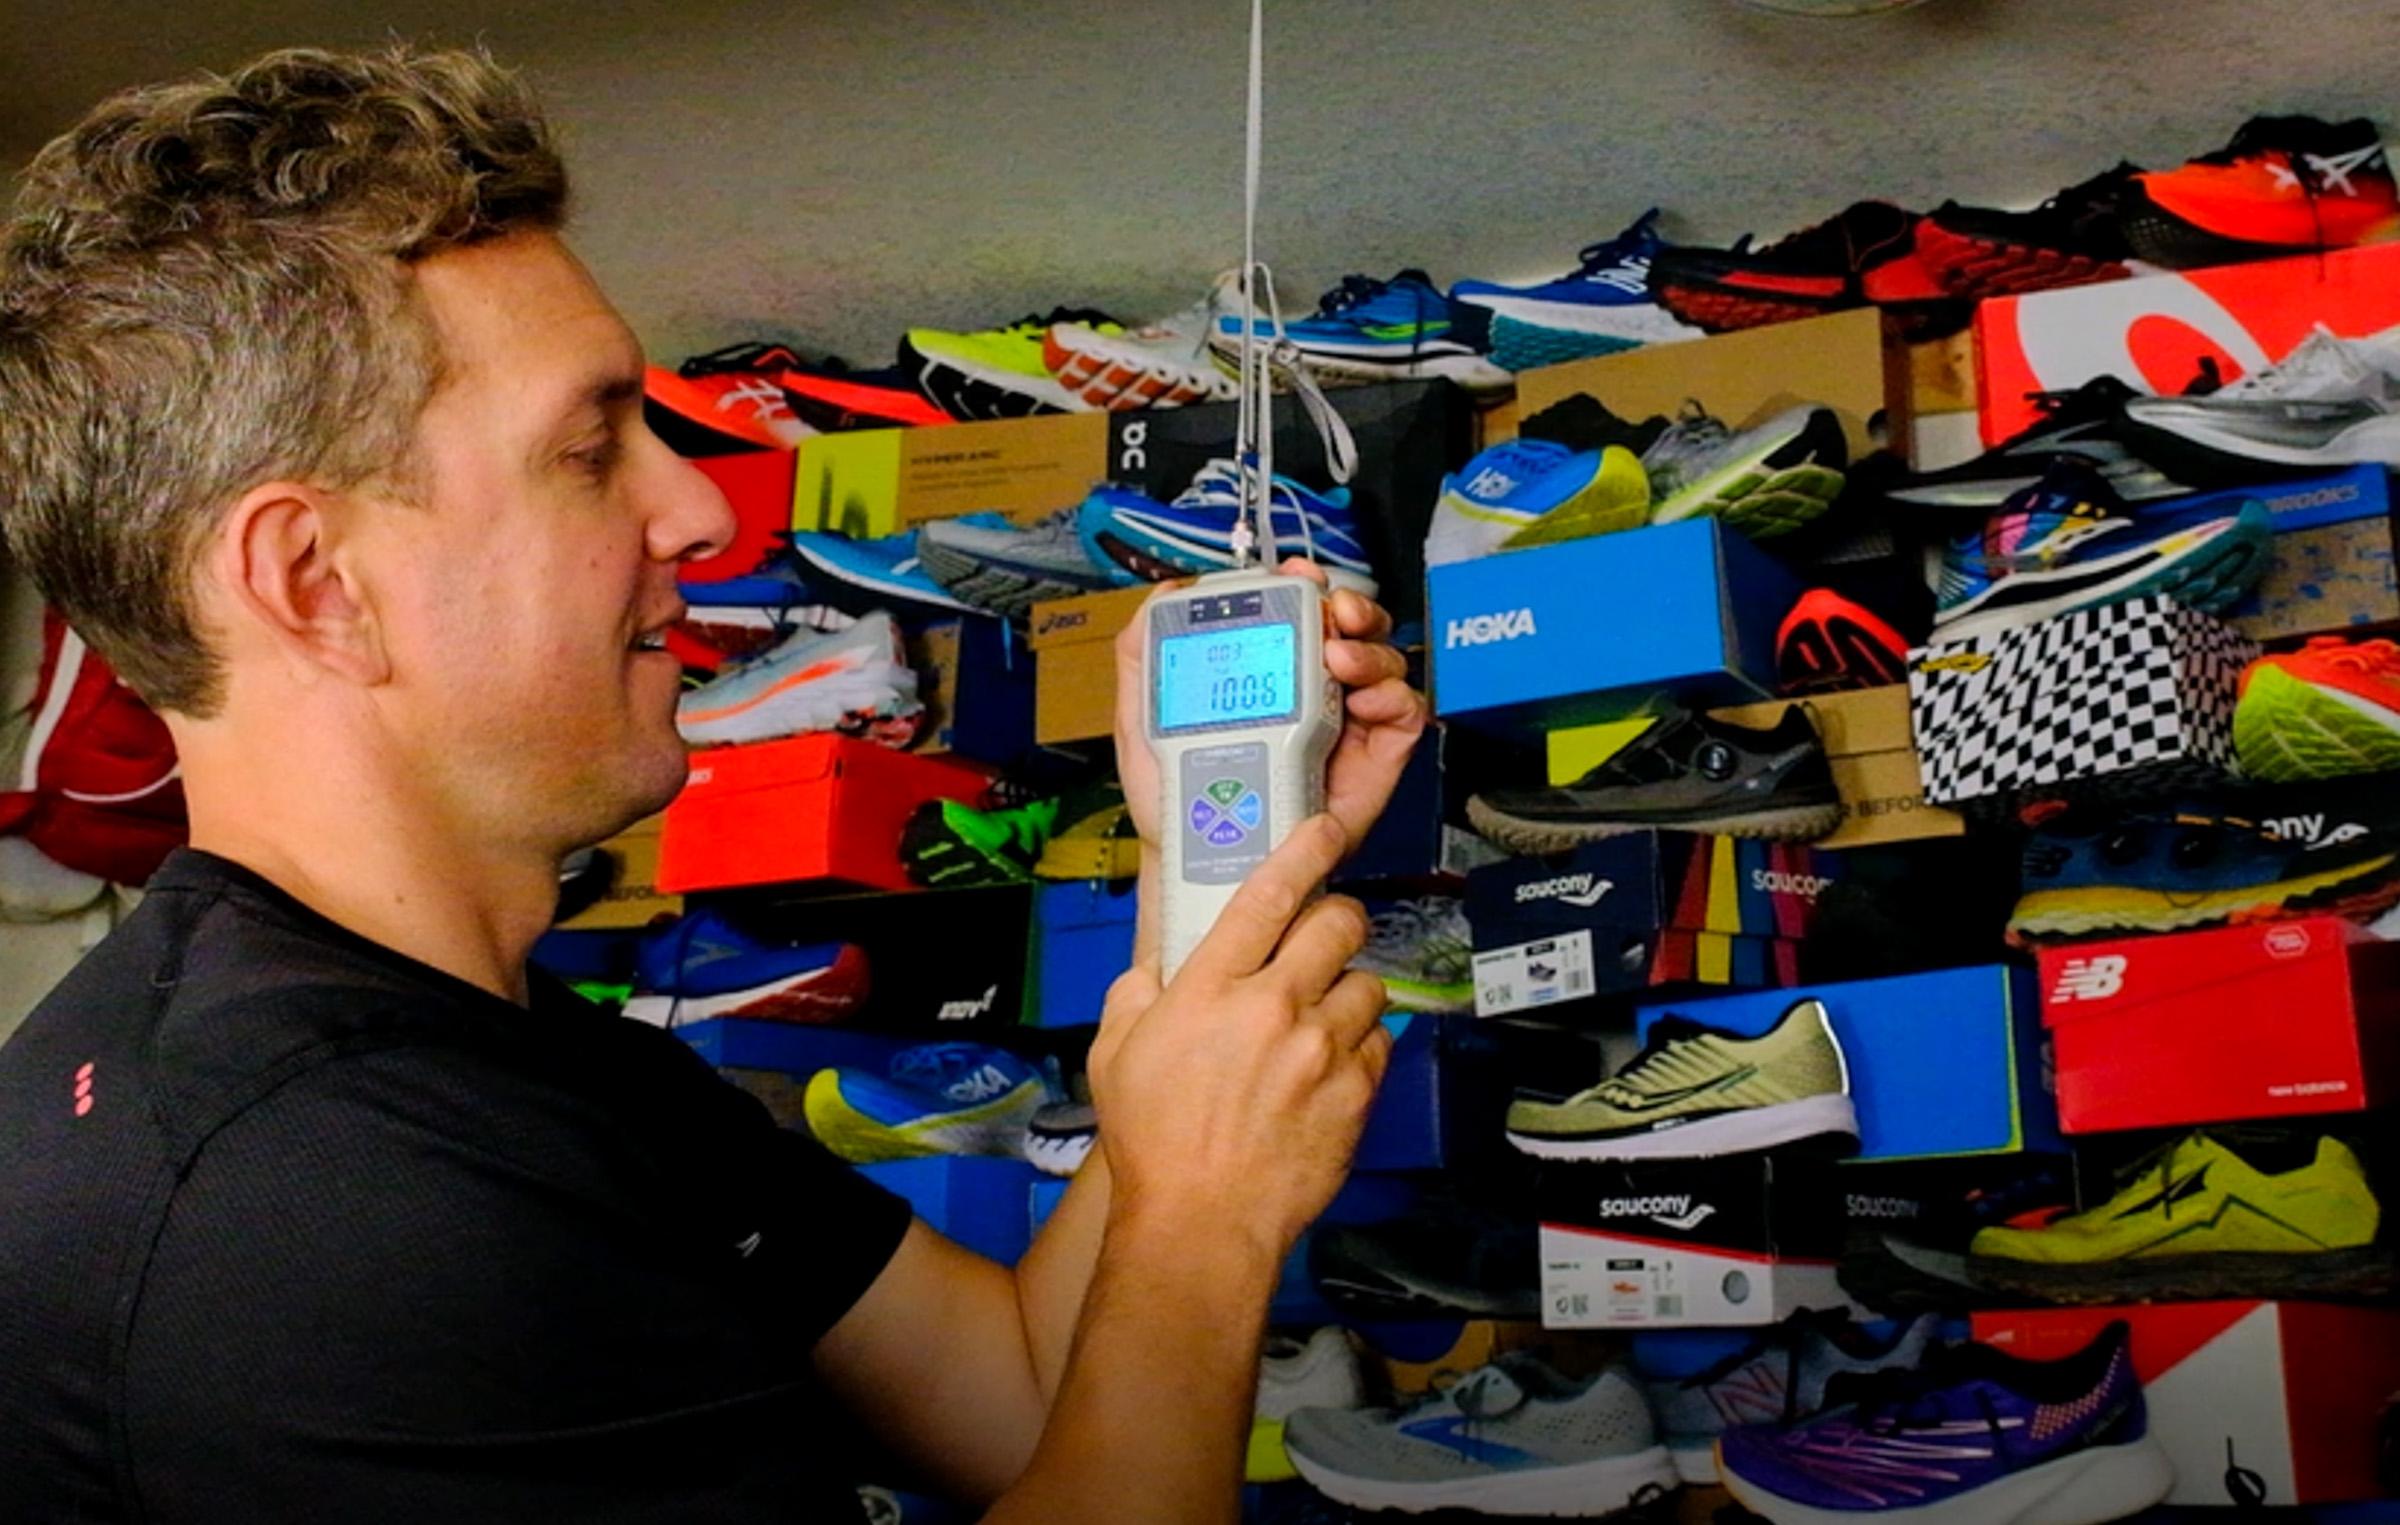
Weight measurements
We weigh the whole shoe before any test runs. Most of our visitors are from the US, where ounces are used. However, a portion are from countries that use the metric system, so we report on both the weight in grams and ounces. Our scale is accurate to 1g/0.05ounce.
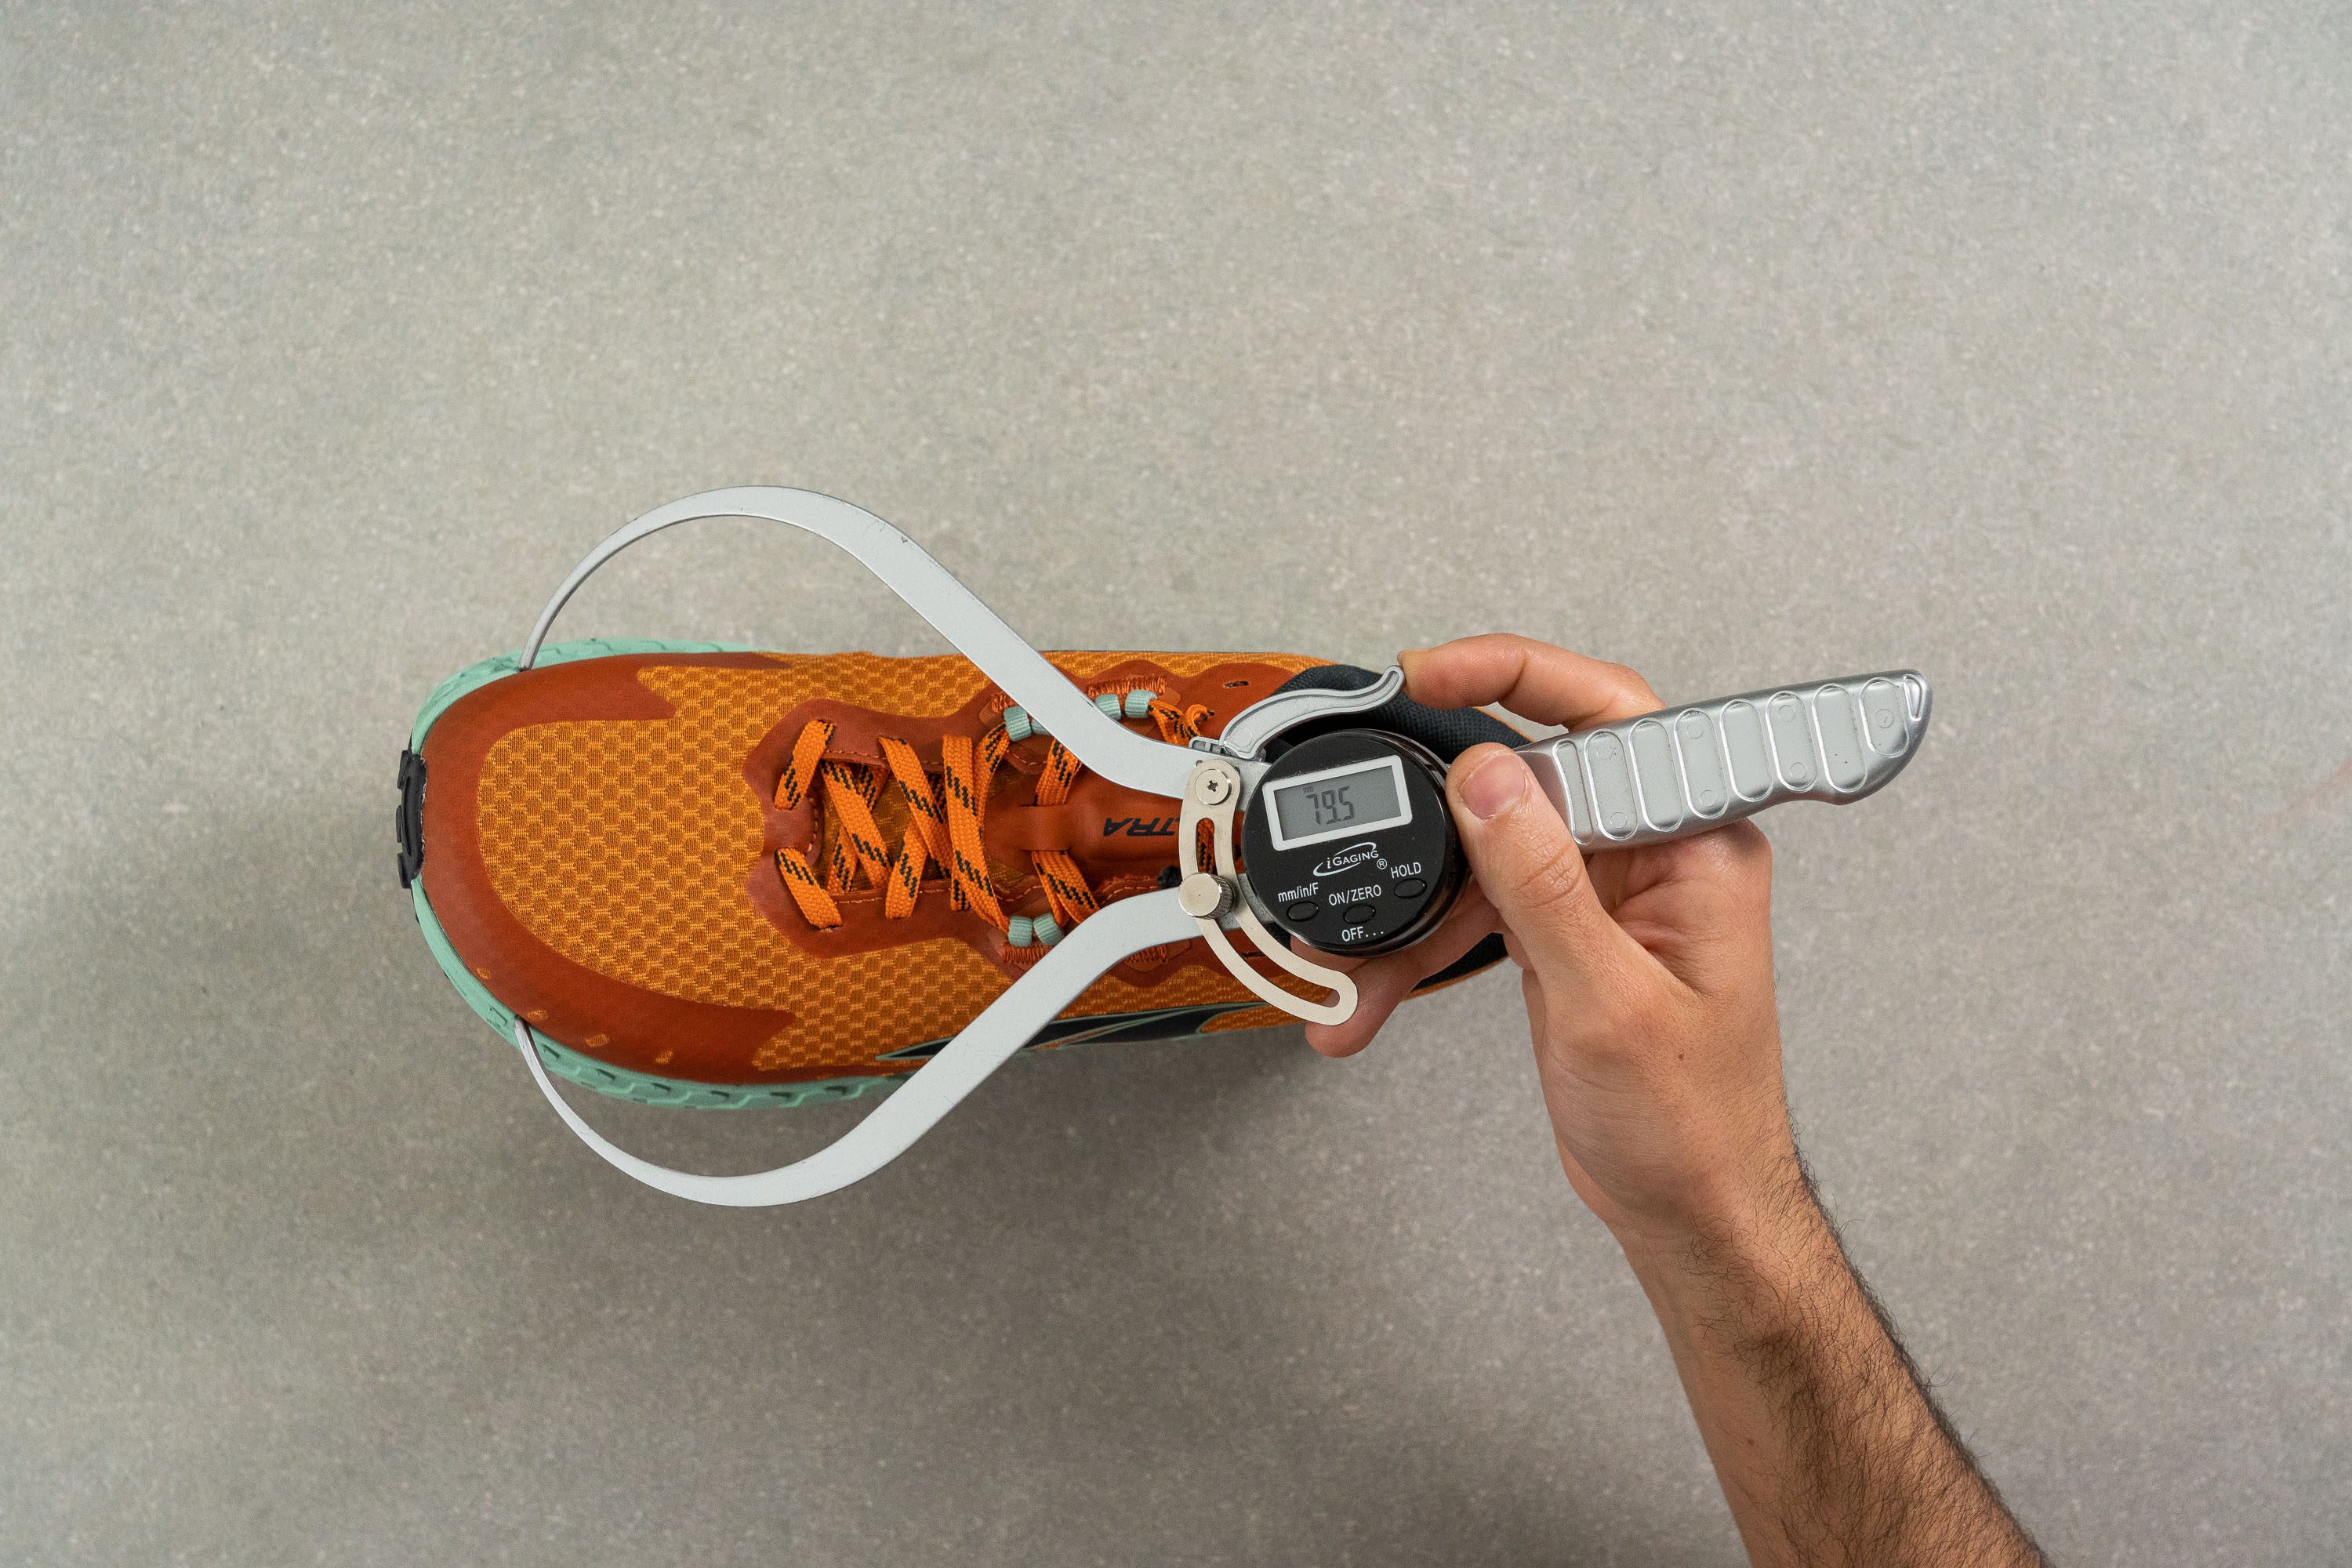
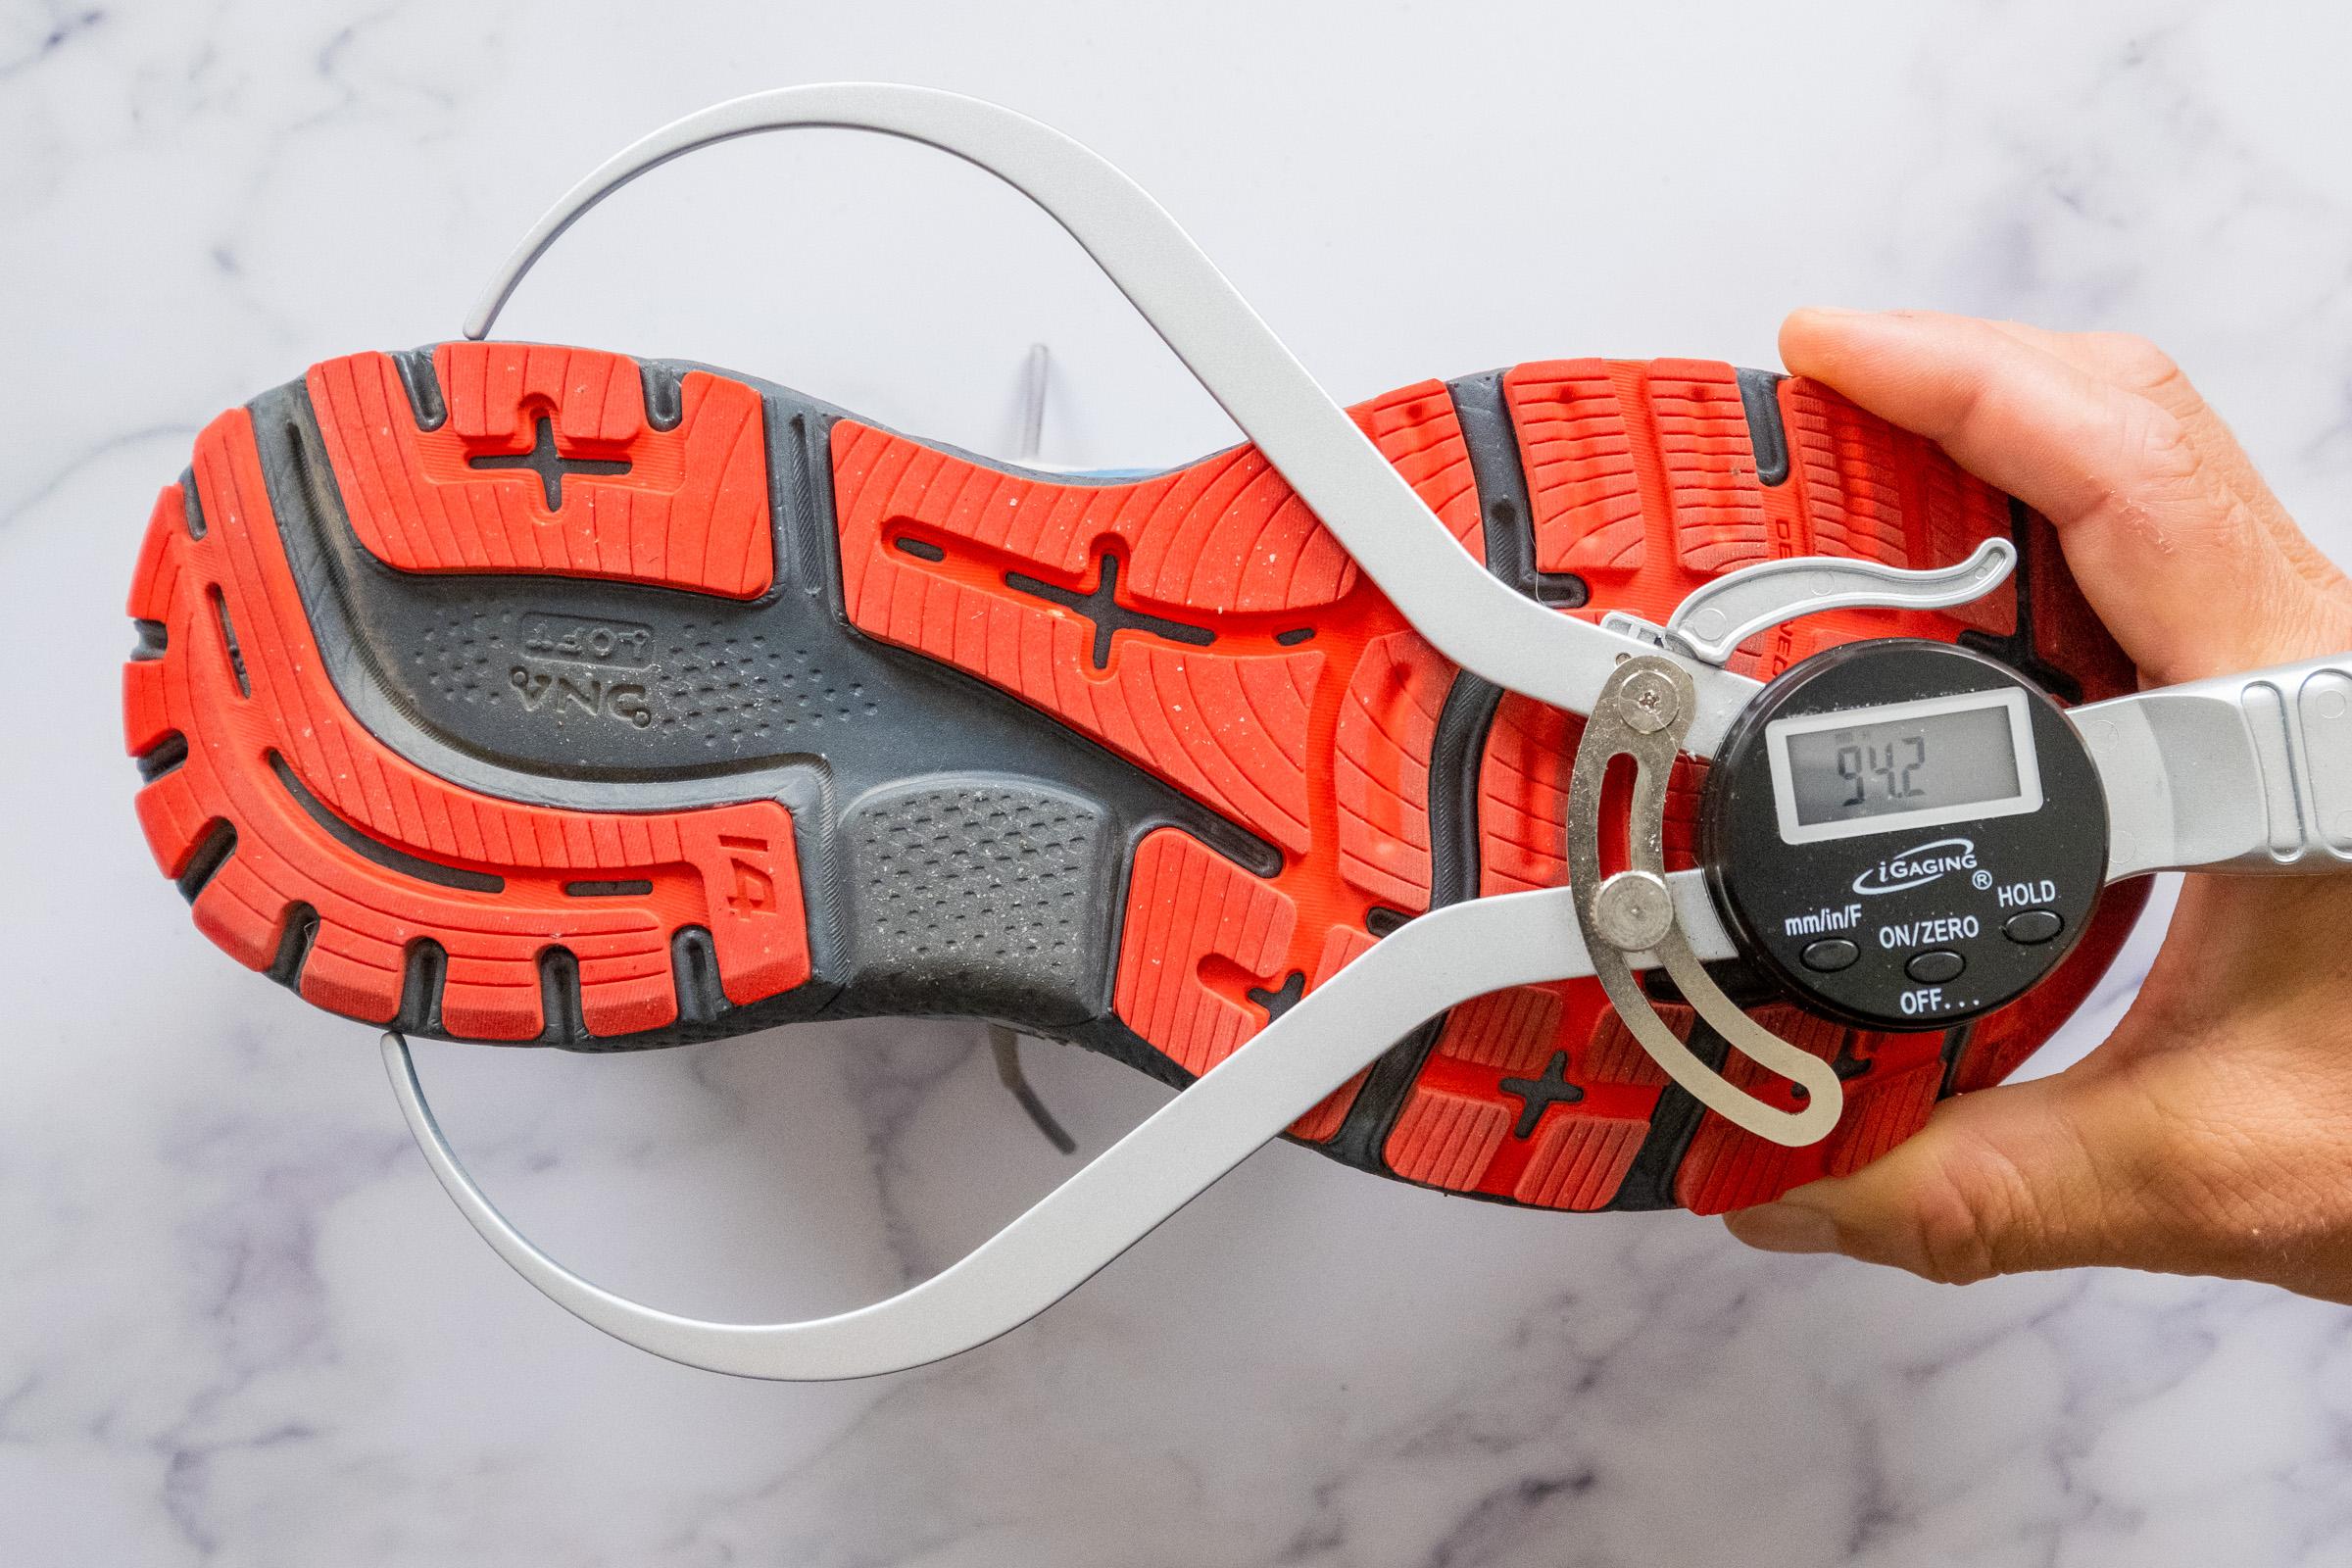
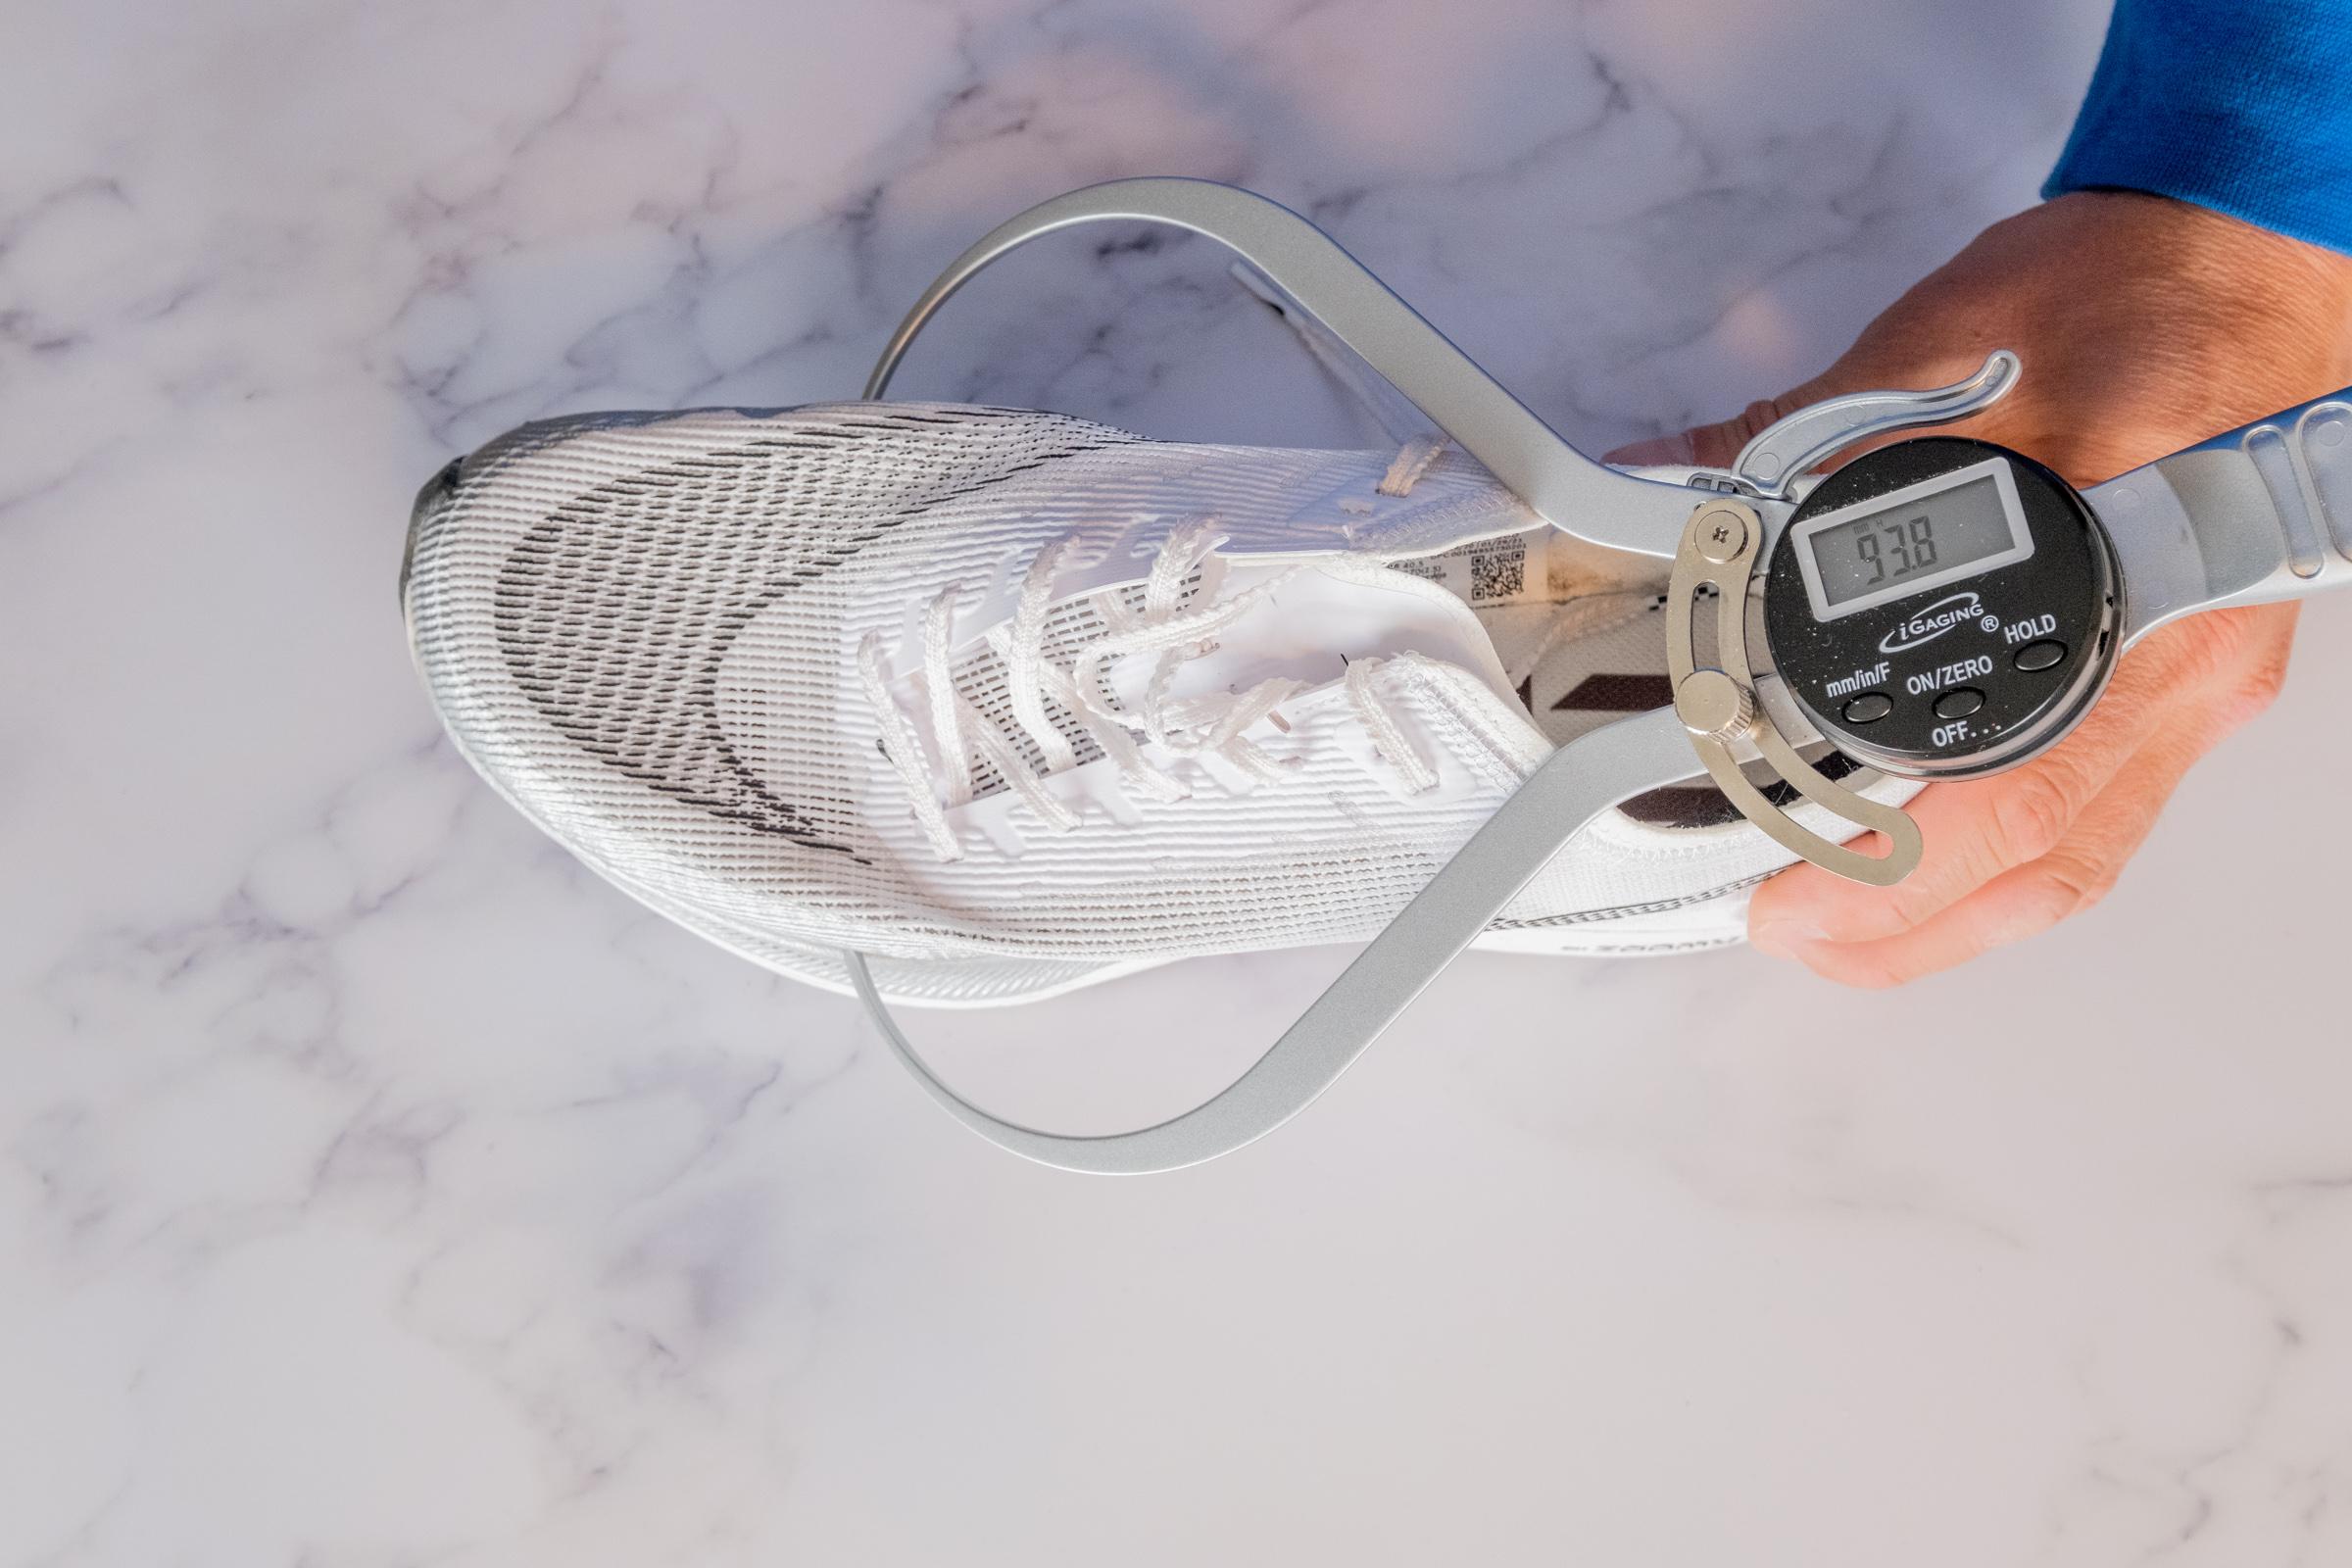
Width measurements
We measure the width of the base of the shoe at its widest point in the forefoot and the heel. We use an 8’’ outside caliper accurate to .1mm.
We also measure the width of the upper where it attaches to the midsole in both the forefoot and the heel. Again at its widest points.
Stack heights and heel drop
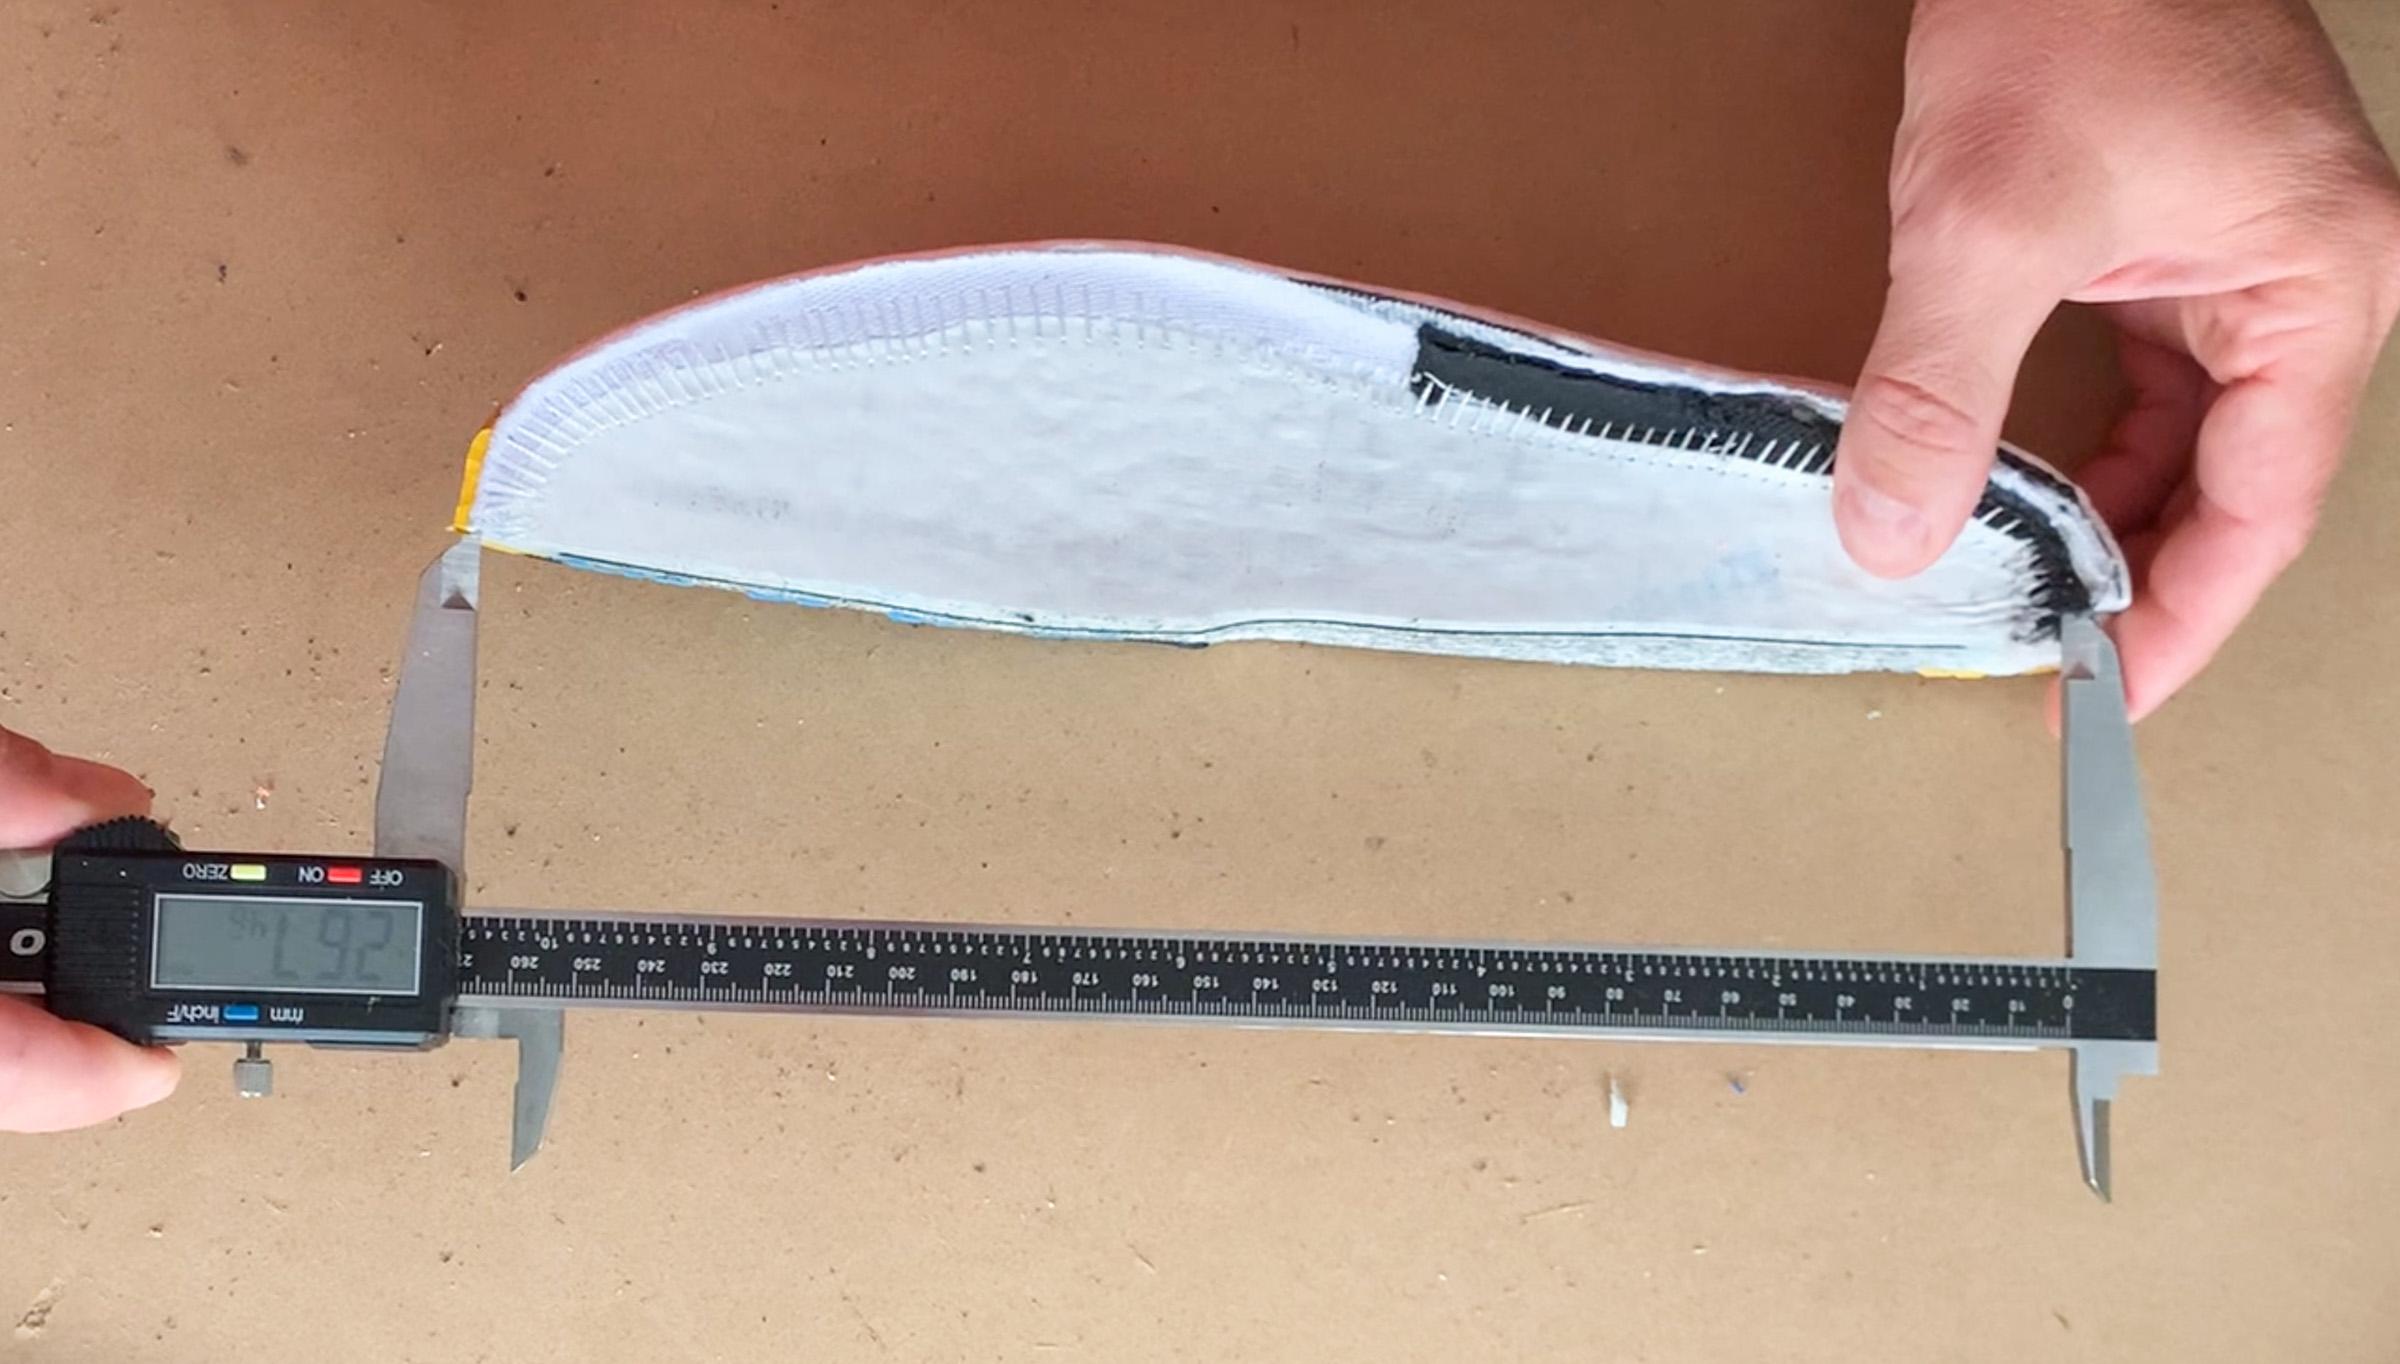
To get the appropriate stack and drop measurements we cut the shoe in half and first measure the internal length of the shoe.
We flatten the shoe out to avoid any rocker or bend and measure from where the stroble board meets the heel and begins to curve upwards into the heel counter, to the inside edge of the toe bumper. We use an electronic digital caliper accurate to .01mm.
From this overall length measurement, we take the stack measurement of the heel at 12% of the total overall length, and the forefoot measurement at 75% of the total length measured again from where the stroble board meets the heel and begins to curve upwards.
This is in accordance with how and where World Athletics measures stack heights in running shoes for eligibility requirements.
We take all stack measurements with the insole included regardless if the insole is removable or not.
Drop measurements are a simple calculation of heel stack minus forefoot stack.
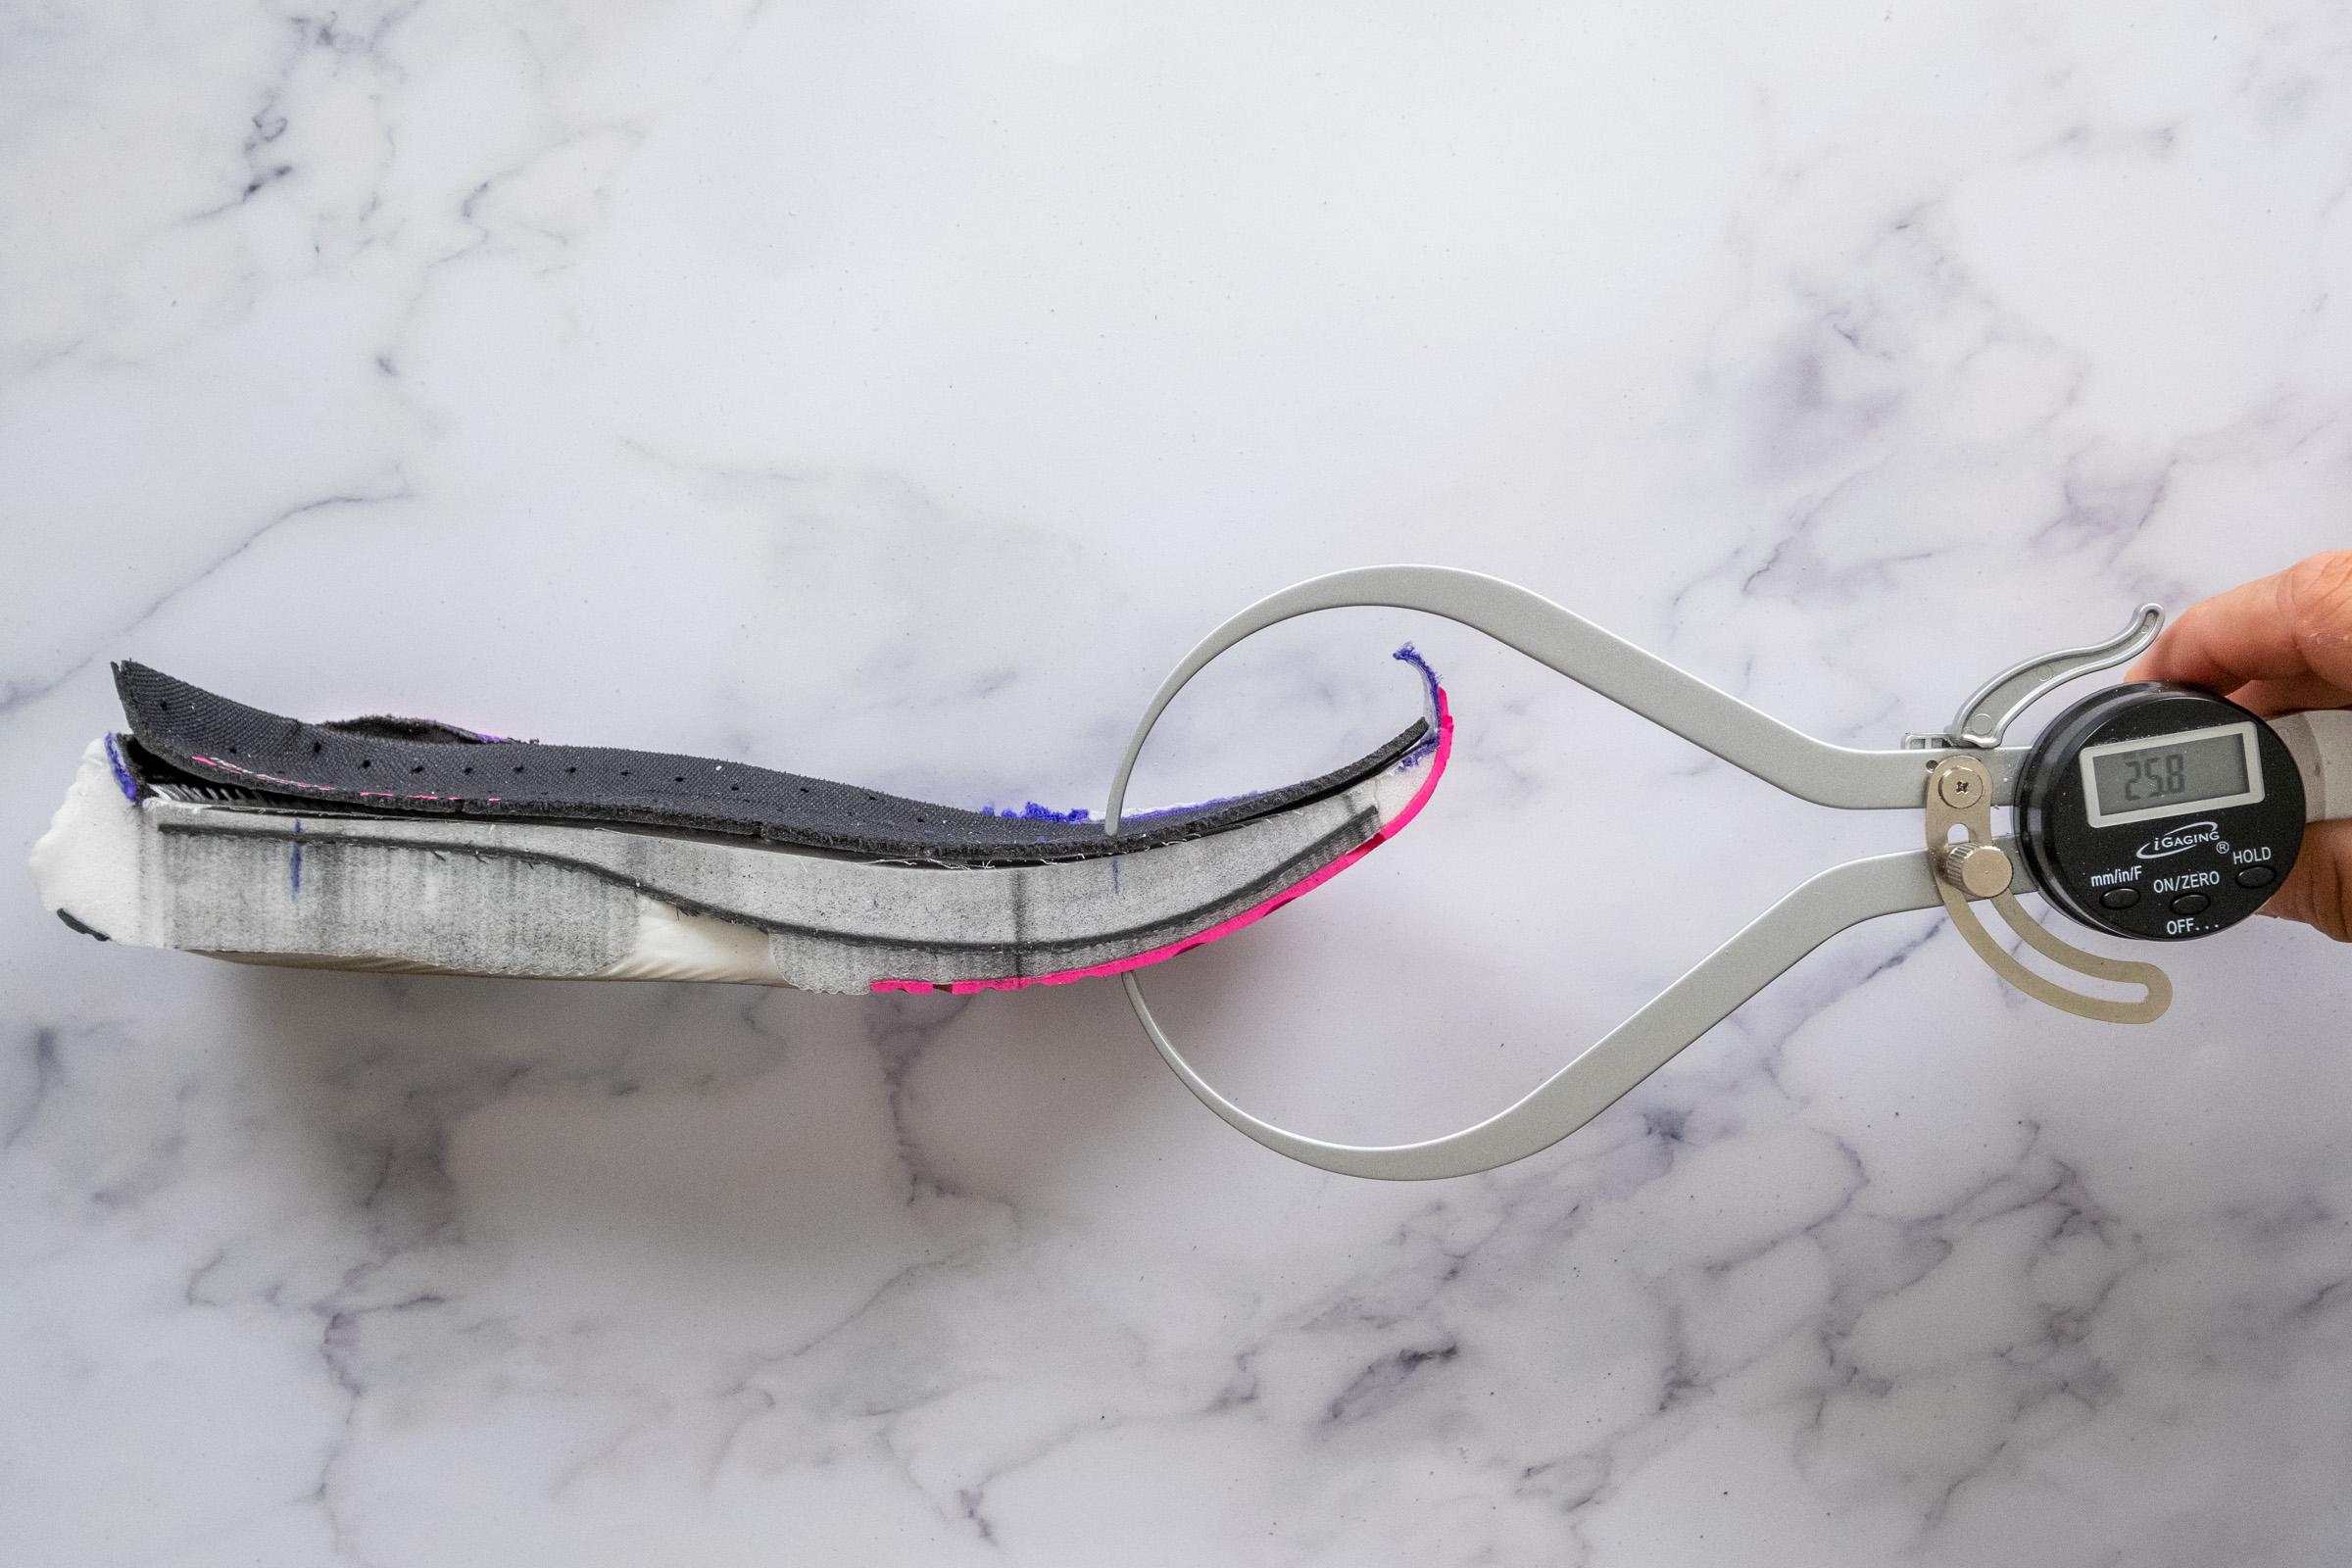
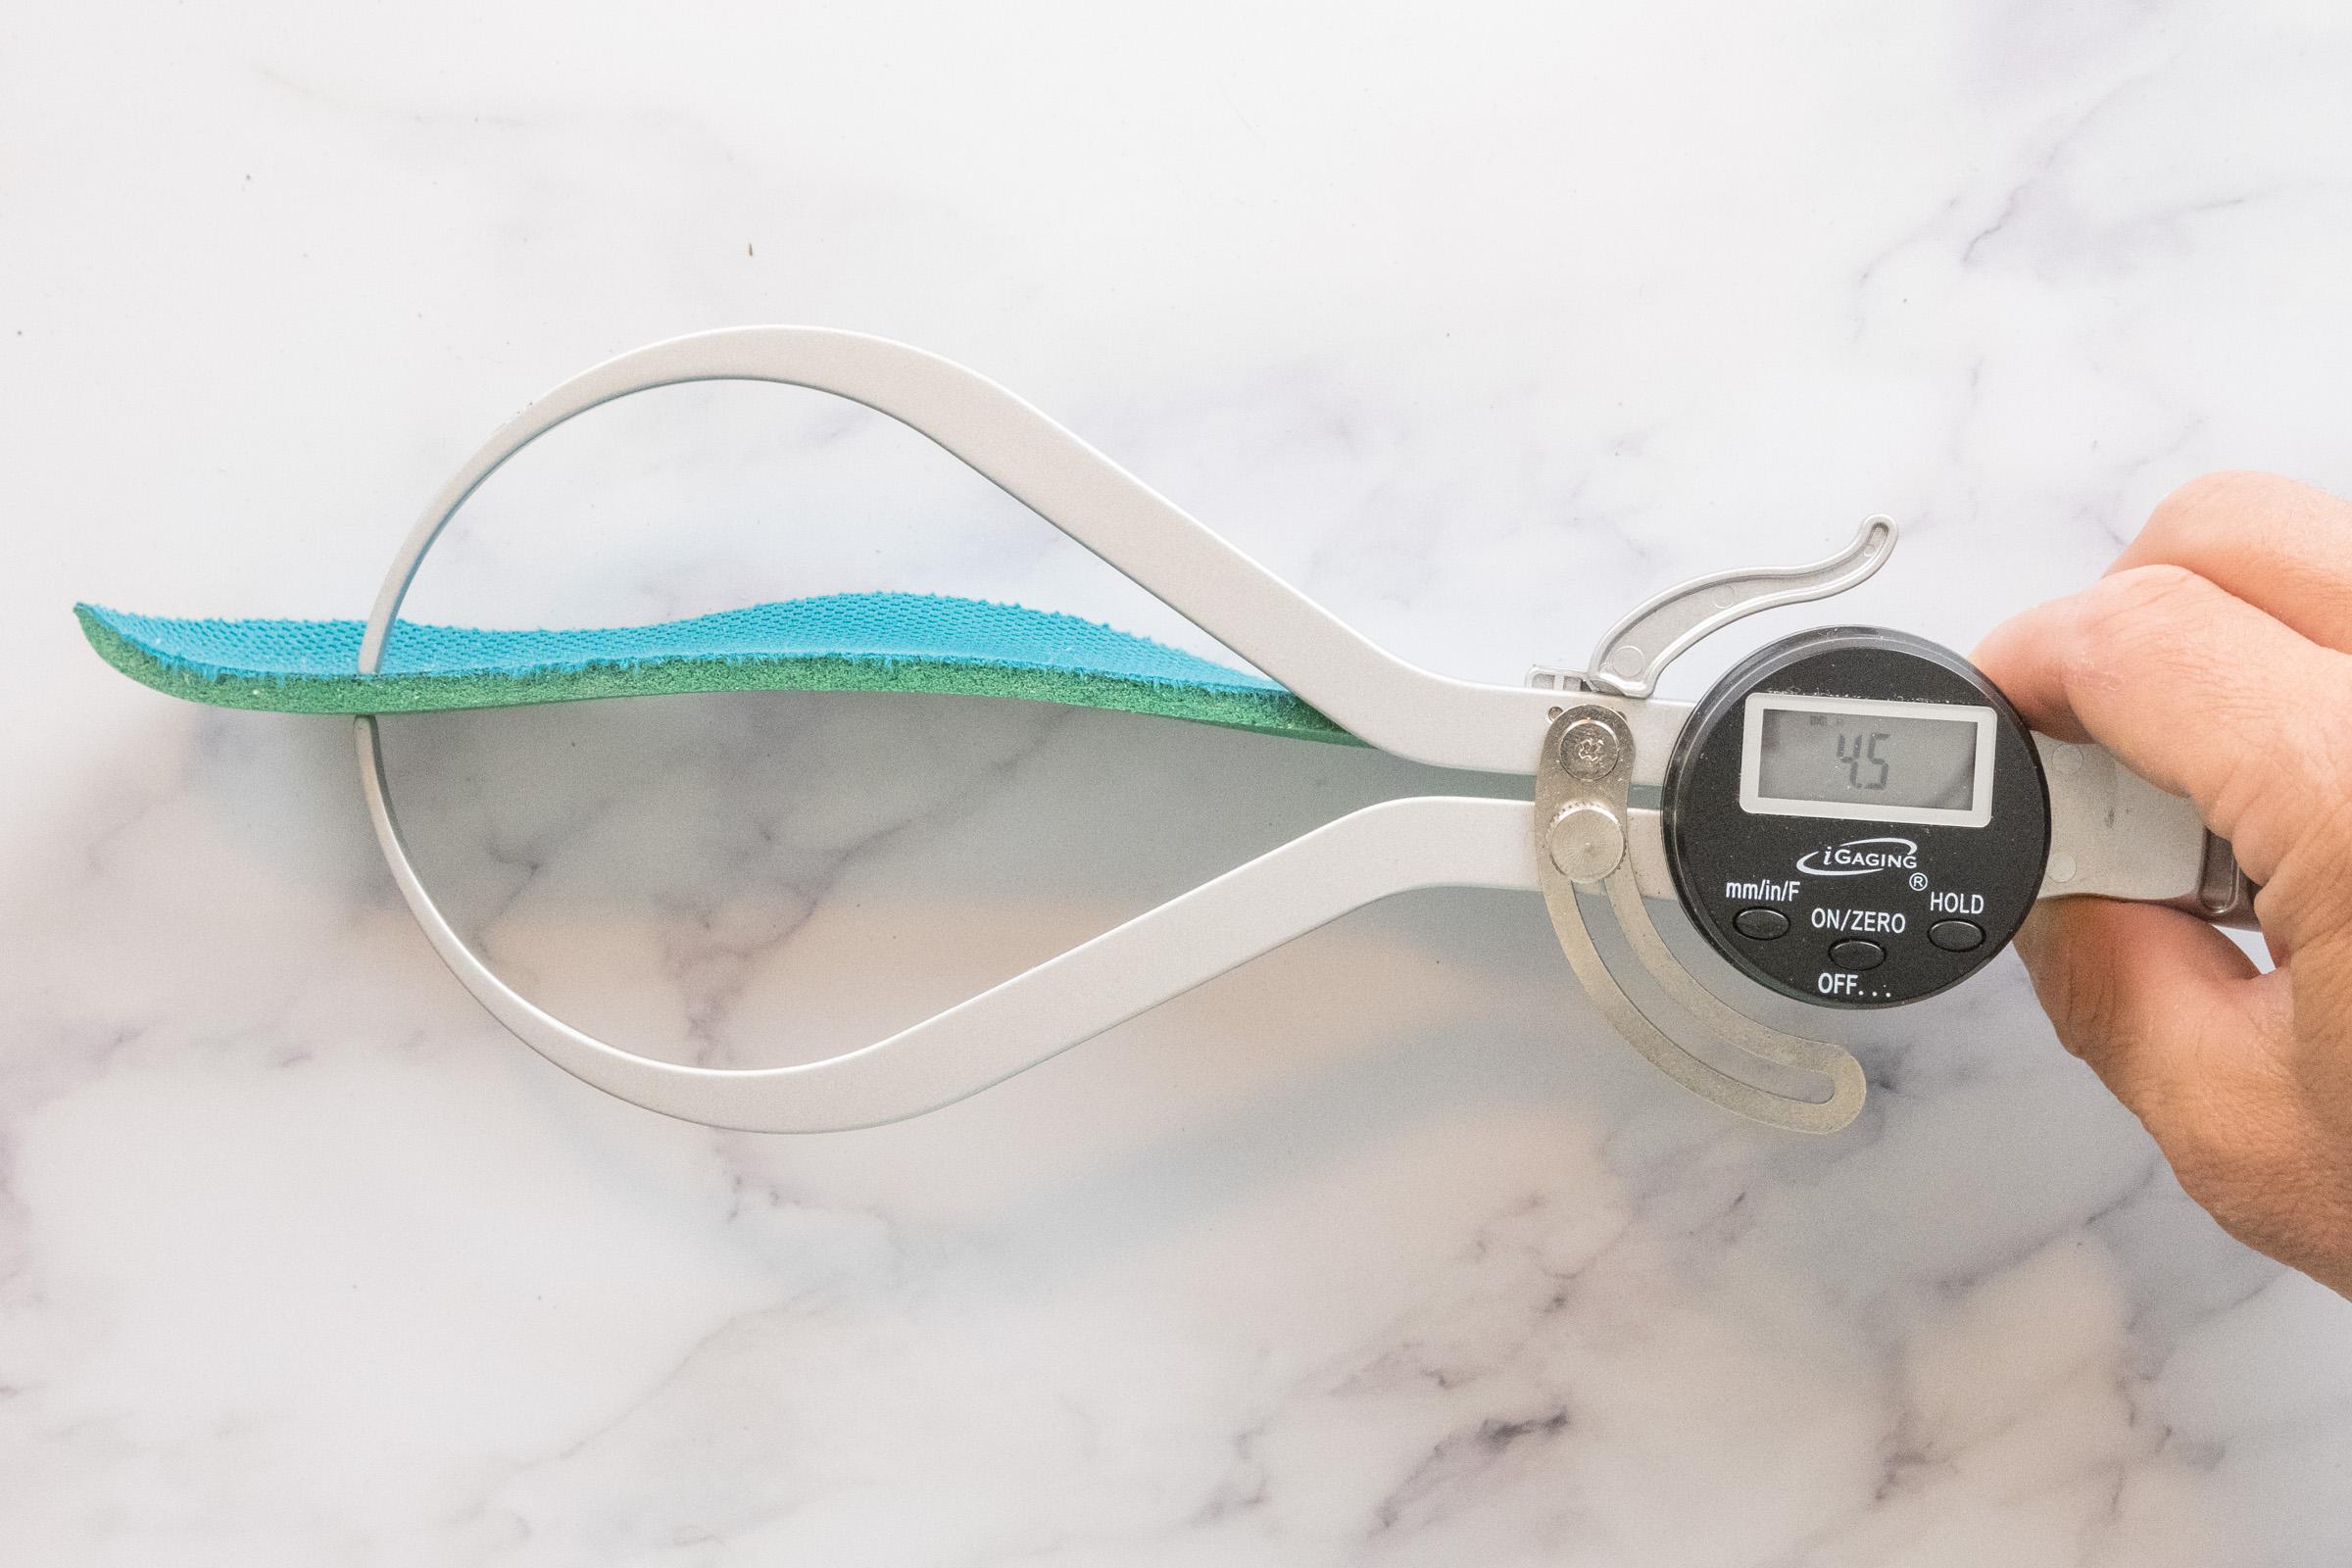
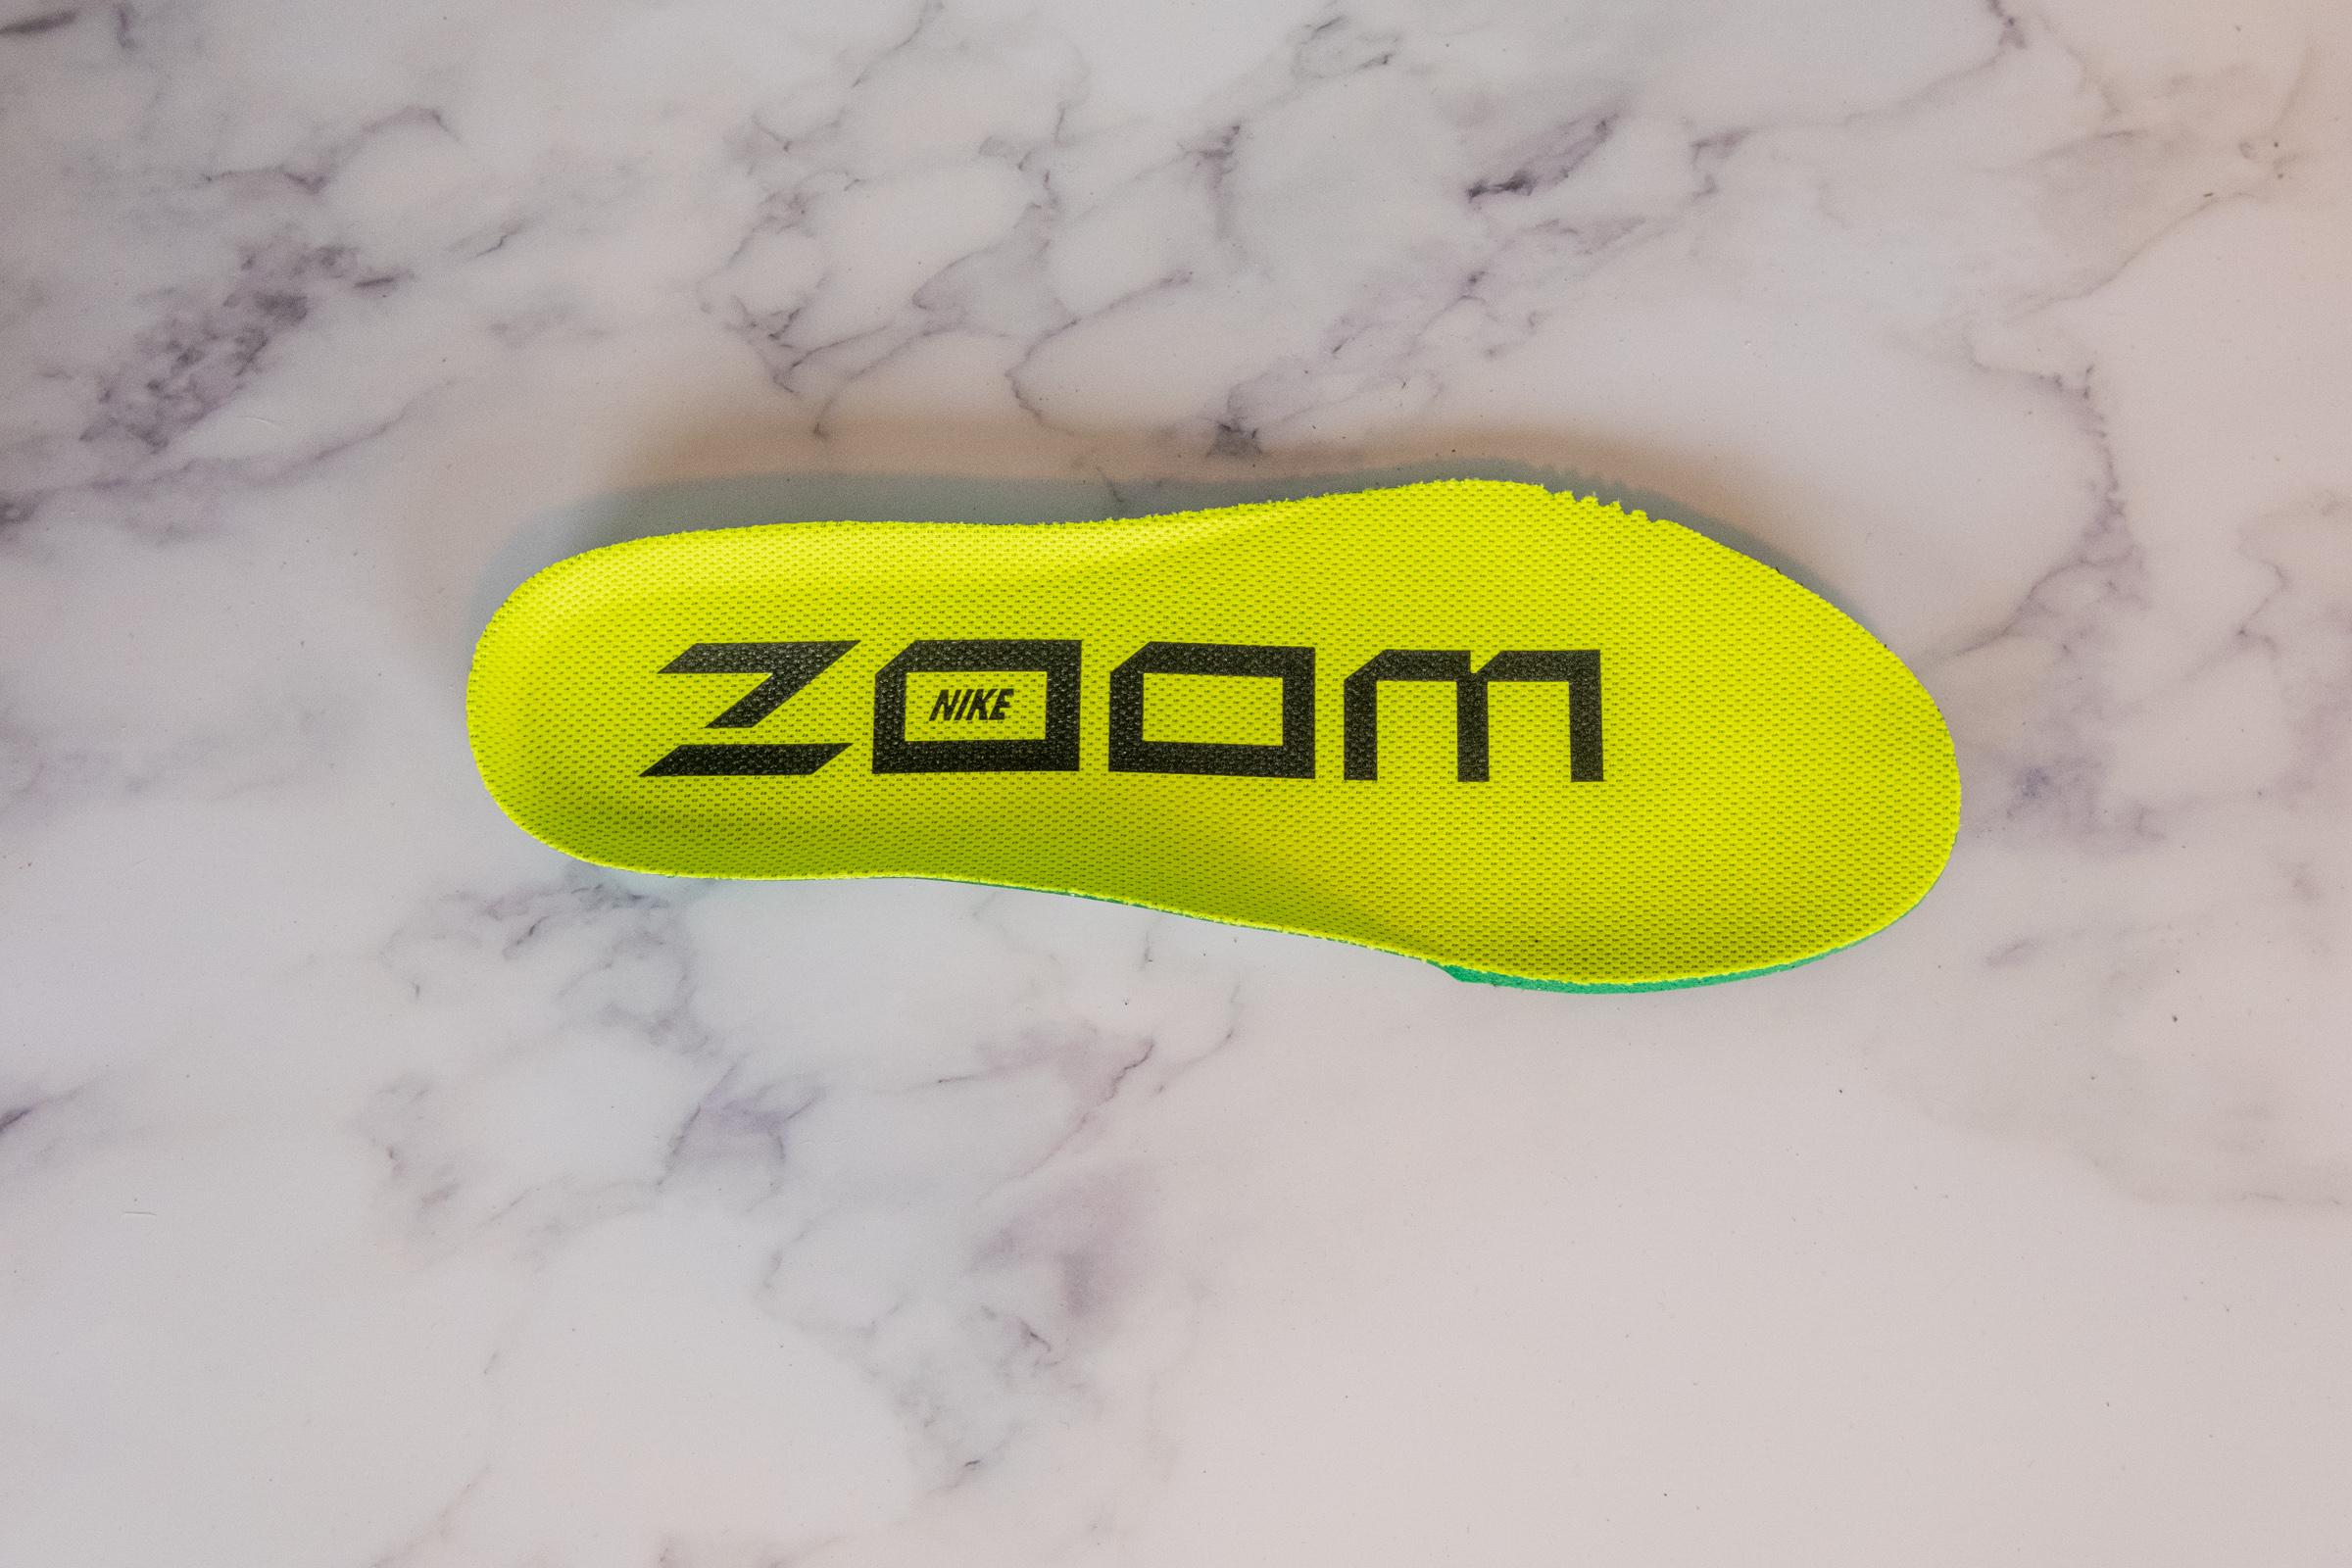
Insole thickness
We remove the insole and measure the thickness in the center of the heel and note if it’s removable or not.
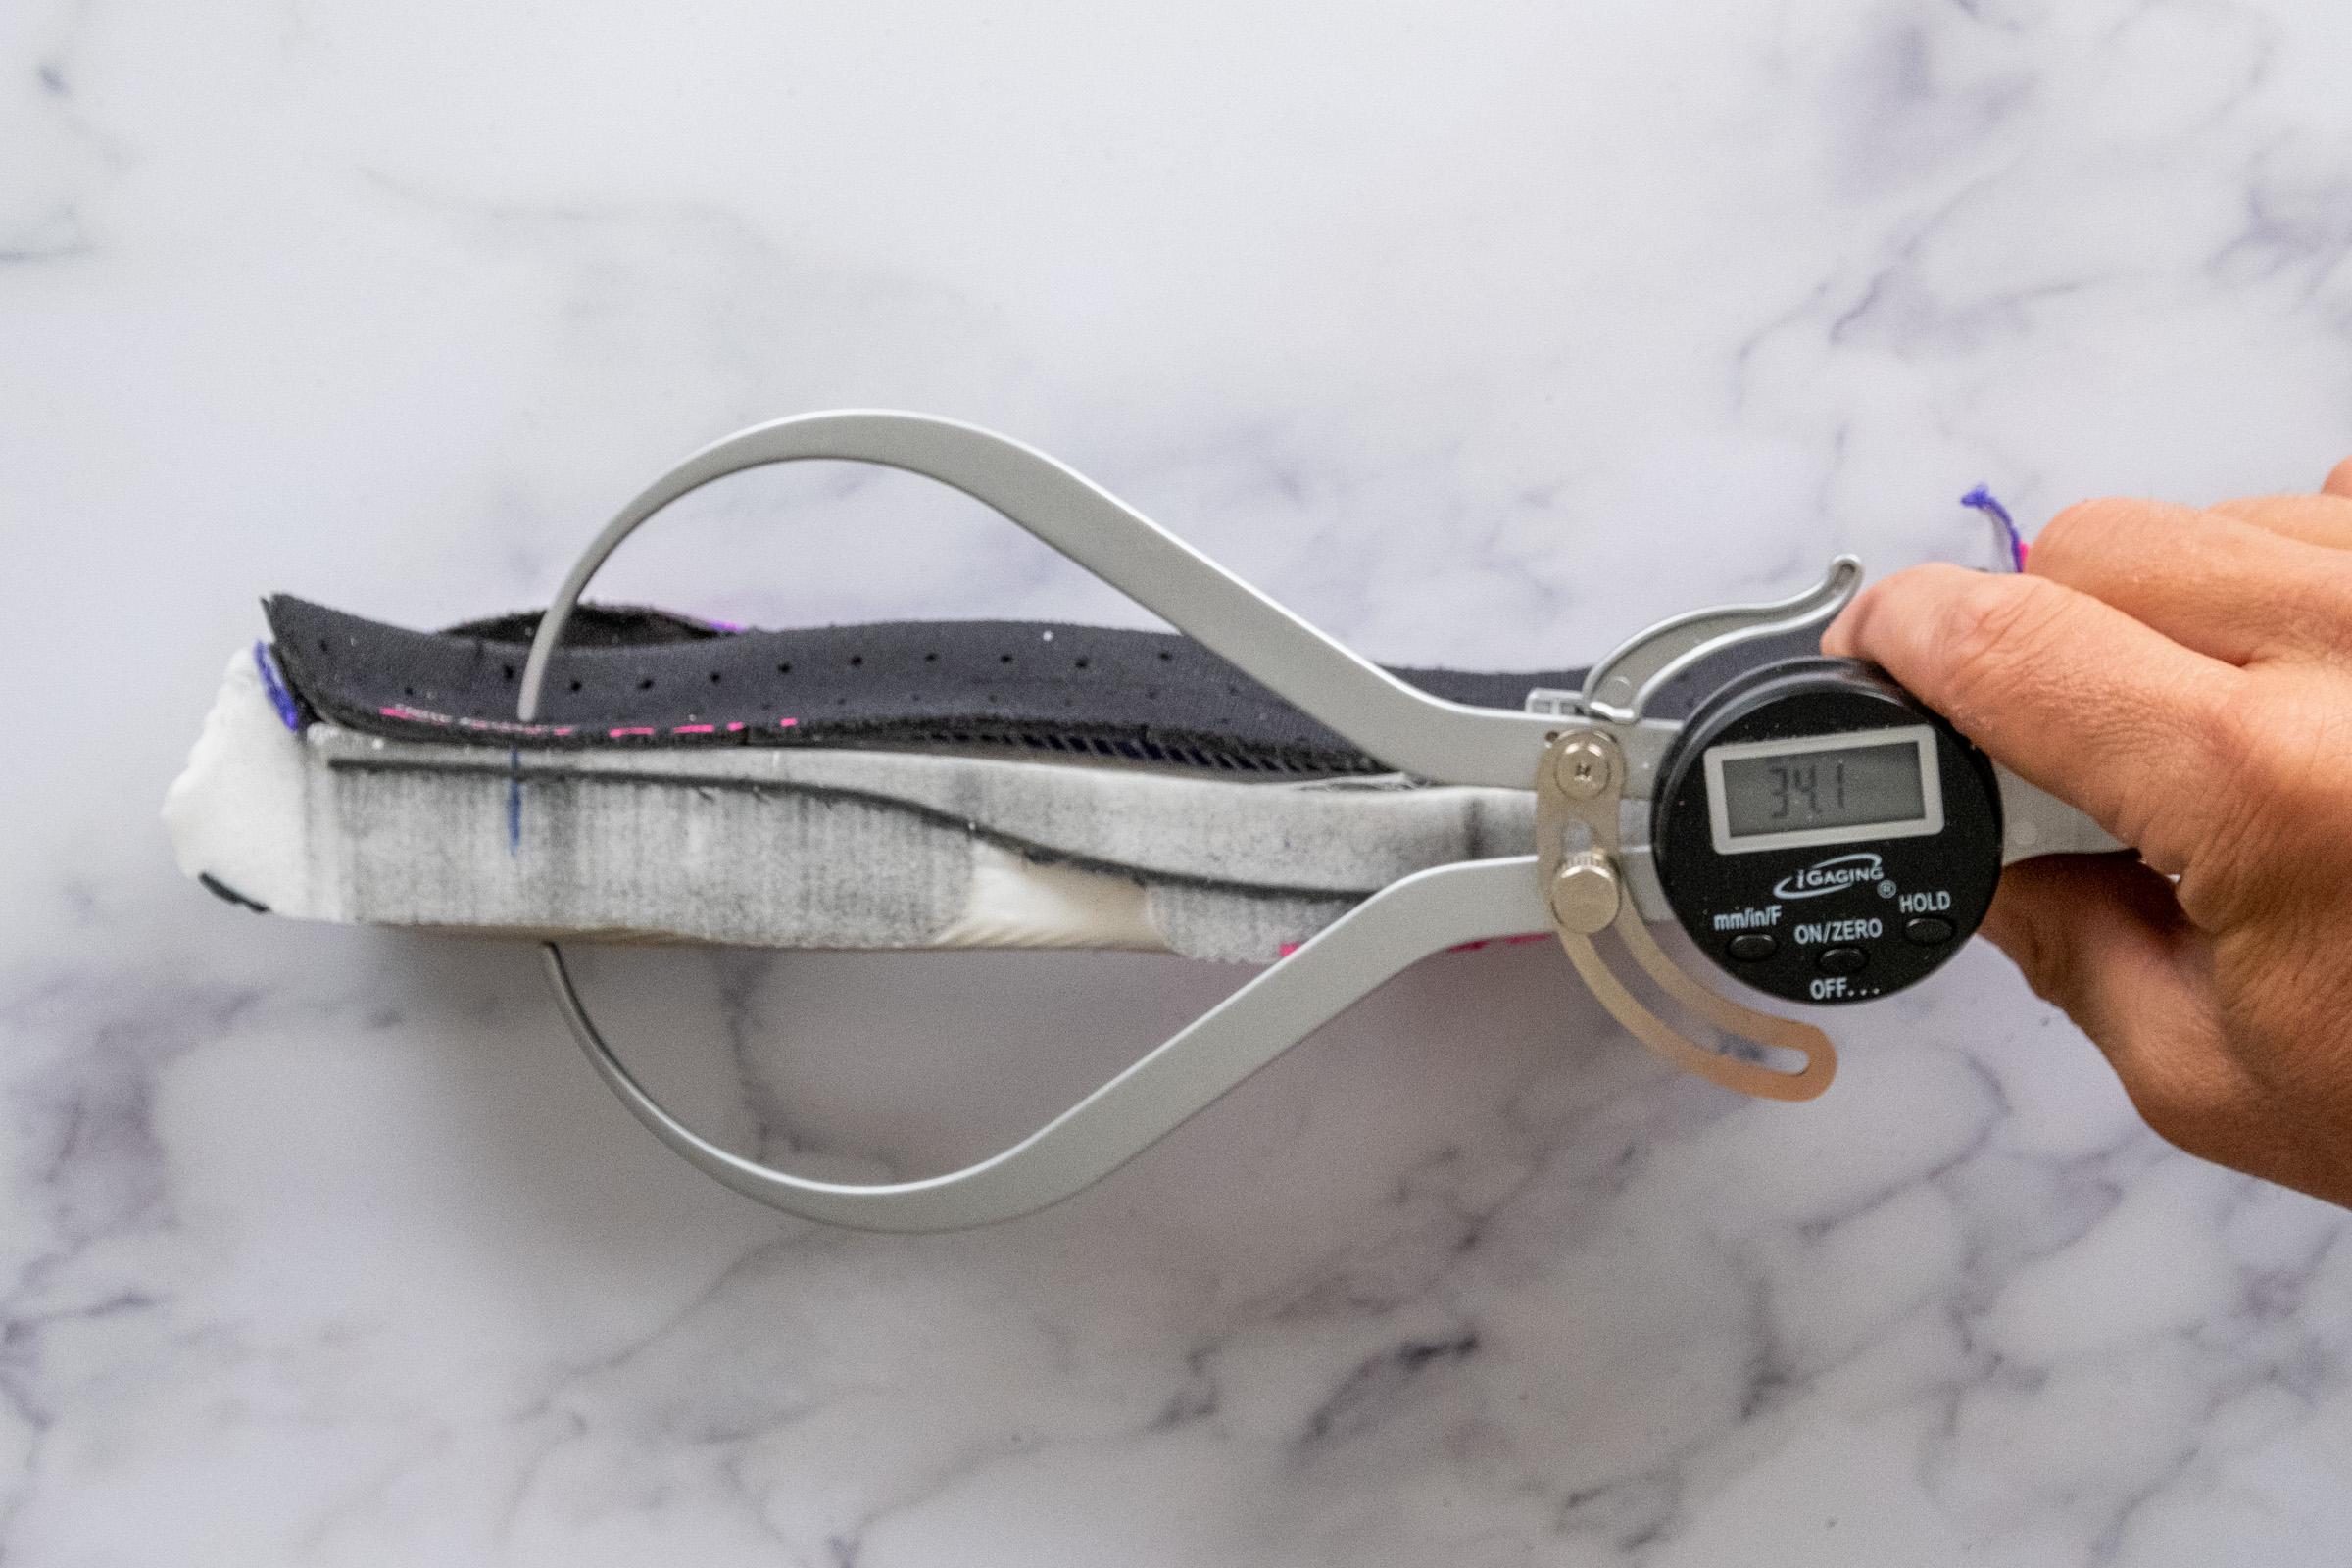
Tongue thickness and gussets
We measure the thickness of the thickest part of the tongue.
We also note if and how it’s gusseted to the shoe. Gusset options include
- None
- 1 side
- Both Sides (fully-gusseted)
- Both sides (semi-gusseted)
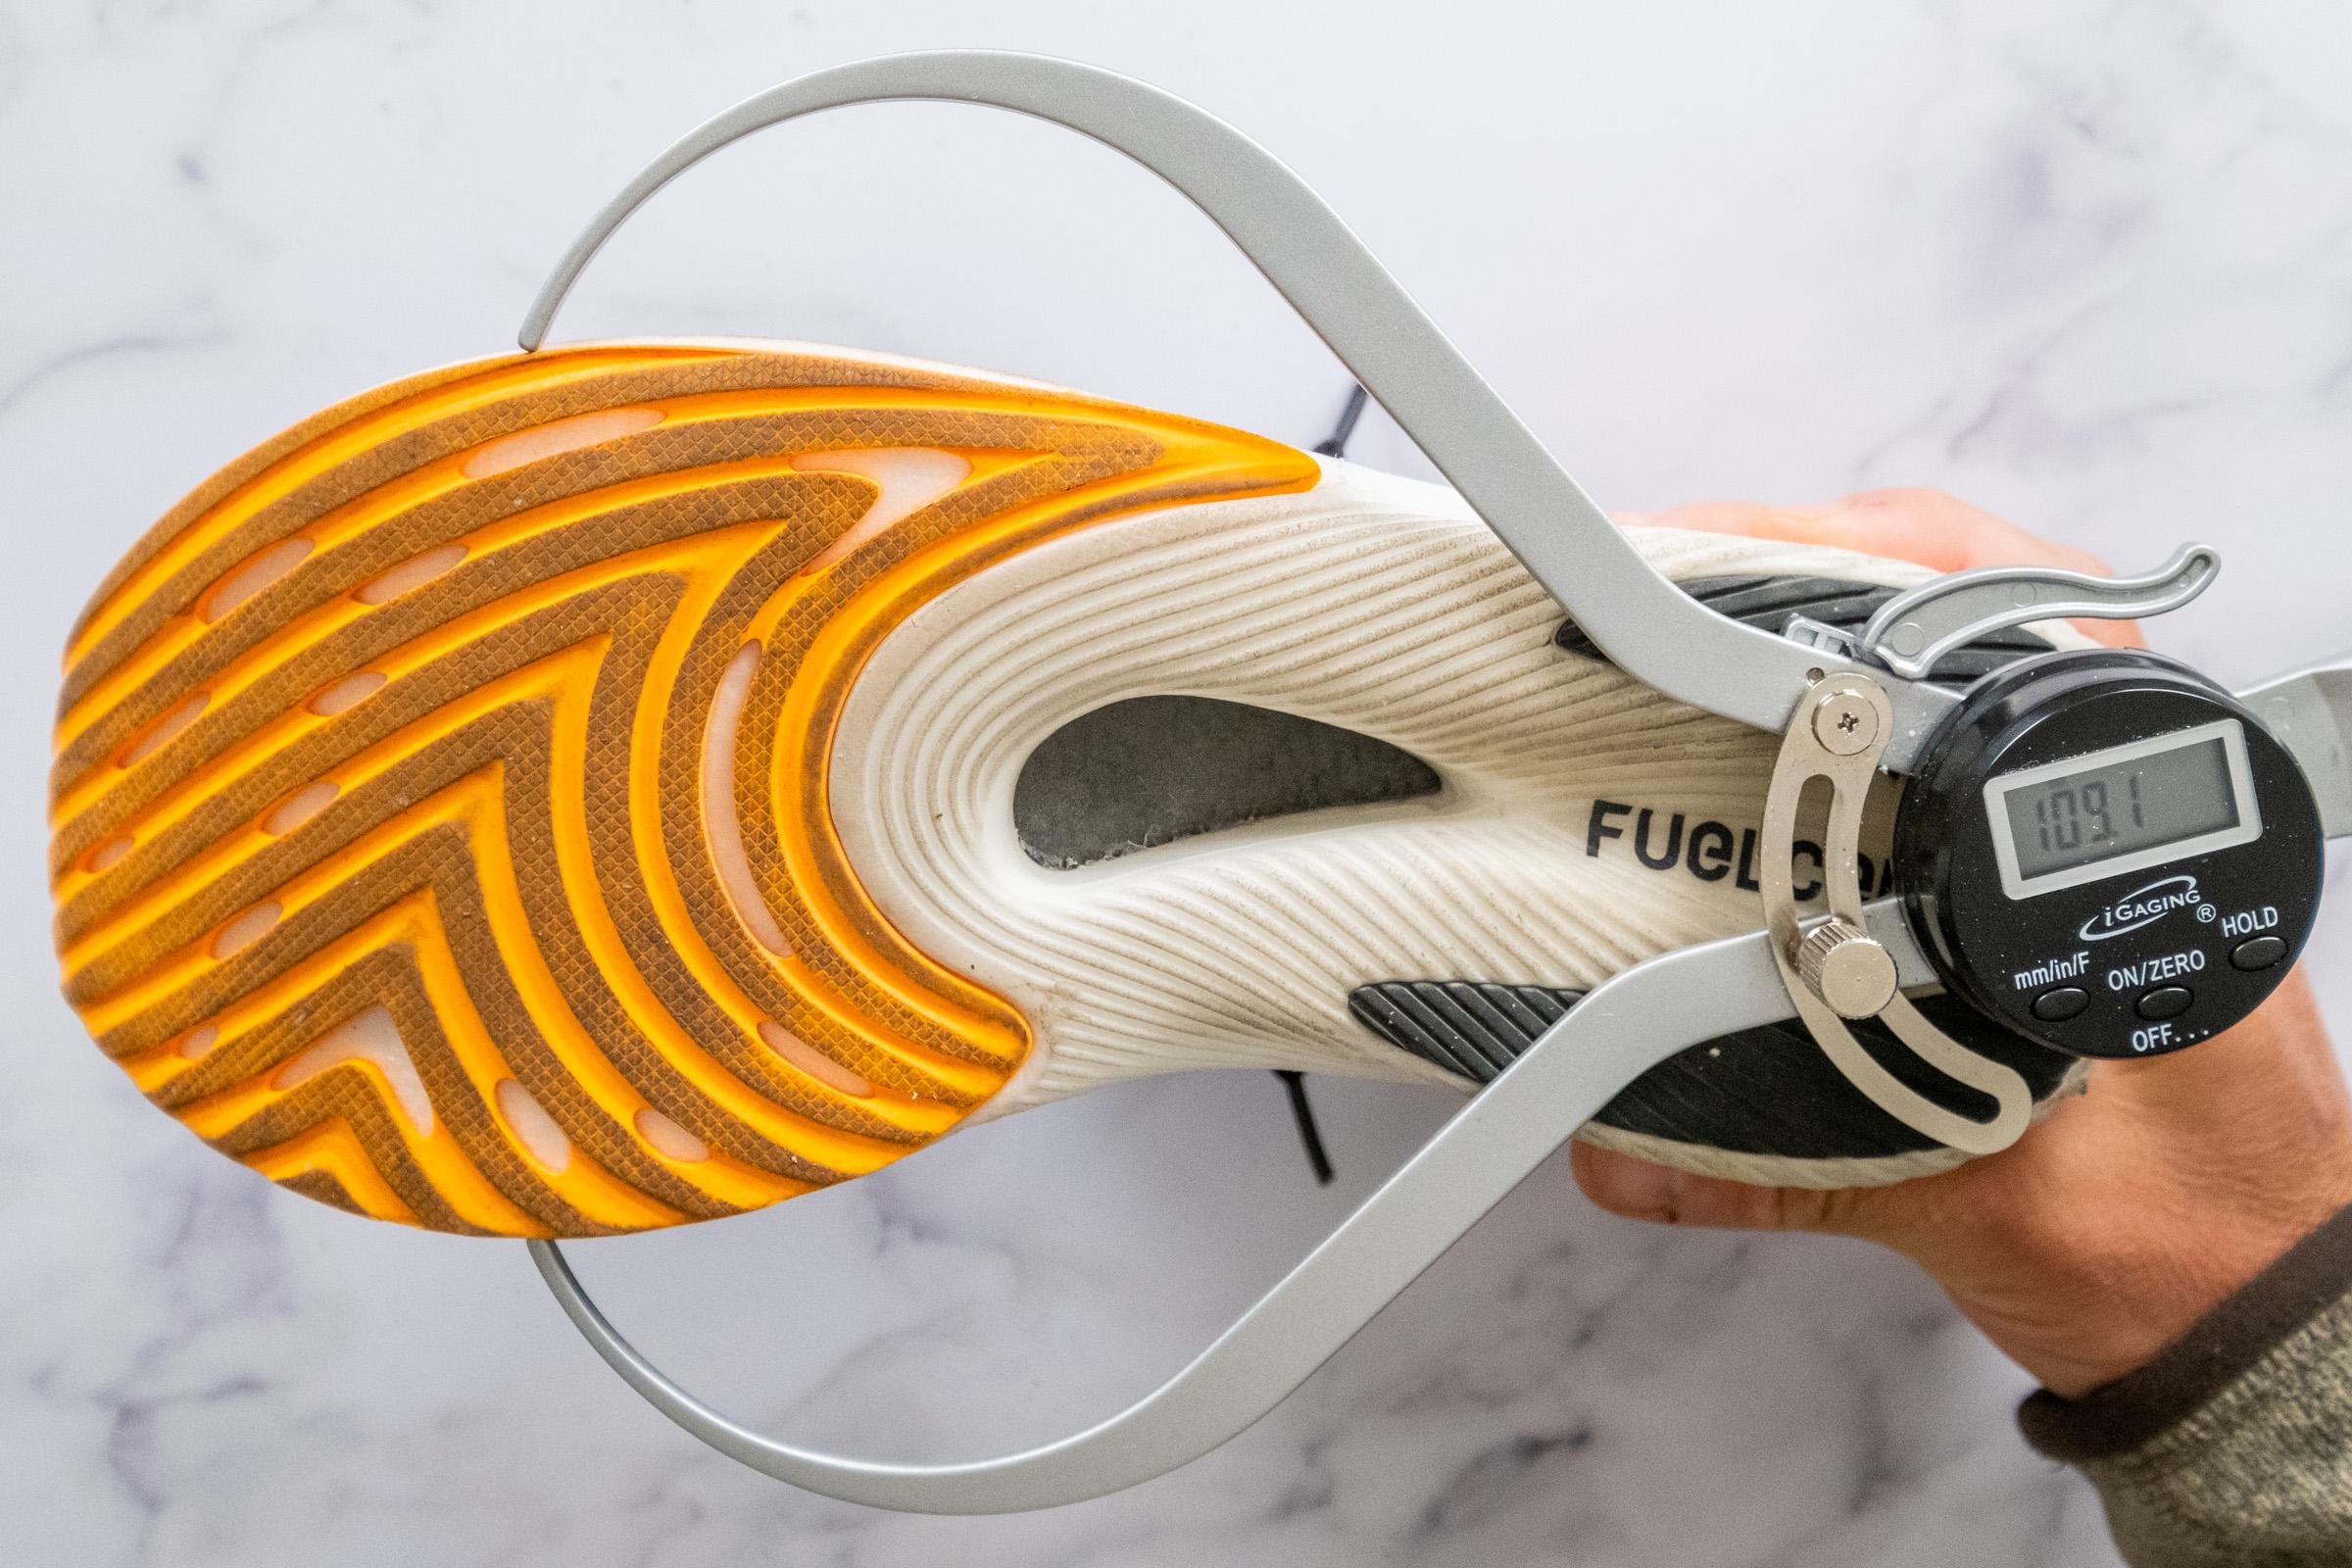
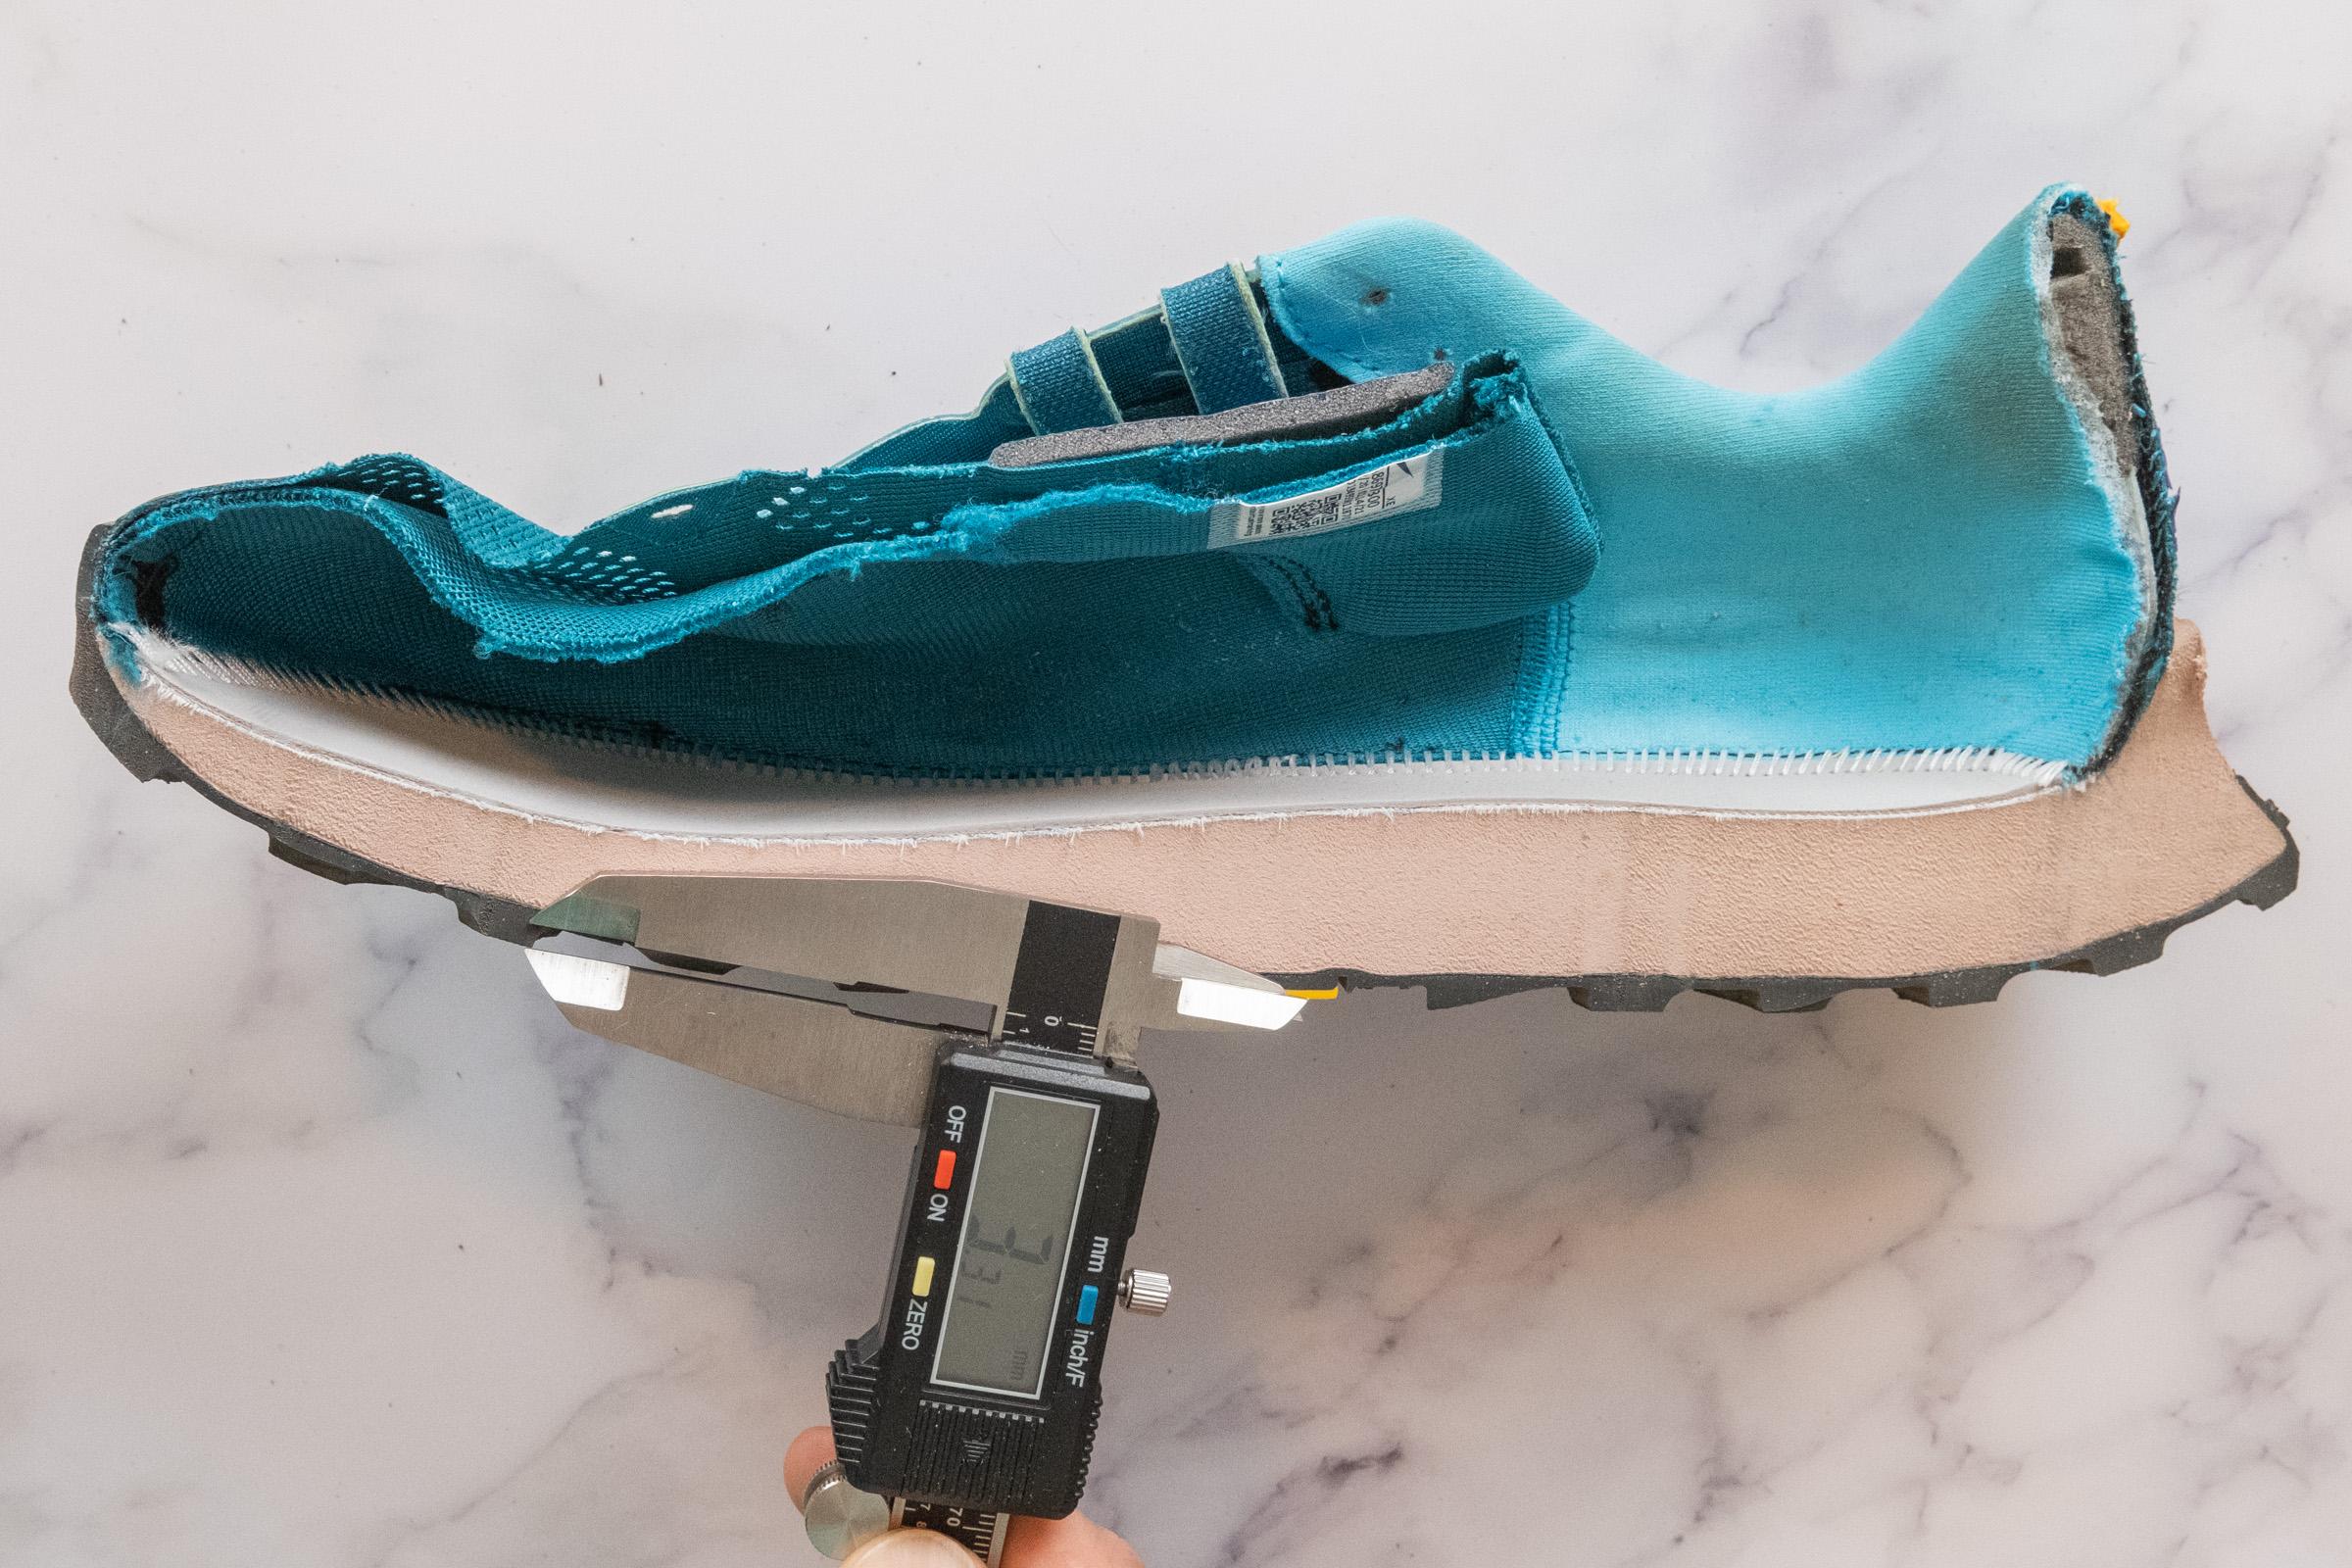
Outsole thickness
The outsole is measured in a few ways. With the shoe cut in half we measure the thickness of the outsole in the forefoot and heel, as well as the thickness of any lugs that may be present (for example on trail shoes).
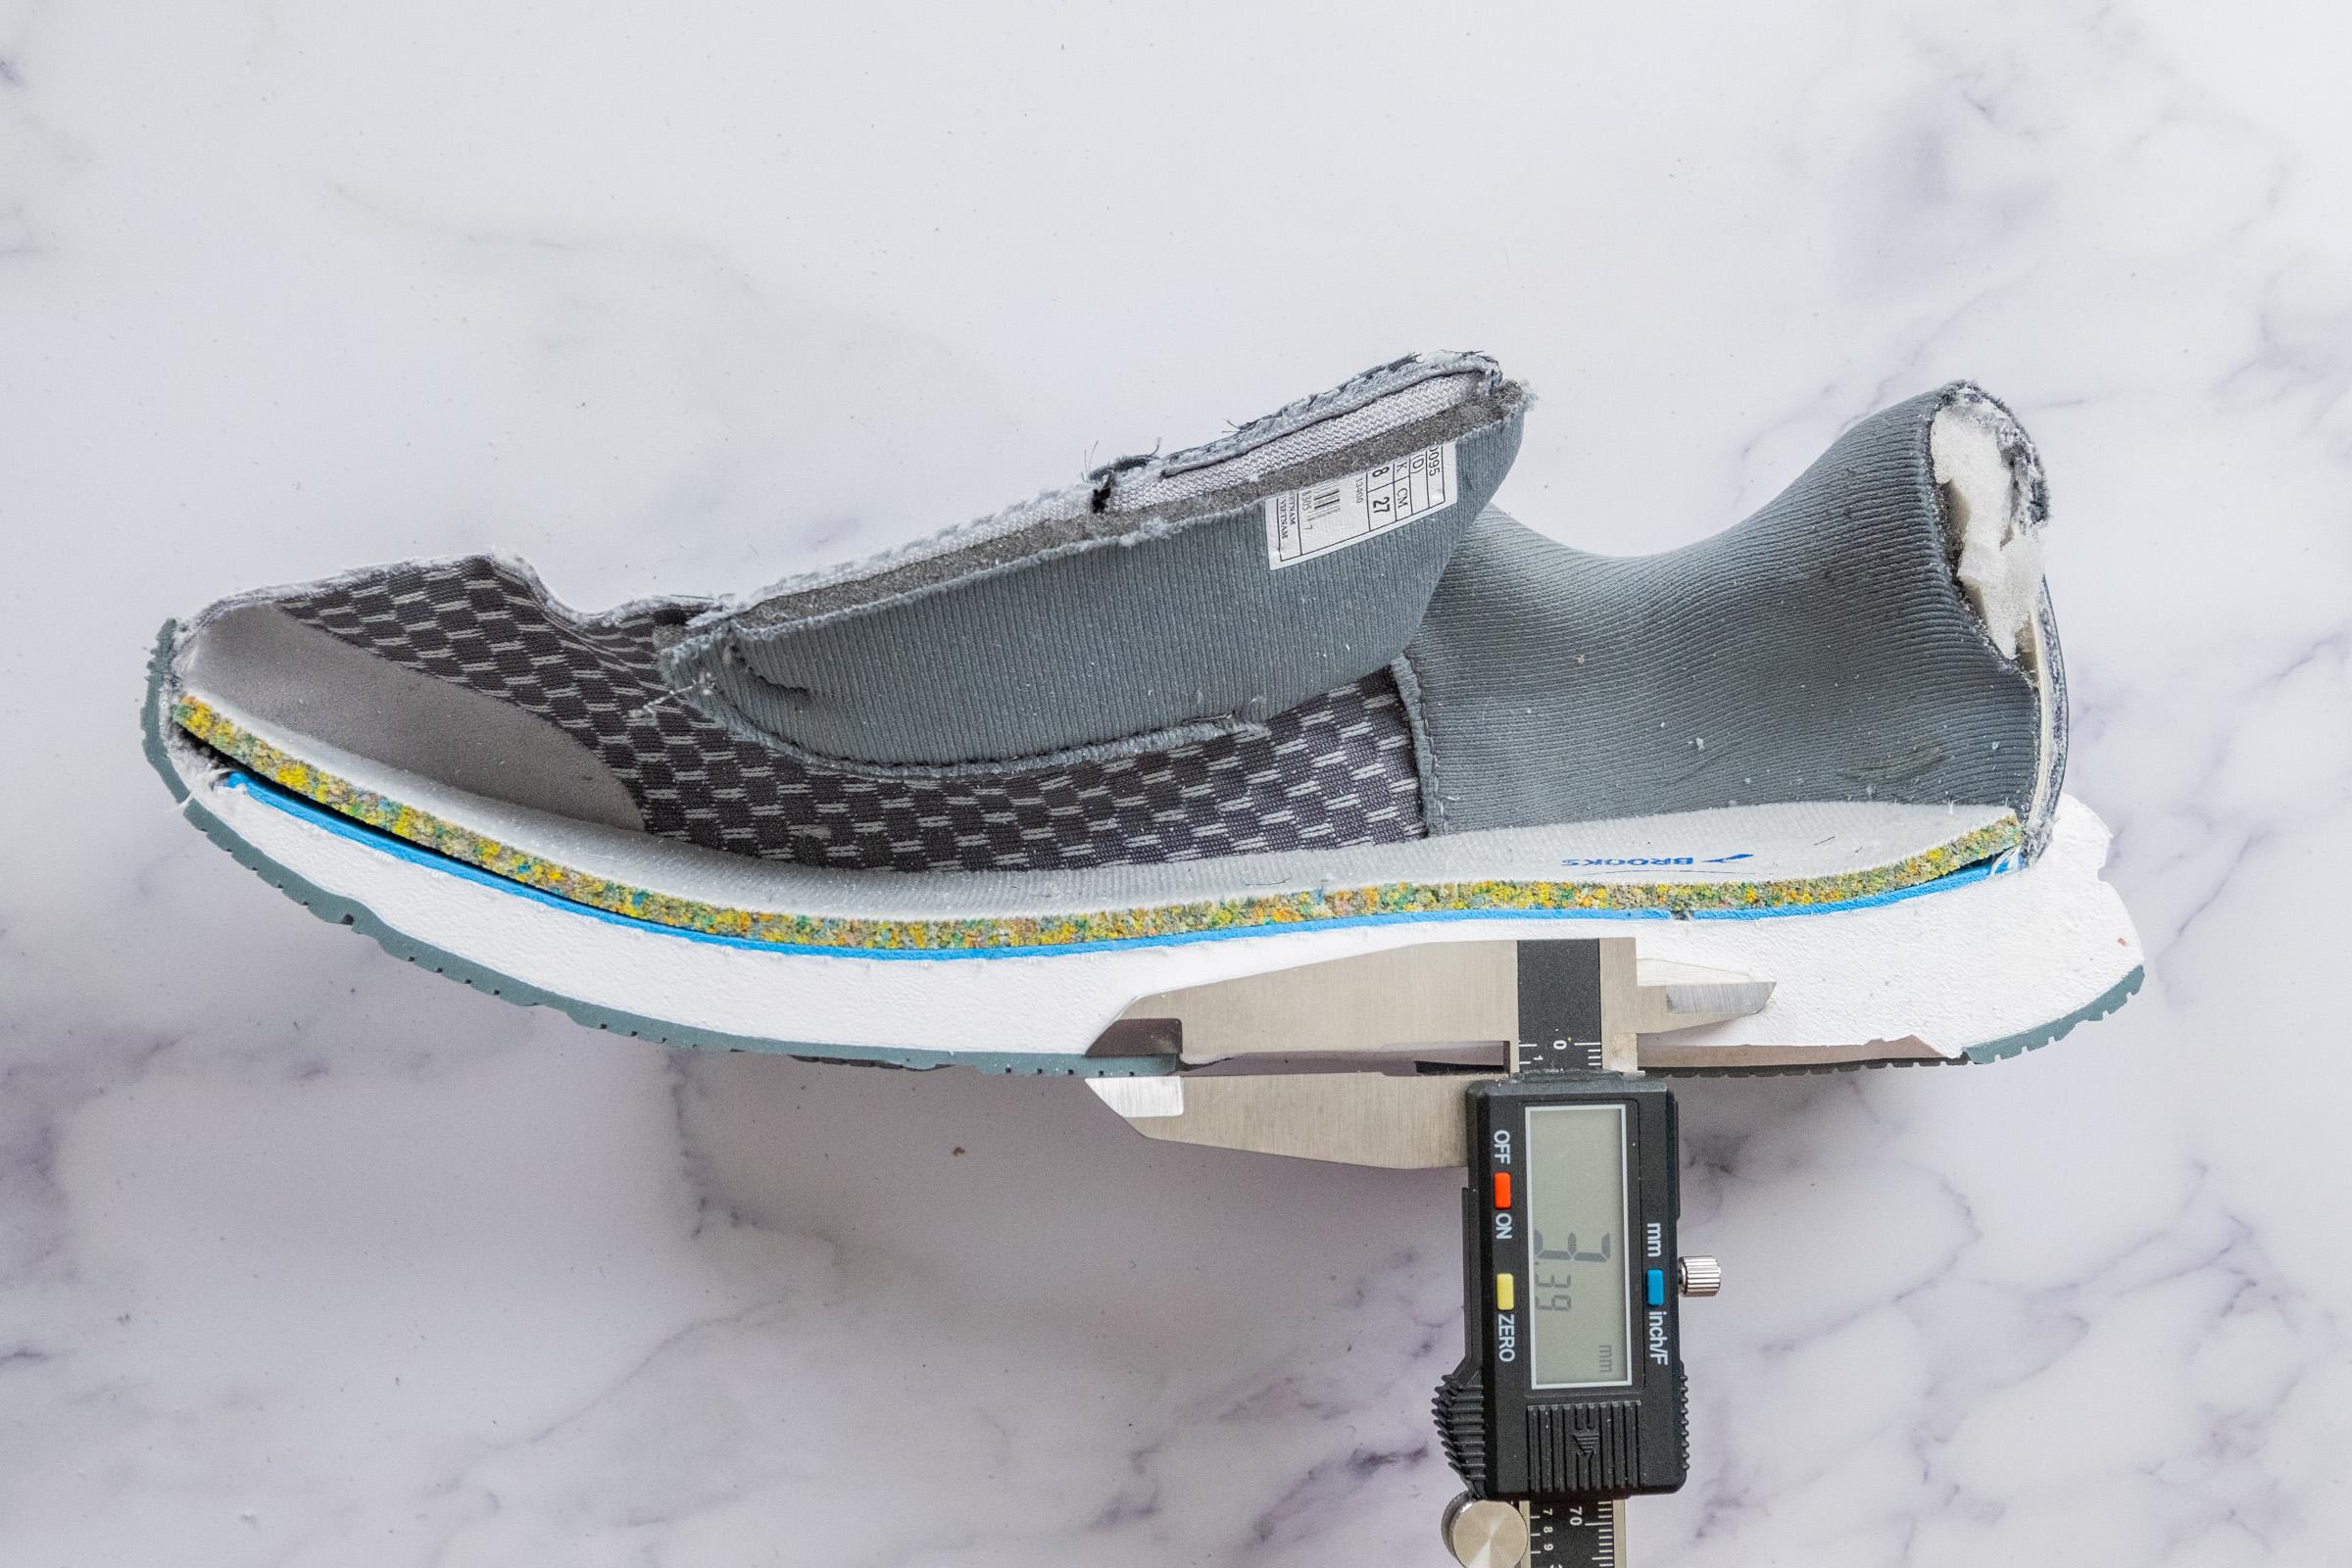
The measurement of any lug is from the base of the lug to the outermost edge of the lug and does not include the thickness of the base outsole.
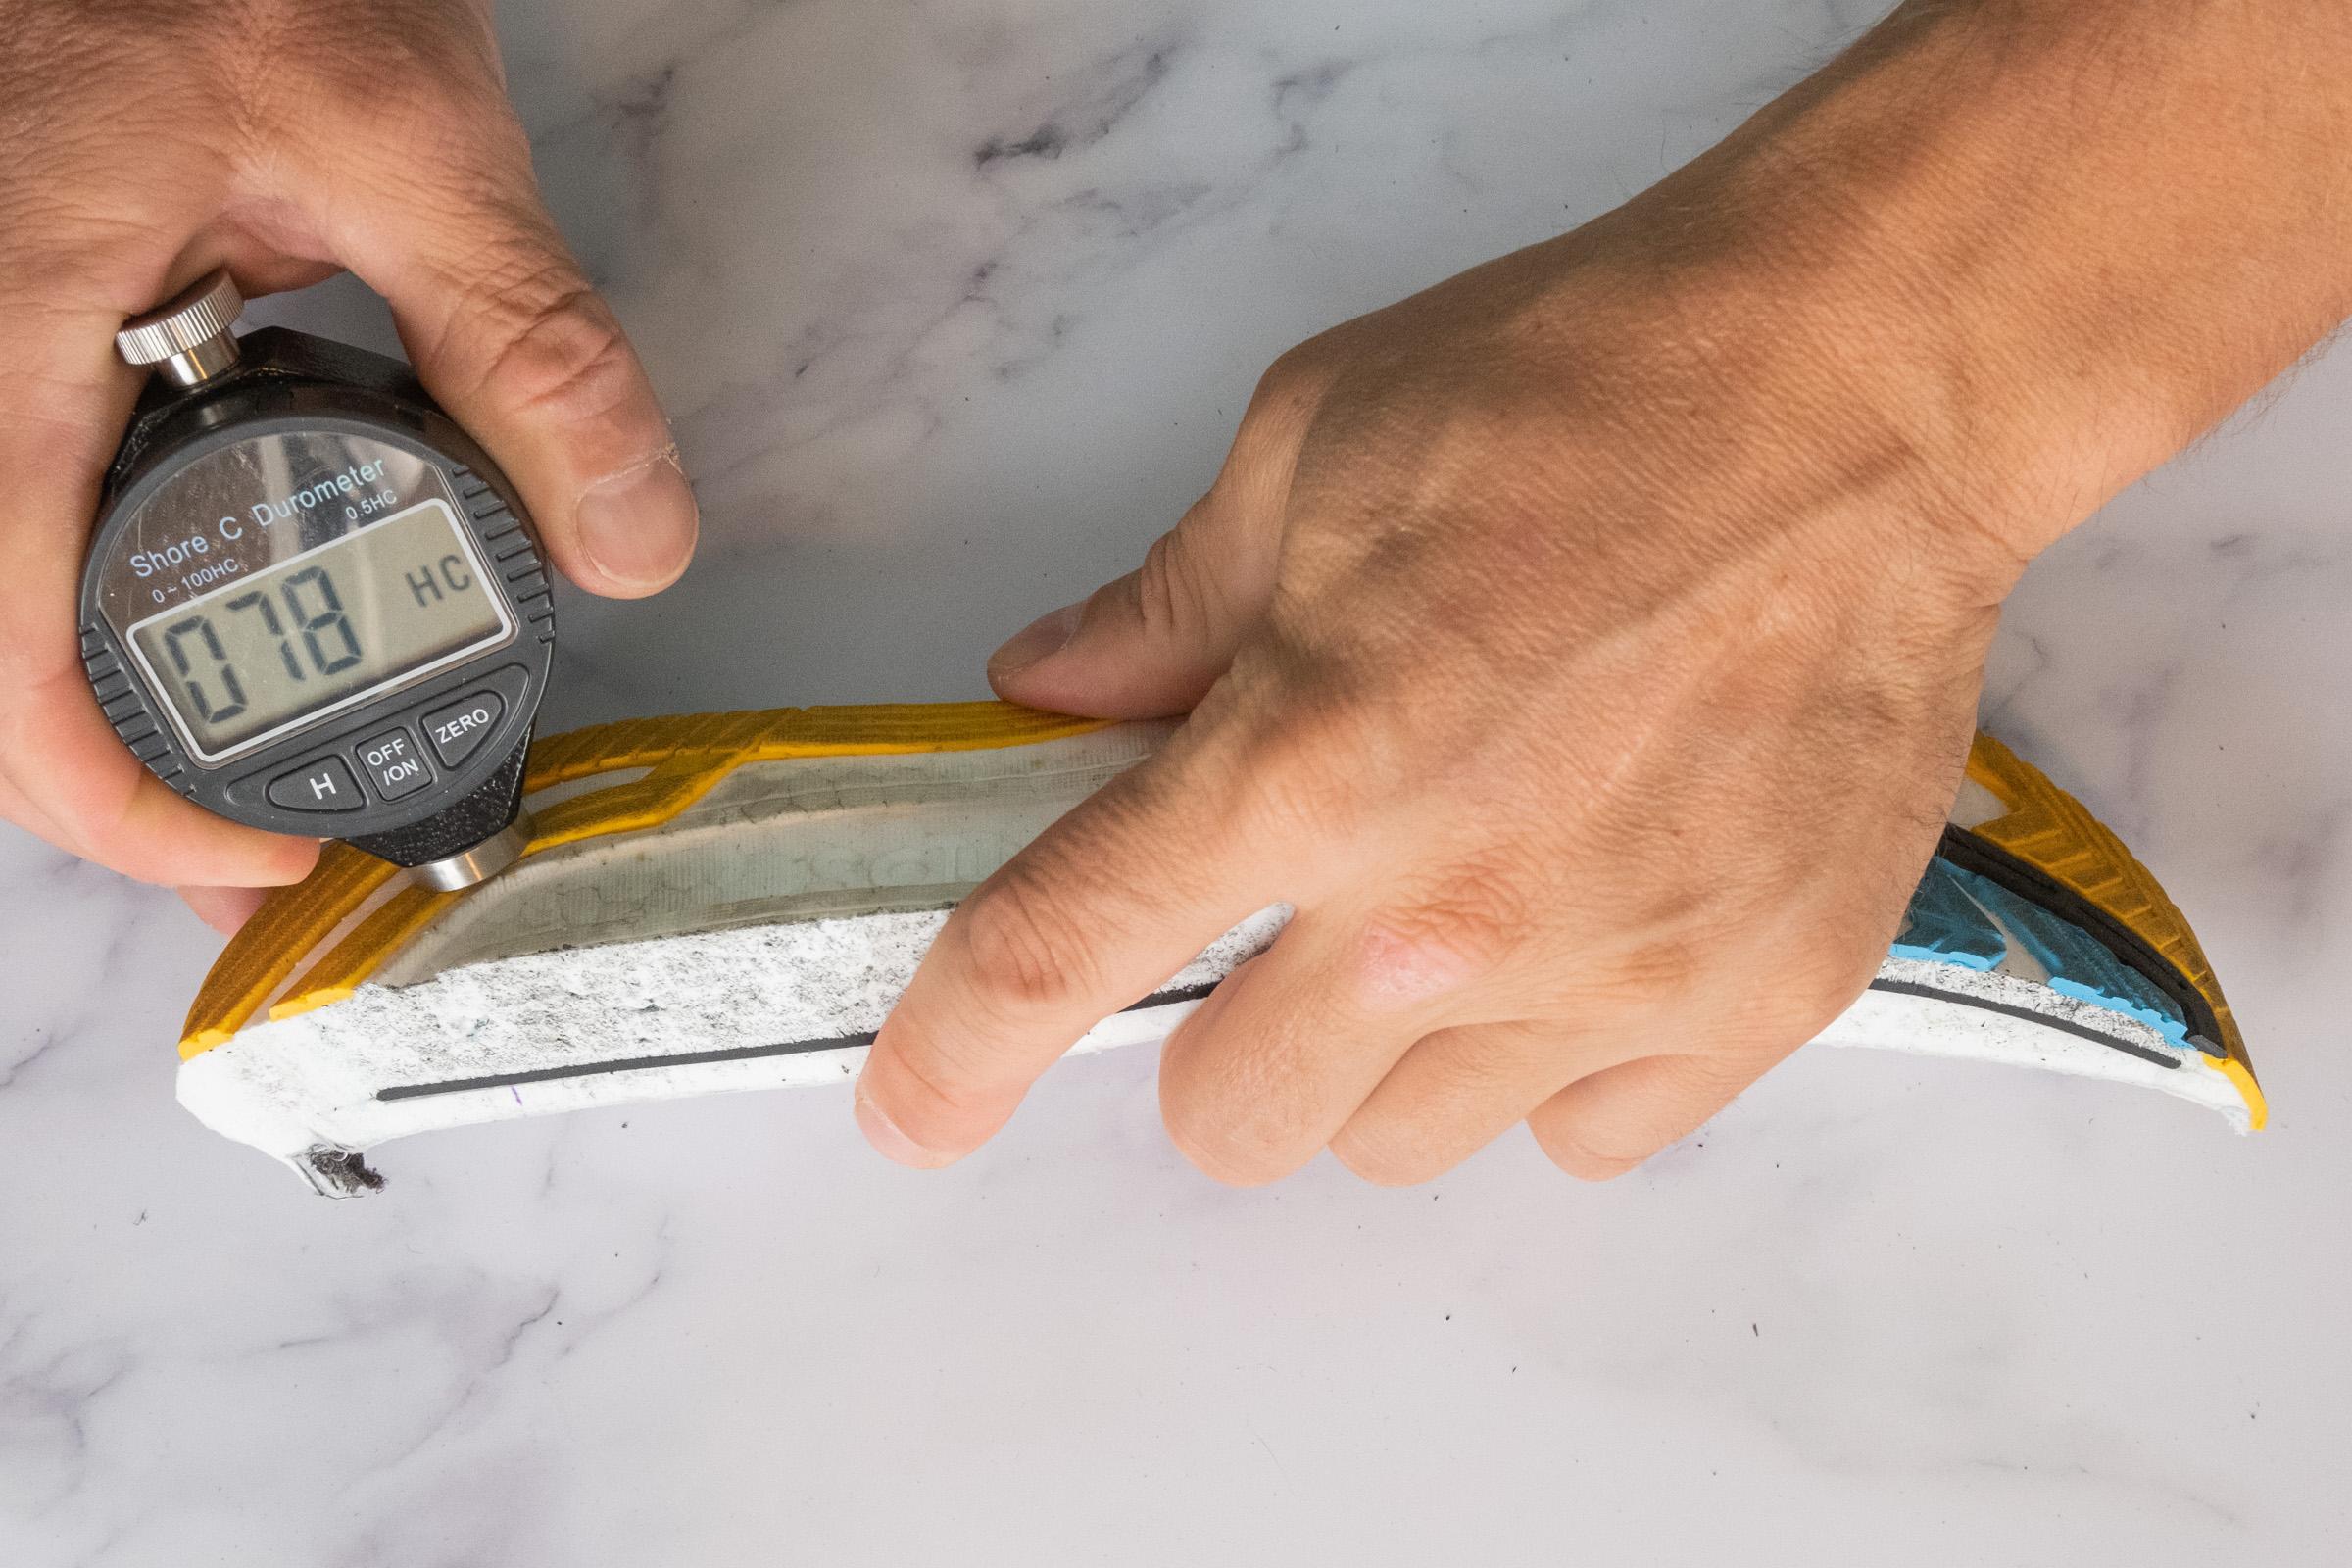
Outsole hardness
We also measure the hardness of the outsole material with an HC durometer at room temperature.
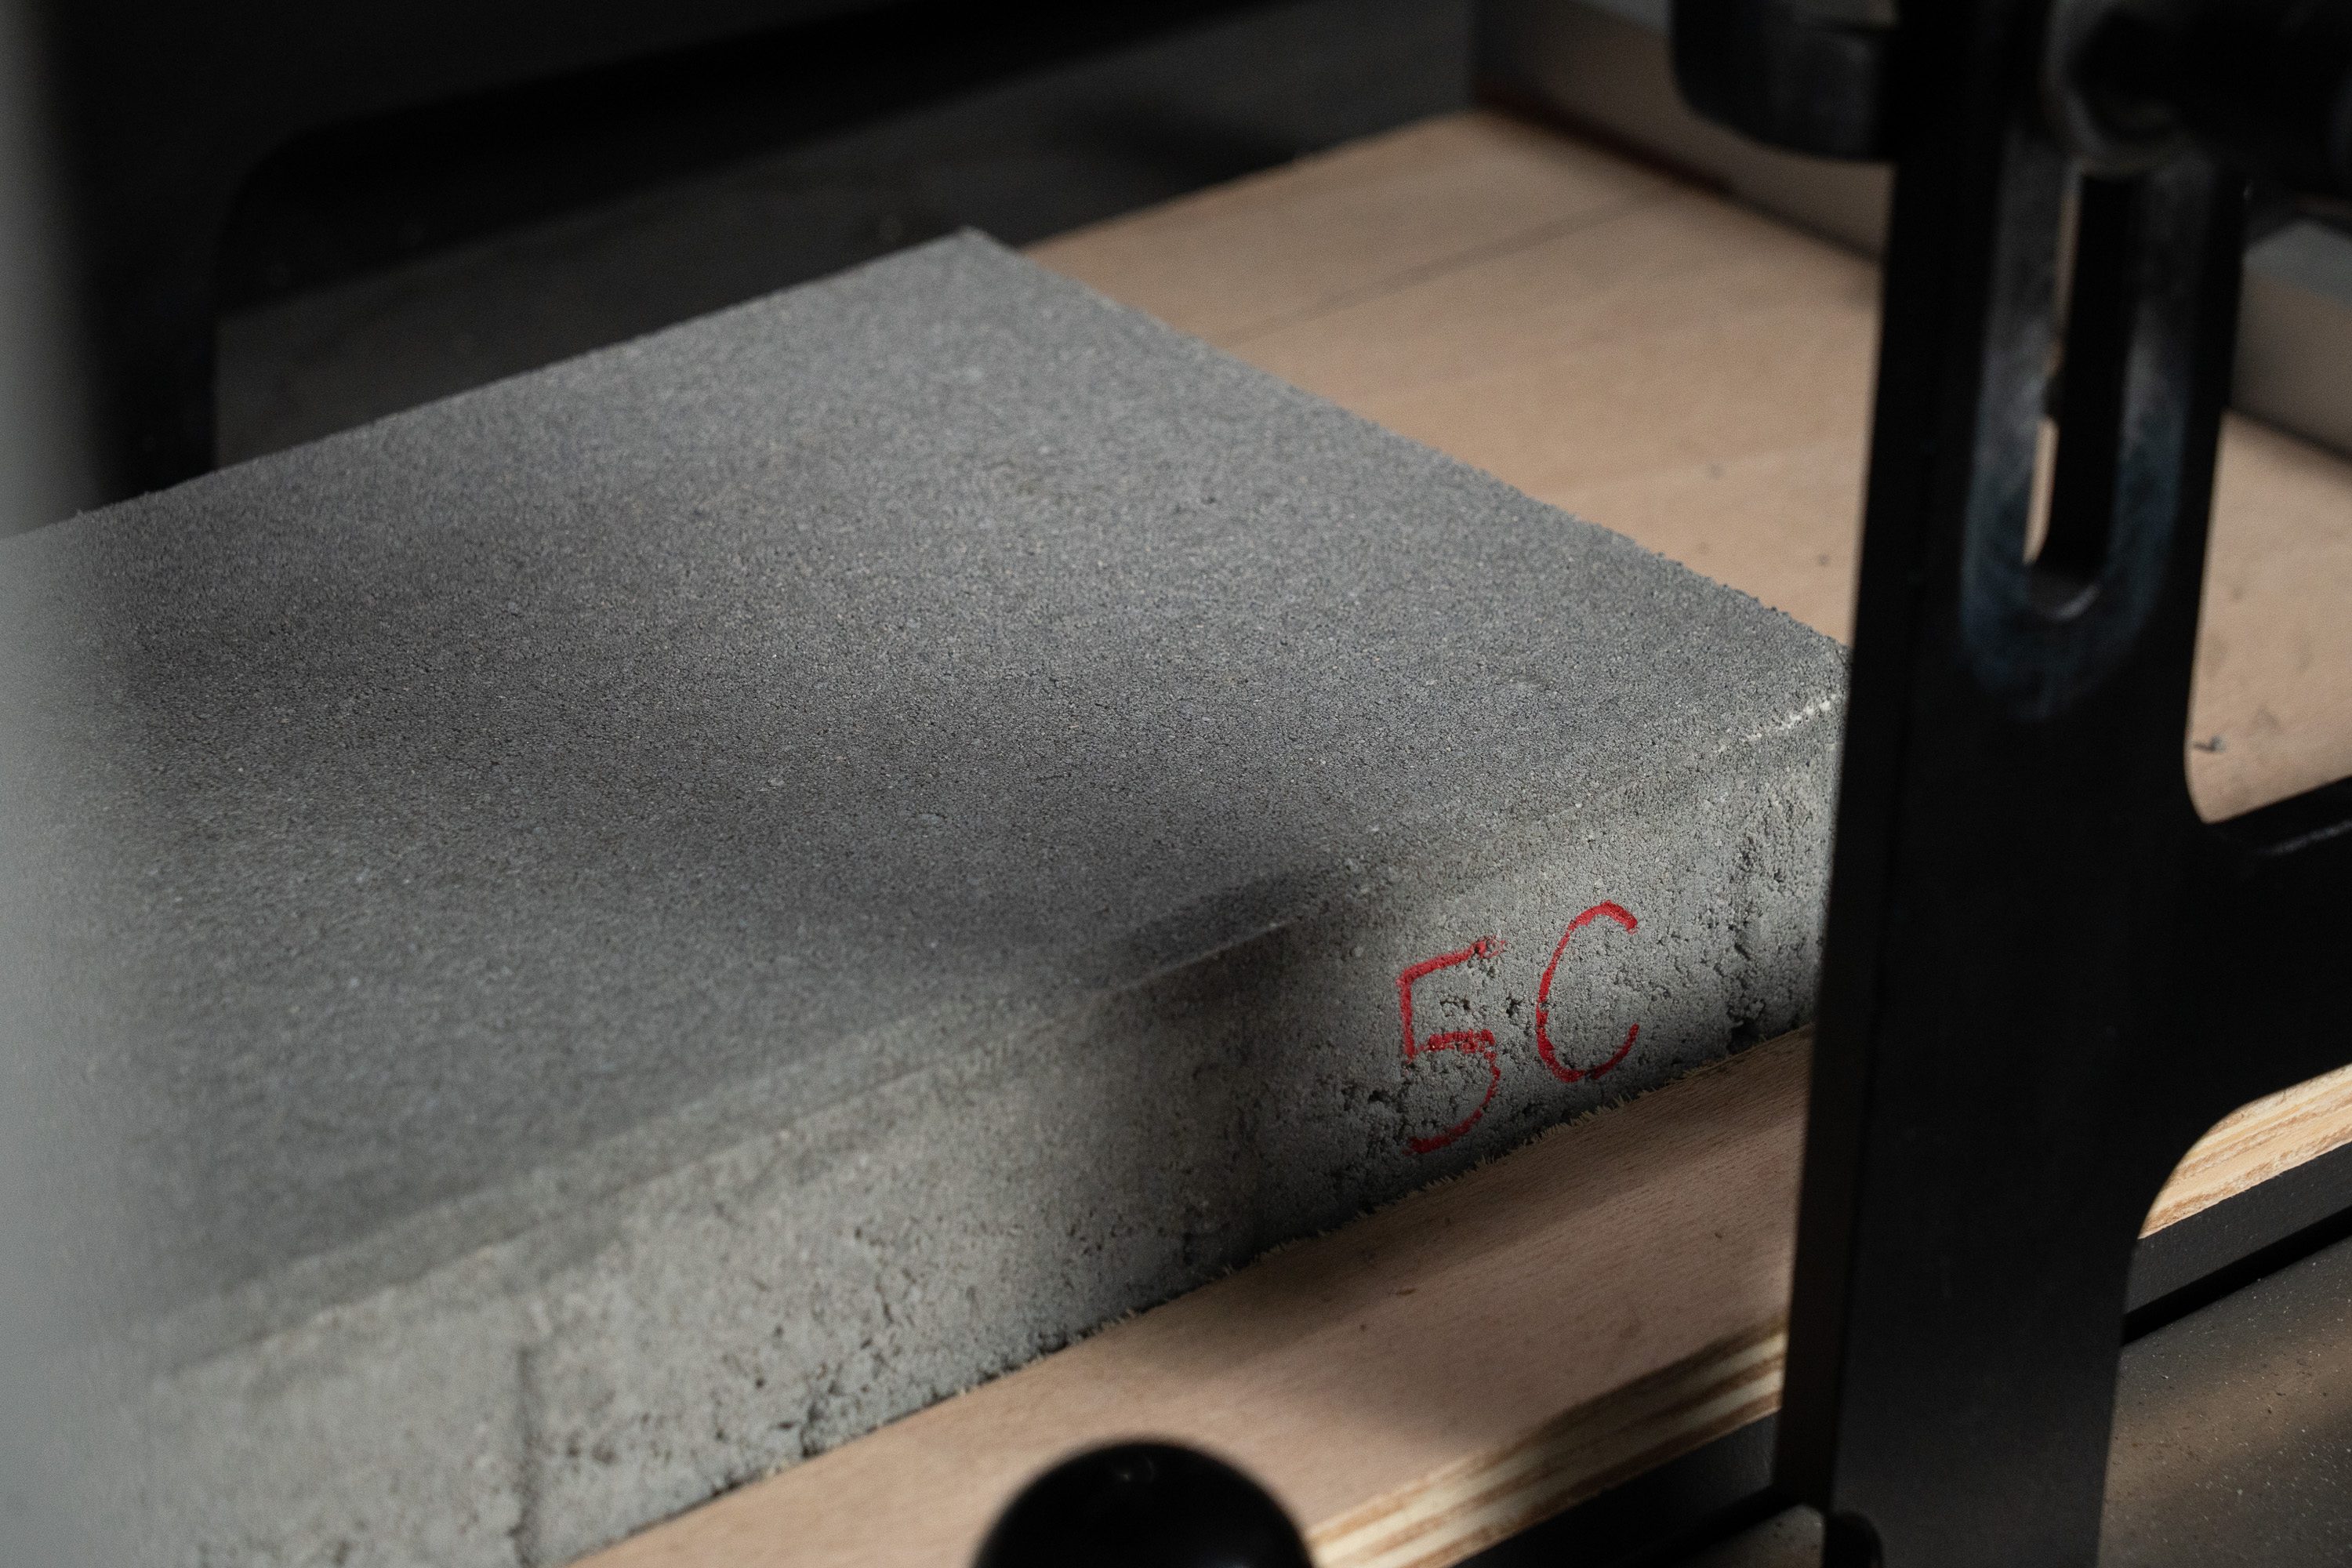
Midsole hardness
We measure the hardness of the midsole foam with an HA durometer at room temperature in the heel of the shoe, and if there are dual-density foams we measure those hardnesses as well.
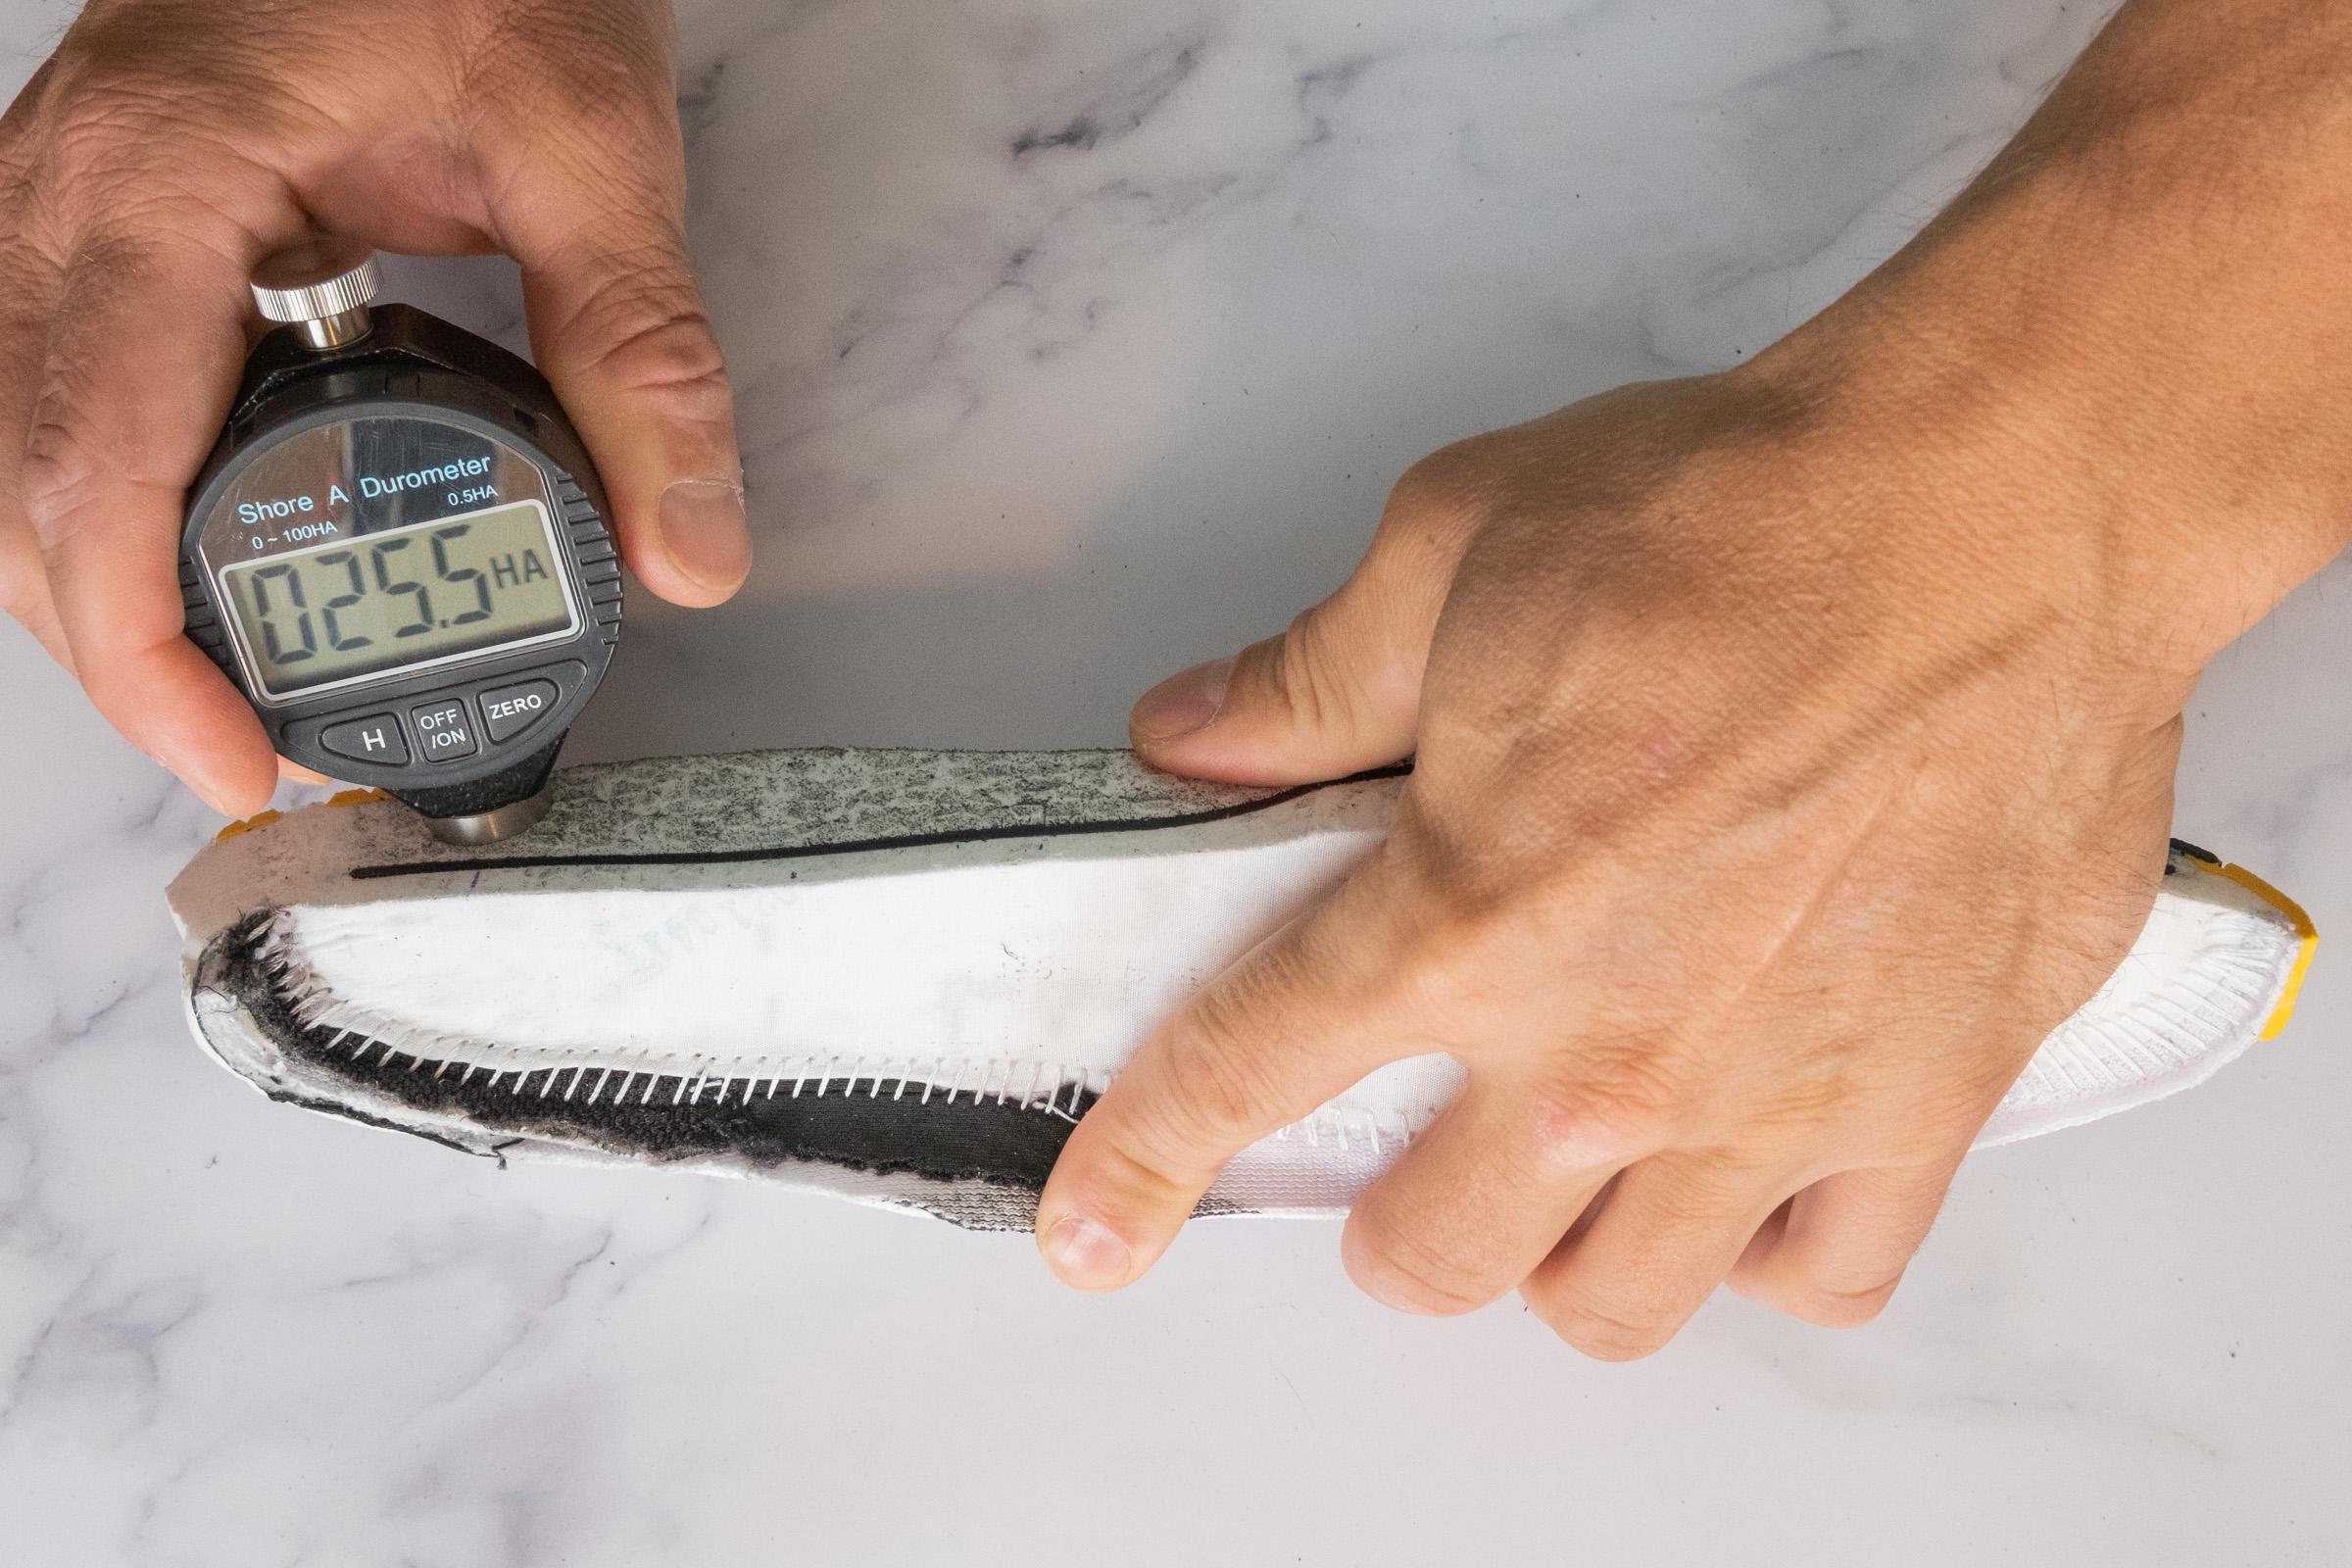
We also place the shoe in a 0-degree Fahrenheit freezer for 20 minutes and measure the hardness of the foam a second time to simulate cold-weather performance.
Heel stiffness
Heel stiffness is measured on a subjective 1-5 scale with 5 being the stiffest by squeezing the sides of the heel counter and pushing from the back of the heel counter.
Shoe flexibility
Using a digital force gauge we measure the resistance it takes for a shoe to bend at its natural bending point starting from 0 degrees and bending it all the way to 90 degrees. Most resistance will typically be found around 20 to 30 degrees.
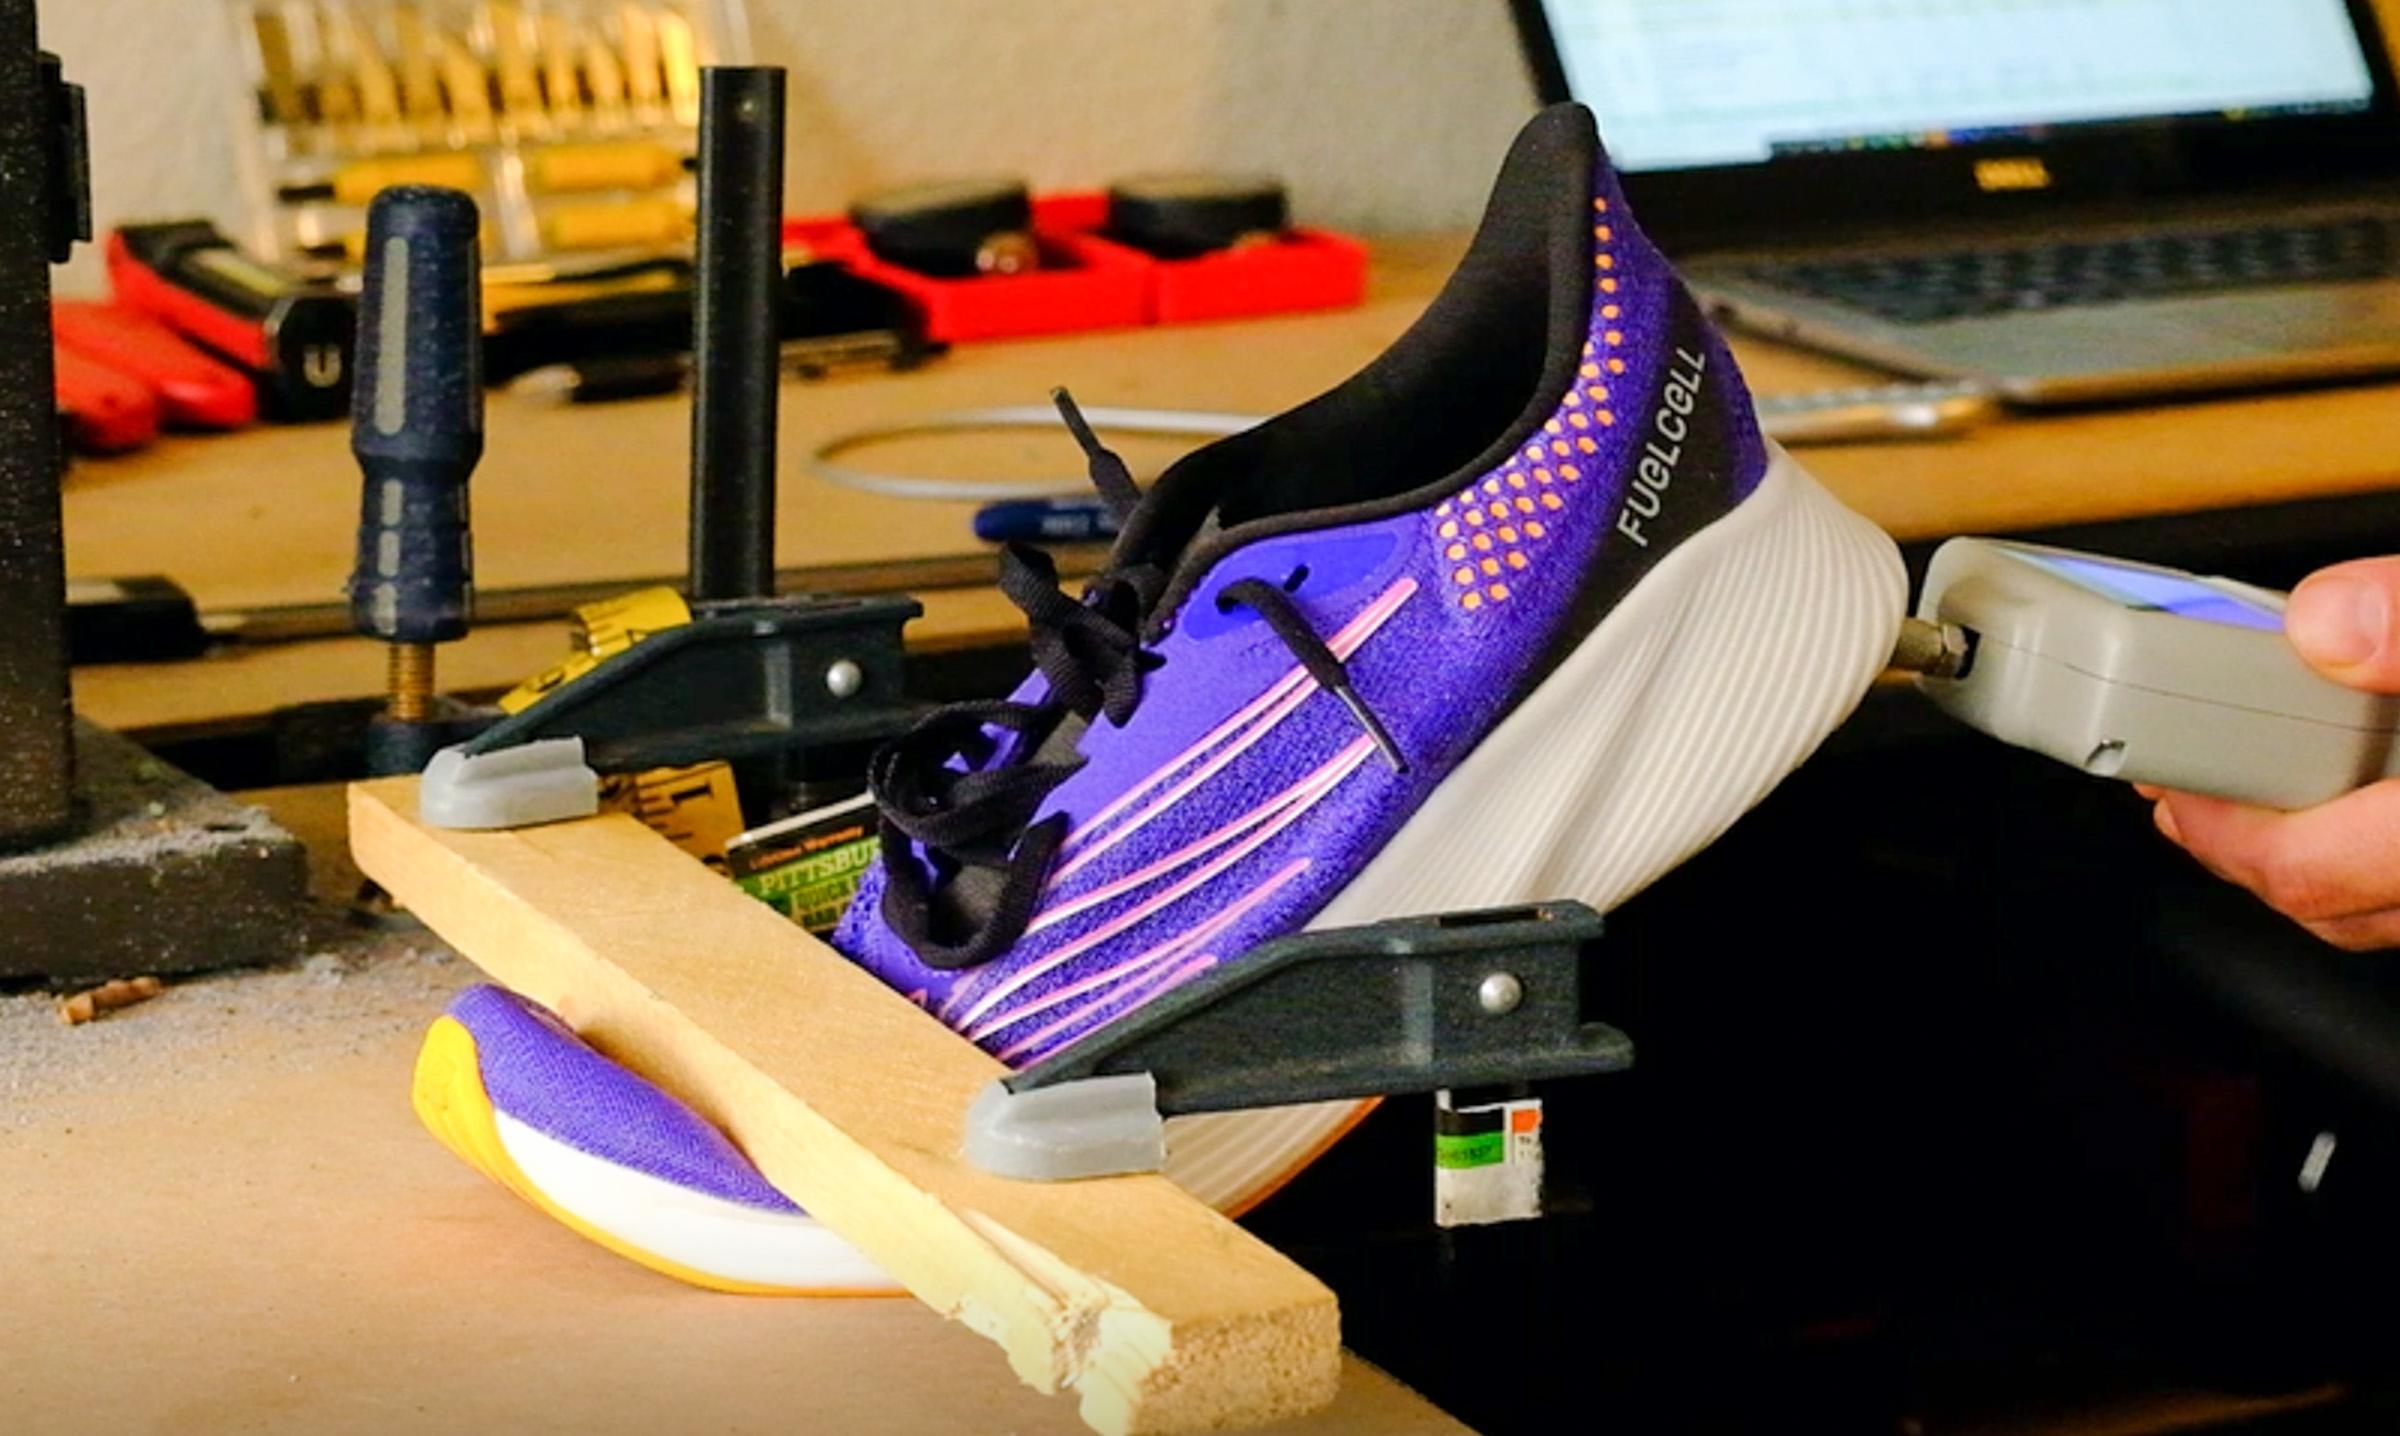
We clamp the shoes to a workbench with a piece of wood over the natural breaking point where the forefoot is designed to bend naturally. Once clamped down we find the center point under the back heel, 1cm from the edge of the outsole.
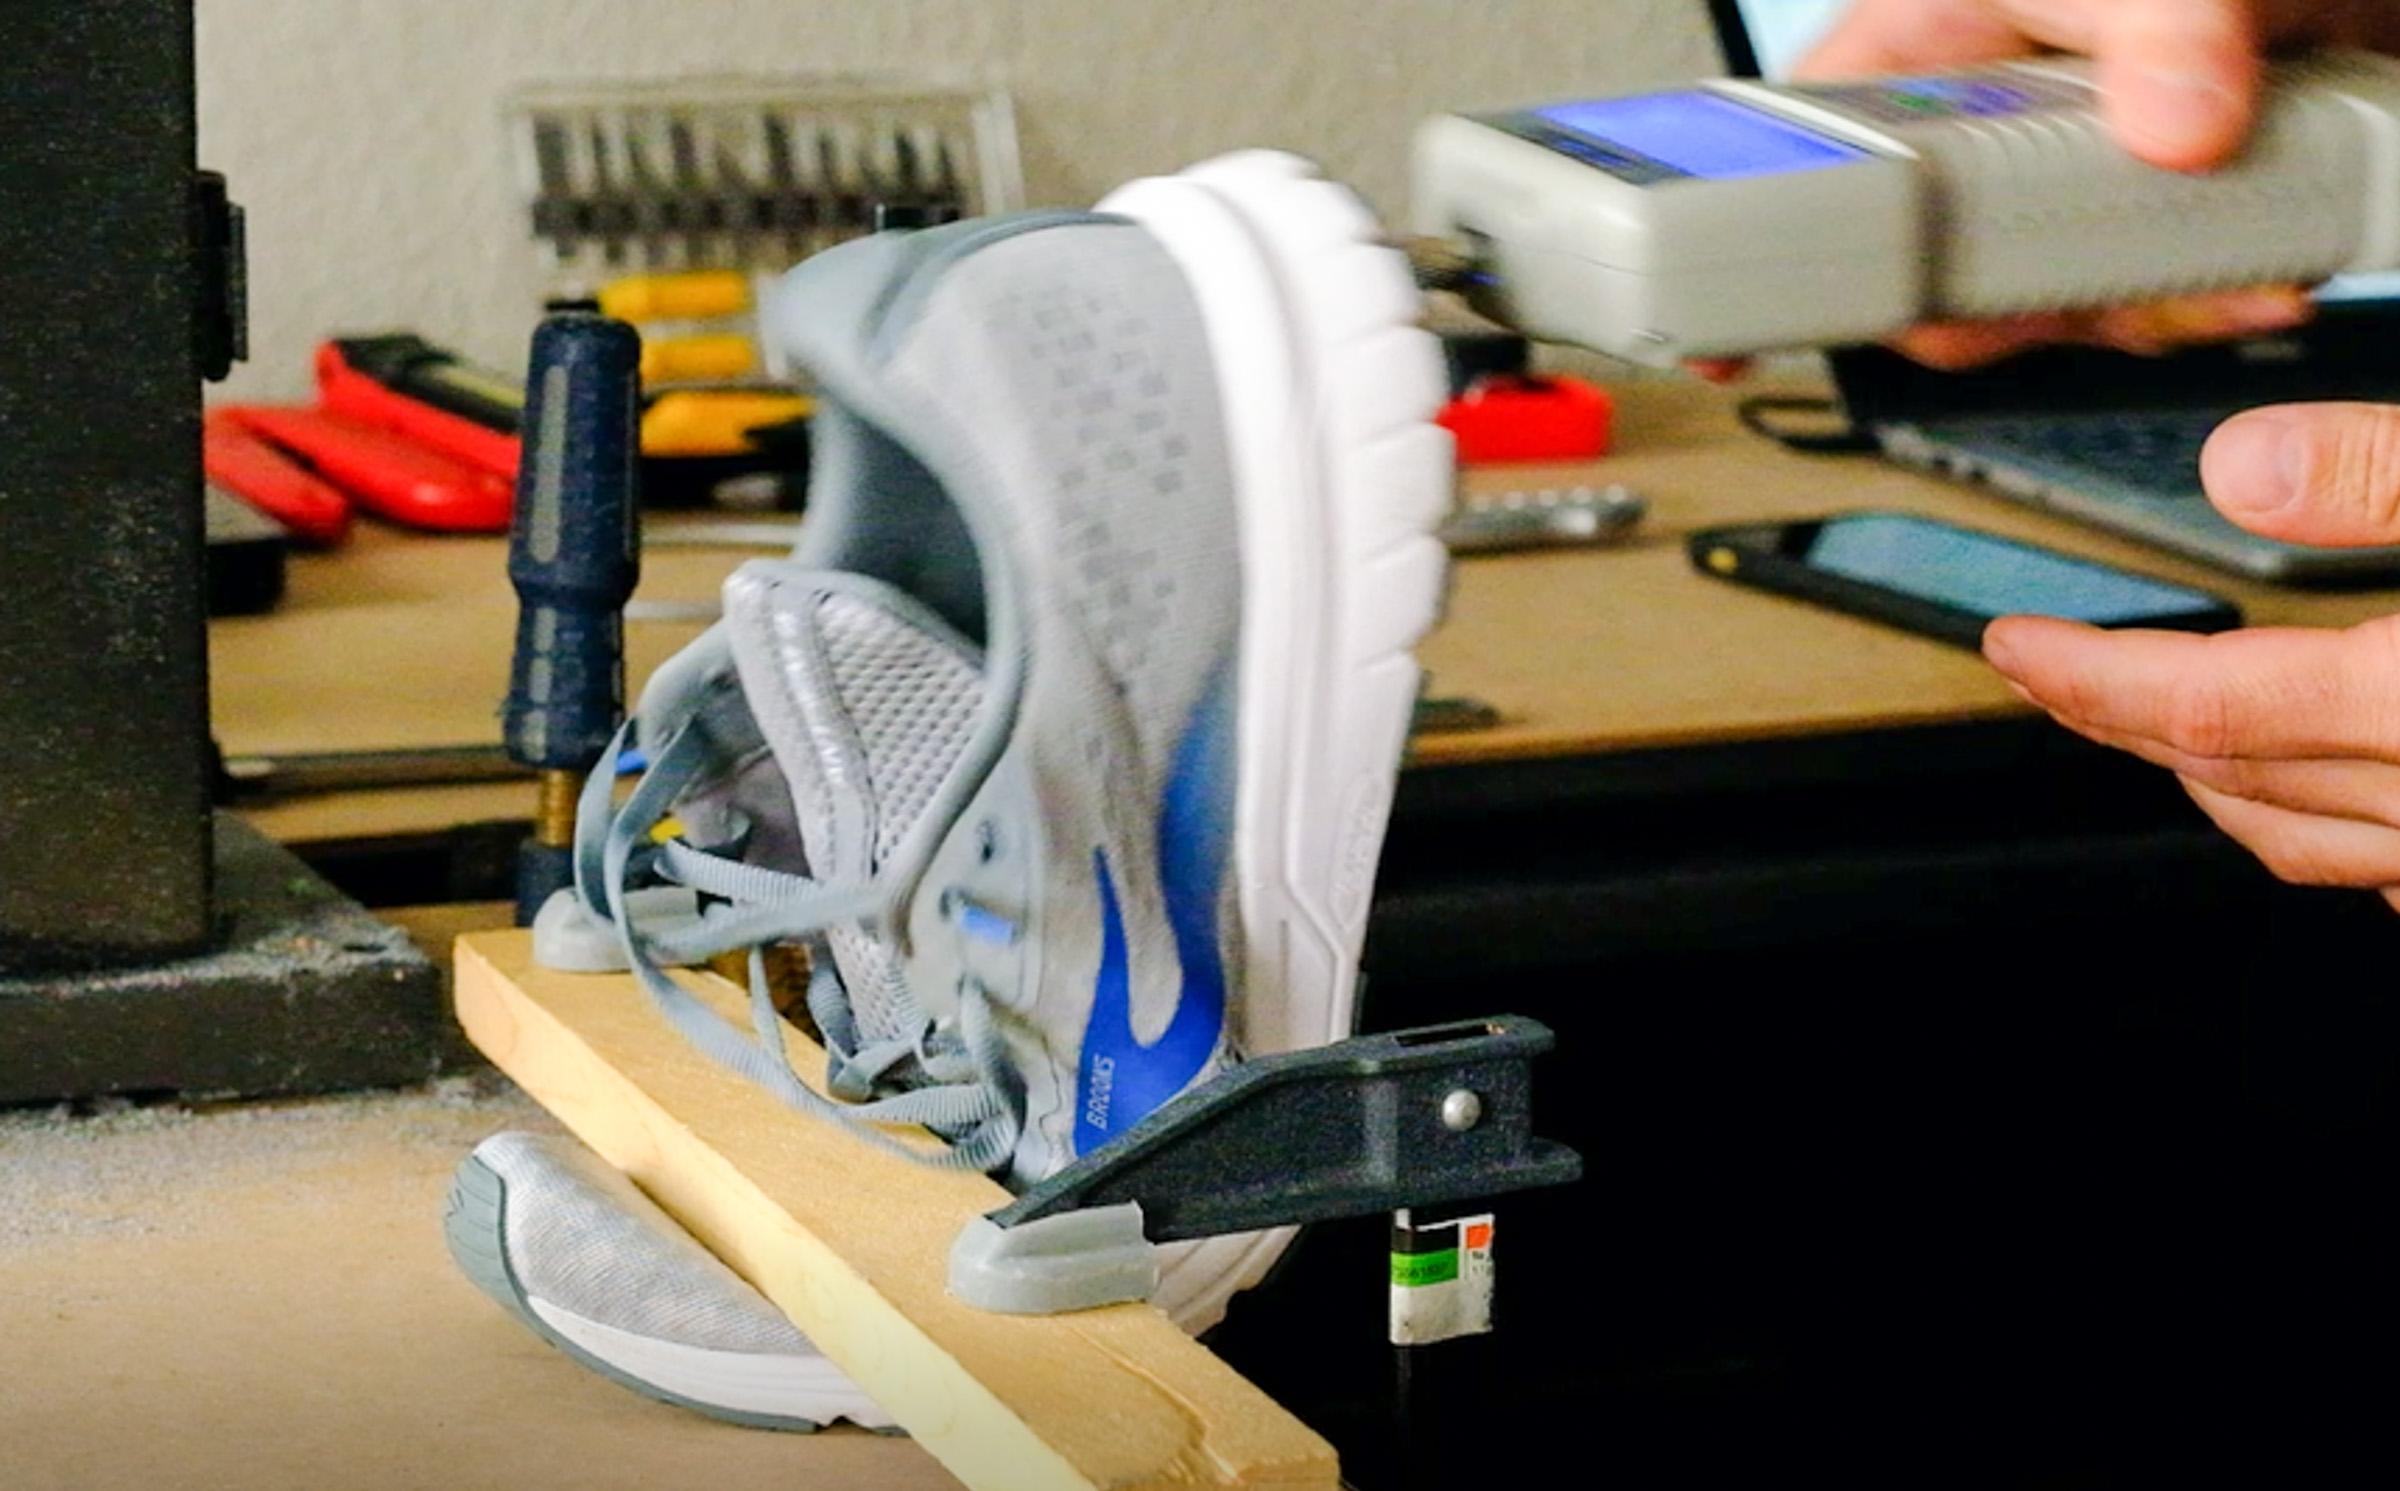
The force gauge measures the maximum resistance in Newtons which is the number that we report on.
We make 3-5 measurements unless we find outliers in our data, in which case we make more measurements to get a reasonable finding. We use an average of the measurements.
Torsional flex
On top of testing the flex of a shoe in the lab, we also test the shoe for torsional and longitudinal flex on a subjective 1-5 scale with 5 being the stiffest.
Lace stretch and slip
We remove the laces from the shoe to test two factors.
Lace stretch is quantified on a subjective 1-5 scale with 5 being the most stretchy simply by pulling the laces from end to end.
We also test the laces for slippage using our digital force gauge. We tie a loop knot in the lace and hang it vertically. From there we tie a basic “test knot” and tighten it with the forge gauge to 100N. We have another loop knot tied at the bottom end of the lace which we pull downward on until the “test knot” slips untied. We record the max effort taken to untie the knot.
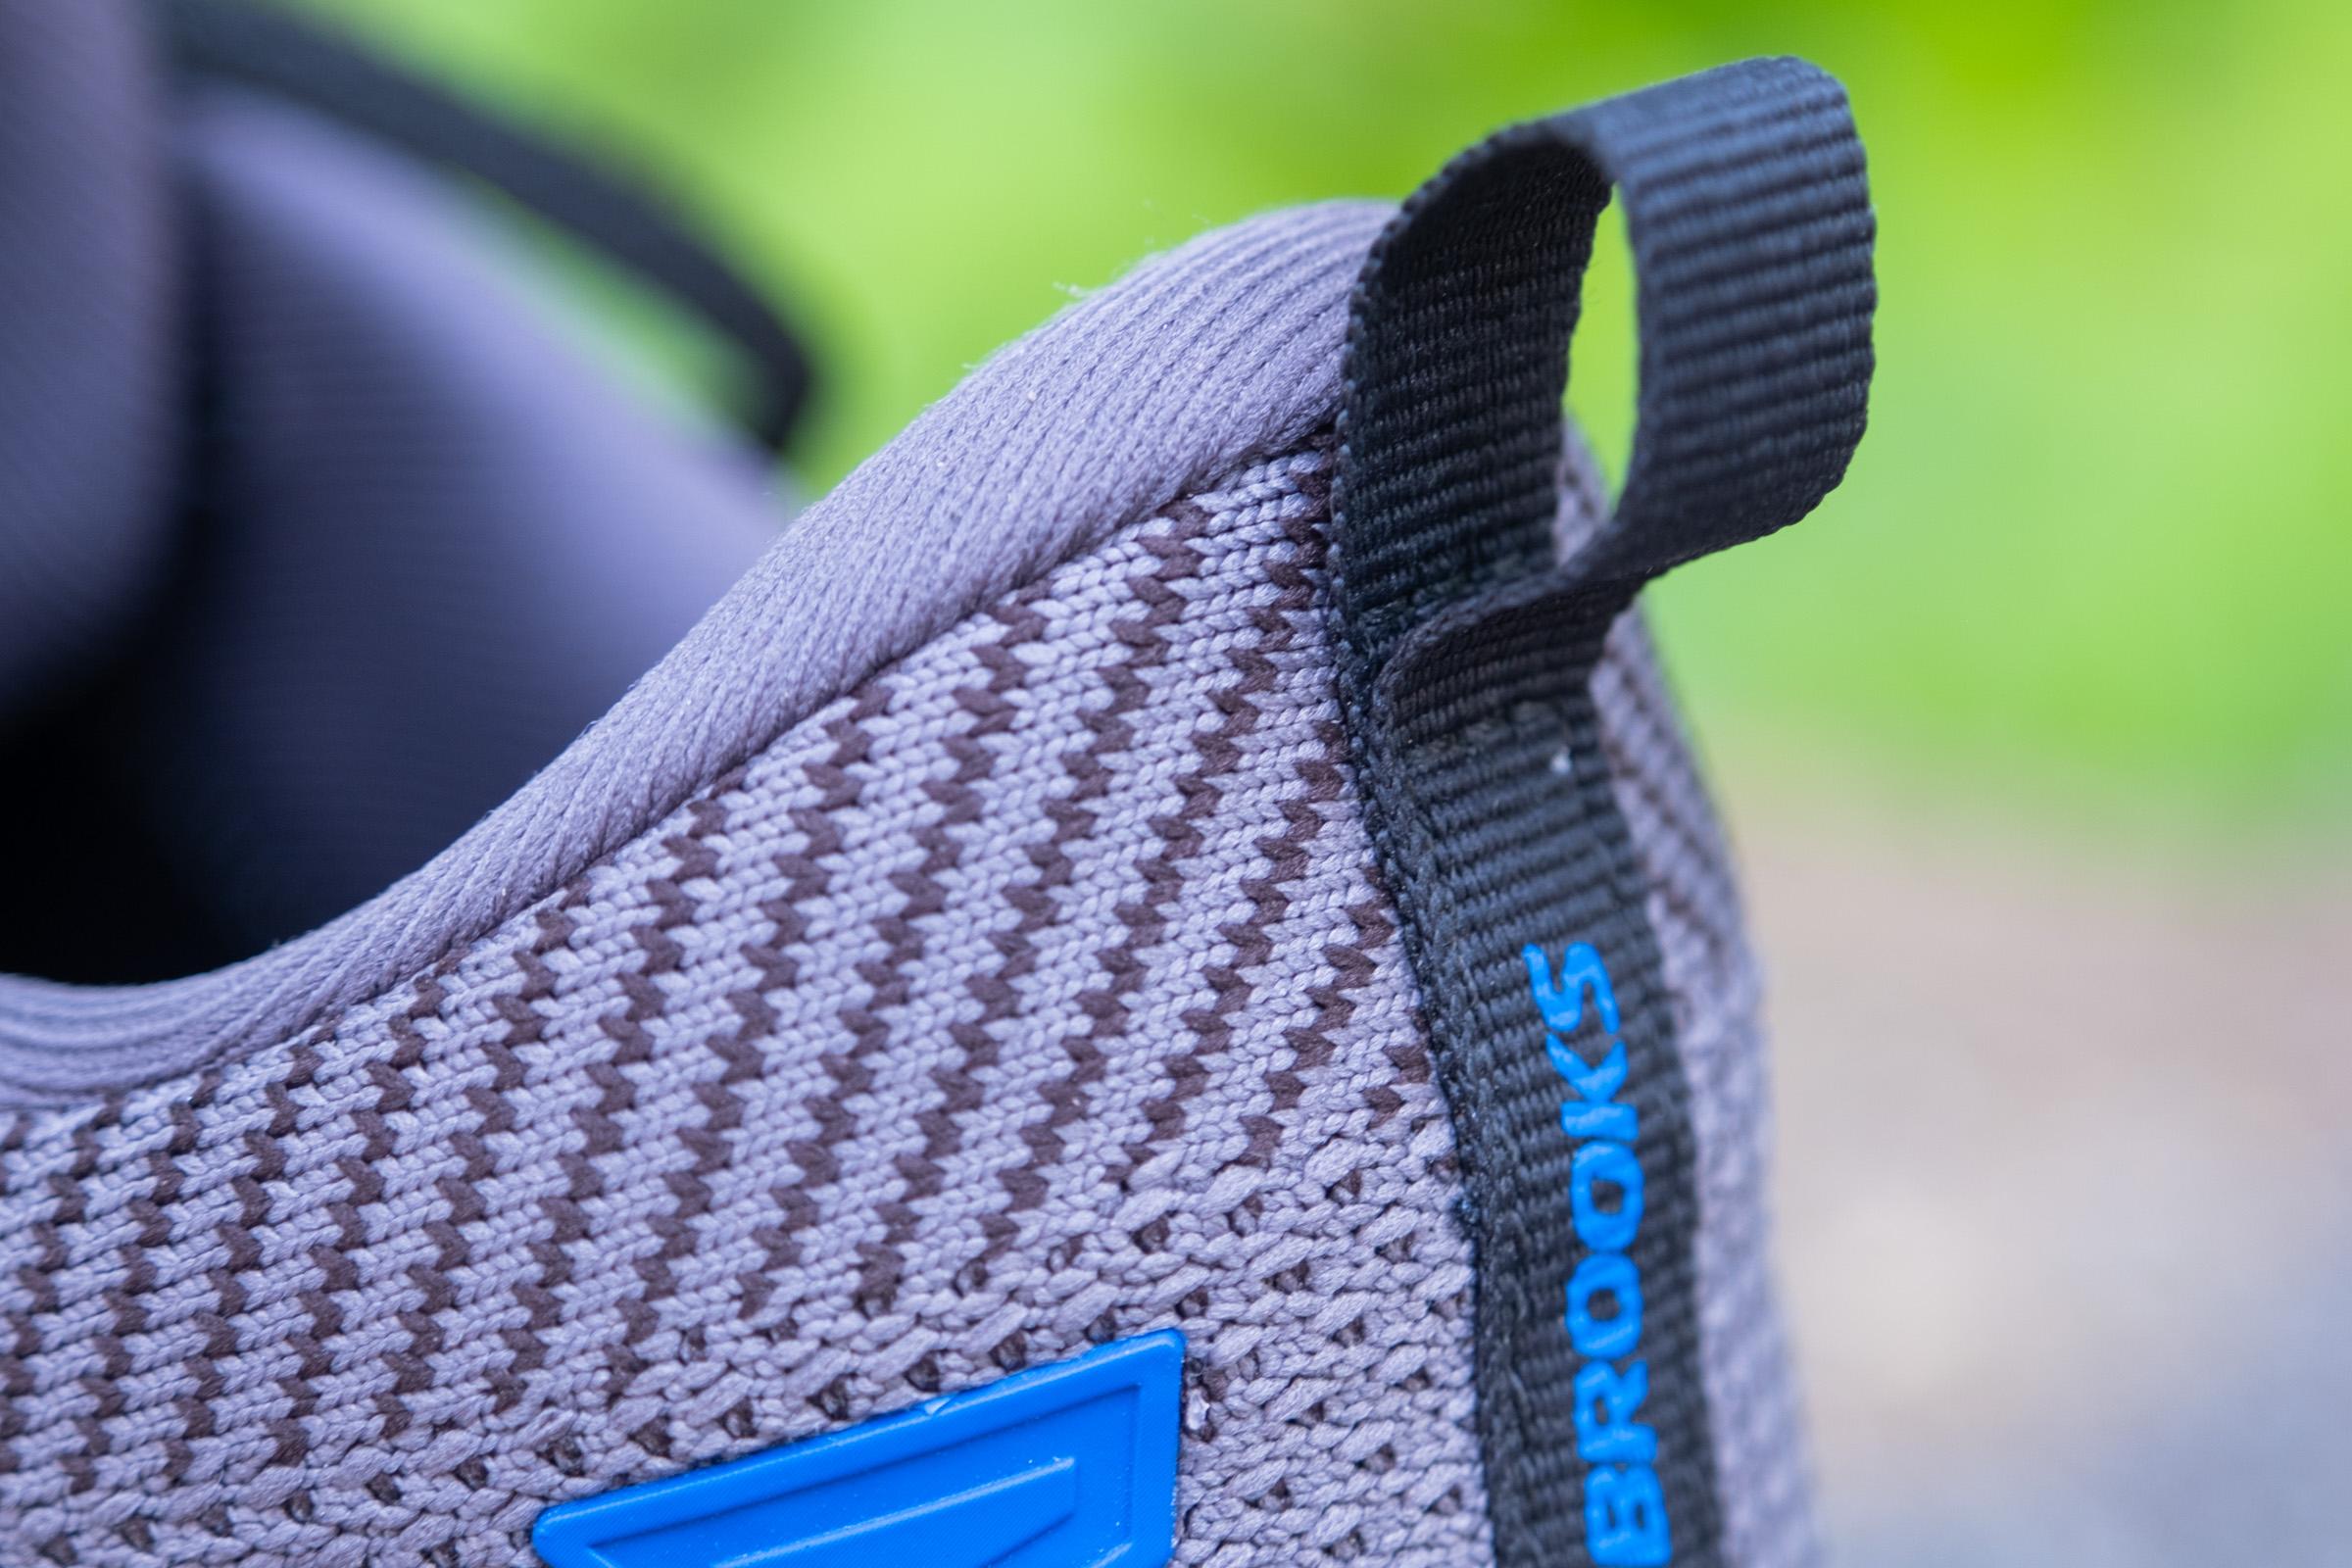
Heel tab type
We note if the shoe has a heel tab. Options include:
- Finger loop
- Pull tab
- None
Breathability
Breathability is measured on a subjective 1-5 scale with 5 being the most breathable by filling the shoe with smoke created by dry ice and boiling water.
Each shoe is filled with smoke using approximately 1 cup of dry ice chunks in a bowl filled with 2 cups of boiling water. The smoke is pushed through the shoe using a cooling fan.
This is filmed in slow motion at 240fps and analyzed for scoring.
1.1 In-depth review methodology
Note: We’ve stopped using this methodology in January 2022.
We have gathered a team of advanced athletes and shoe experts to create the most authoritative shoe reviews. They put each pair through vigorous field testing and write a review based on personal experience. They also attach photos and videos of the shoes, during their run, hike, gym session, or any other activity they take part in for an in-depth test.
All our testers have backgrounds that are nothing short of impressive. We work only with people who are passionate, enthusiastic, and very geeky about footwear and sports. Most of them compete at recreational or sub-elite level, or cover weekly mileages that are high above the average ones. The author of every in-depth review is shown at the top and their biography is added at the bottom of the review.

Here is a typical track record of our expert from the running category:
- runs at least 30 to 40 miles a week, with some going up to 70 miles a week when training for a marathon
- is a competitive runner on various distances (from 5K to ultra)
- does all types of runs, from easy days and long hauls to fartleks and tempo training
- faces various terrains and weather conditions
- sets PRs (some of the examples include 15:57 for a 5K and 3:28 for a marathon)
Learn more about our testers from other categories here.